
I must be on a milk-carton kick because today’s project is using the same base as the watermelon treat holder I made last week, only larger. I knew I had to create a birdhouse as soon as I saw the Birds & Branches Bundle from Stampin’ Up!

Isn’t the carton the cutest?! I cut a circle in the front panel of the carton and framed it with a scallop circle for the entrance to the birdhouse. I covered the entrance with a piece of window sheet so that any treats put inside the carton will be visible.
The roof is embossed using the Pinewood Planks 3-D embossing folder and then trimmed with a 1/2″ strip of scalloped card stock. I used a paper piercer and handheld circle punch to attach the roof to the top of the birdhouse with the baker’s twine from the Flowers for Every Season Ribbon Combo Pack so that the recipient can open the box without damaging it.
Here is the video tutorial from today’s Make-it-Monday Facebook Live showing how to assemble the birdhouse milk carton. Below the video you will find the project cutting and scoring guide along with a list of the supplies used in today’s project.
Project Cutting & Scoring Guide:
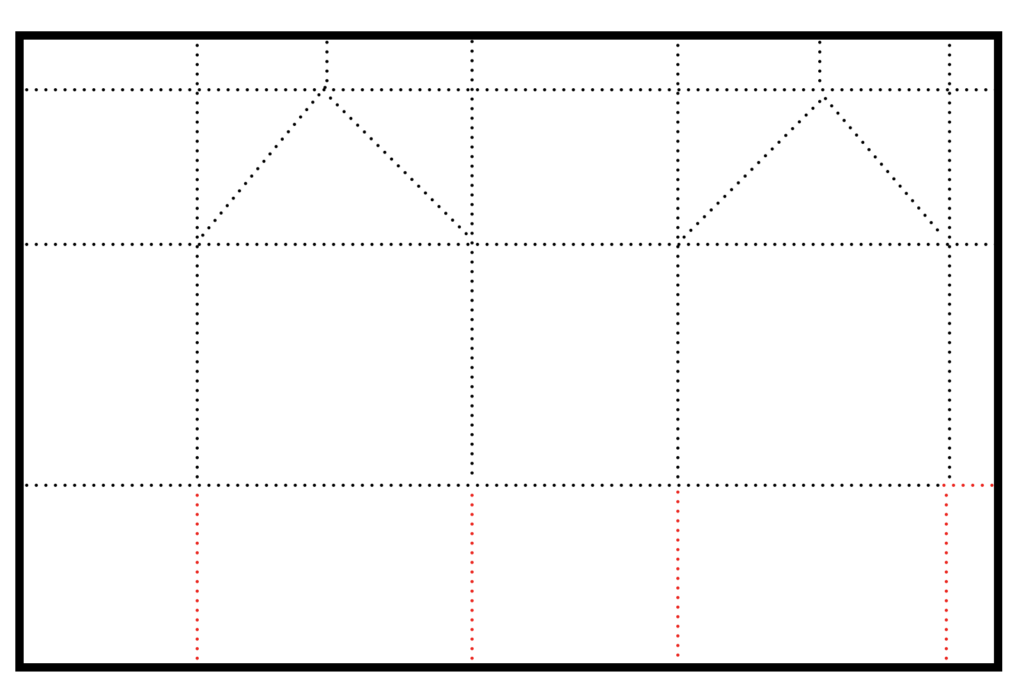
- Milk Carton = 10-1/2″ x 7″ piece of Seaside Spray card stock. Score at 2-1/2″, 5″,, 7-1/2″ and 10″ on the 10-1/2″ side. Score at 1/2″, 2″ and 4-1/2″ on the 7″ side. Trim per diagram
- Carton Panels = four pieces of 2-1/4″ x 2-1/4″ 2020-2022 In-Color Designer Series Paper
- Birdhouse Roof = 3″ x 5″ Flirty Flamingo card stock
Click on any of the images below for more information about that product.
Product List


These sweet little birdhouses would be a cute way to gift someone a gift card. I would fill the carton with some wrapped candy and slide a gift card in with the candy. They would also make sweet little table favors or party decorations.
I hope this post inspires you to create a milk carton birdhouse treat holder of your own!