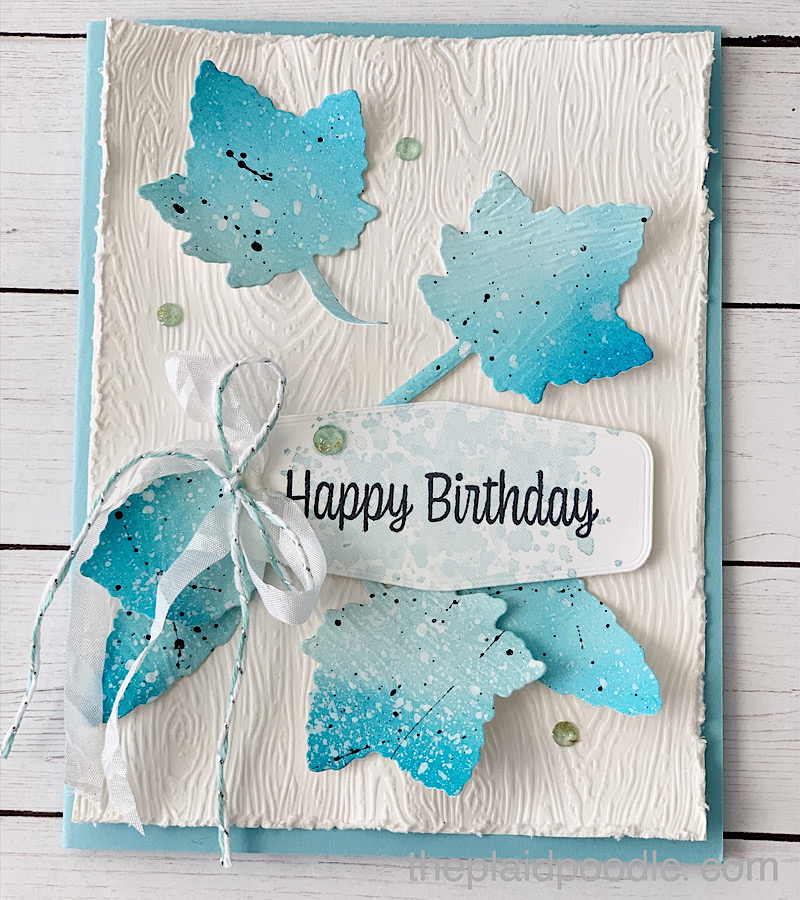
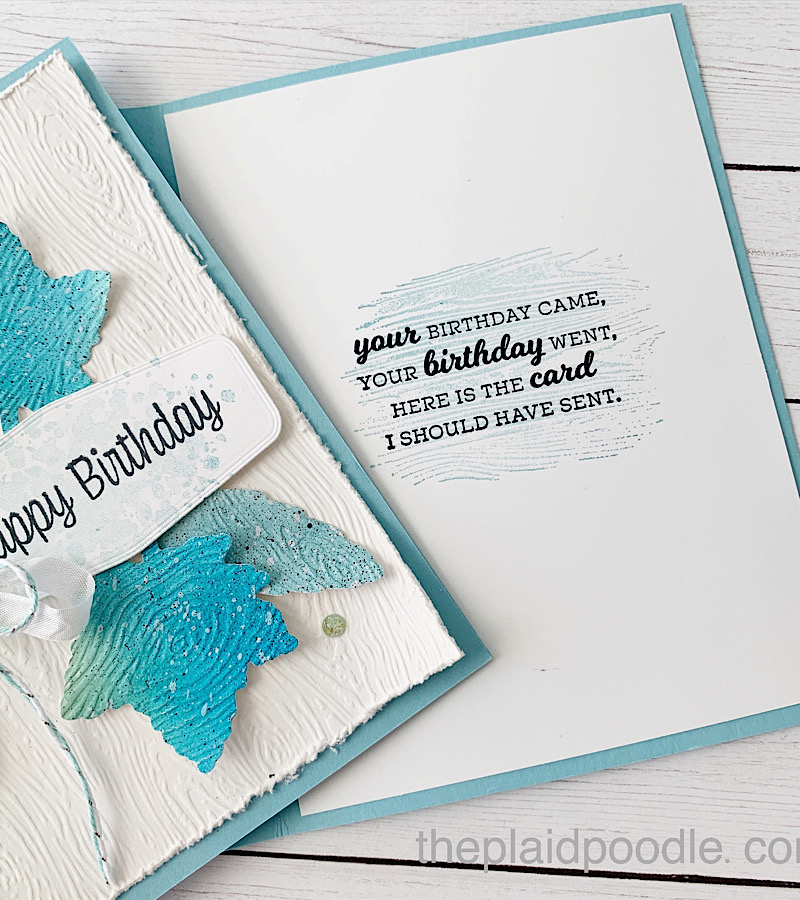
If you like playing with lots of techniques when making a card, this one is for you! This autumn themed card uses non-traditional colors, has dry embossing, ink blending, die-cutting, distressing and splatters!
I’m late sending a birthday card to a special someone and the inside sentiment I chose for today’s card is coming to my rescue! The sentiment comes from the In Your Words stamp set from Stampin’ Up!
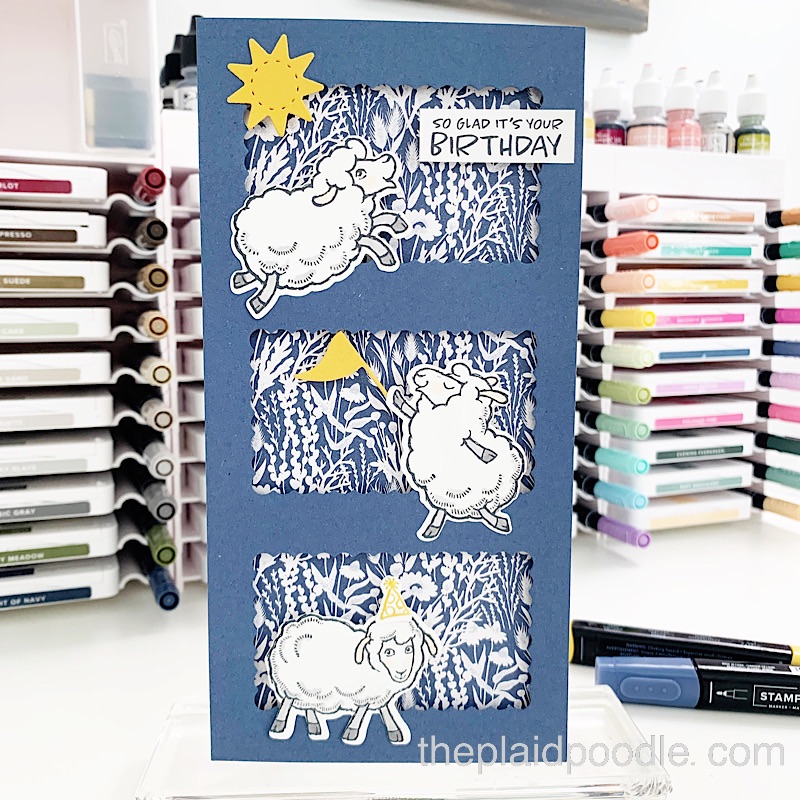
Sure, you can count sheep when trying to sleep, but the lambs in the Counting Sheep Stamp Set want to party! These fun, frolicking farm animals are ready for birthday parties and other festive occasions. Of course, you can also pair these darling sheep with greetings of your choice to use them for any occasion. They are ready to jump right onto your projects!
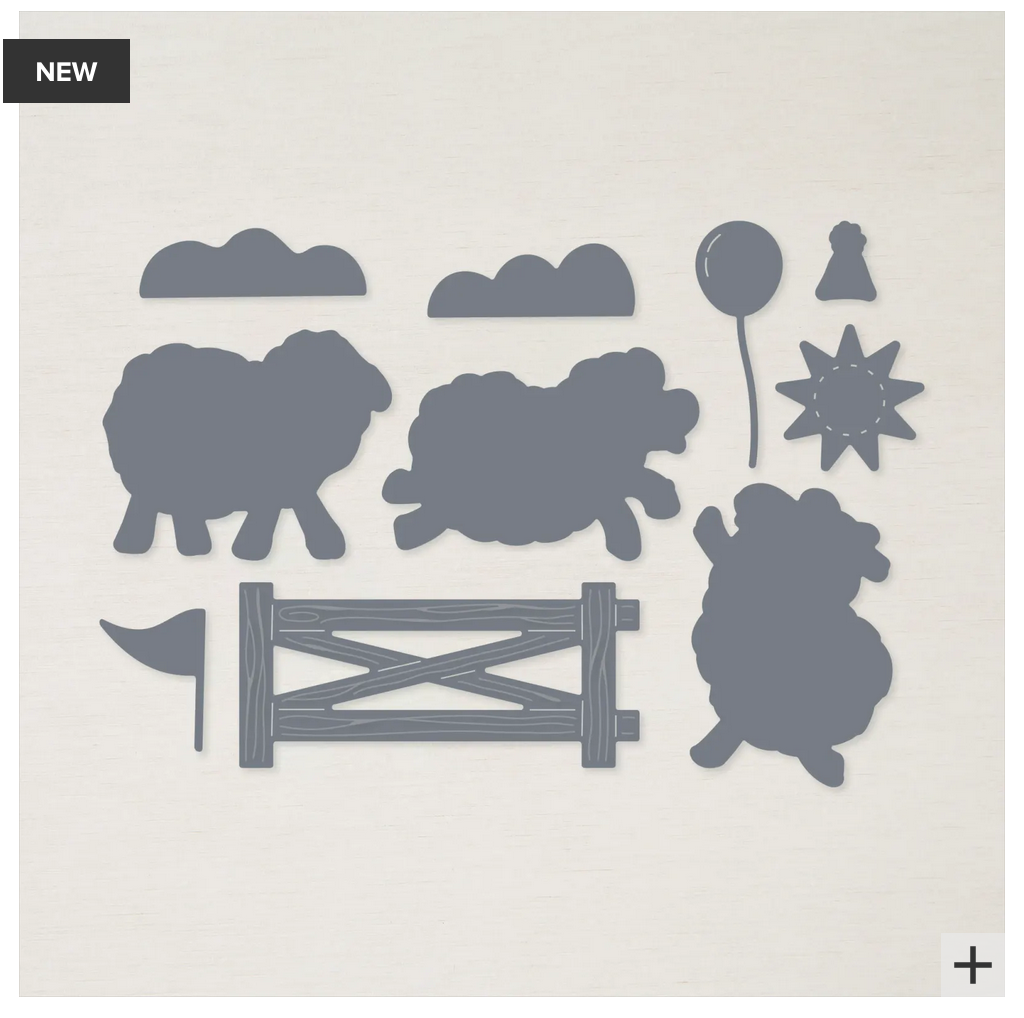
Create a fabulous farm life scene with the images in the Sheep Dies. Choose from a selection of sheep, then add a fence (even though there’s no way to contain this much fun). Complete the scene with party supplies so you’re ready to celebrate! Use these dies on any project you want to turn into a party.
Sale-A-Bration
The Counting Sheep Cling Stamp Set and coordinating Sheep Dies are part of the Sale-A-Bration promotion. For every $50 and $100 you spend, you’ll earn an exclusive Sale-A-Bration item for free! Depending on the amount you spend, you’ll be able to mix ‘n’ match the Sale-A-Bration items you earn. The Counting Sheep Cling Stamp Set is FREE with a $50 purchase and the coordinating Sheep Dies are also FREE during Sale-a-Bration with a $50 purchase. Here is my first creation using these fun new products.
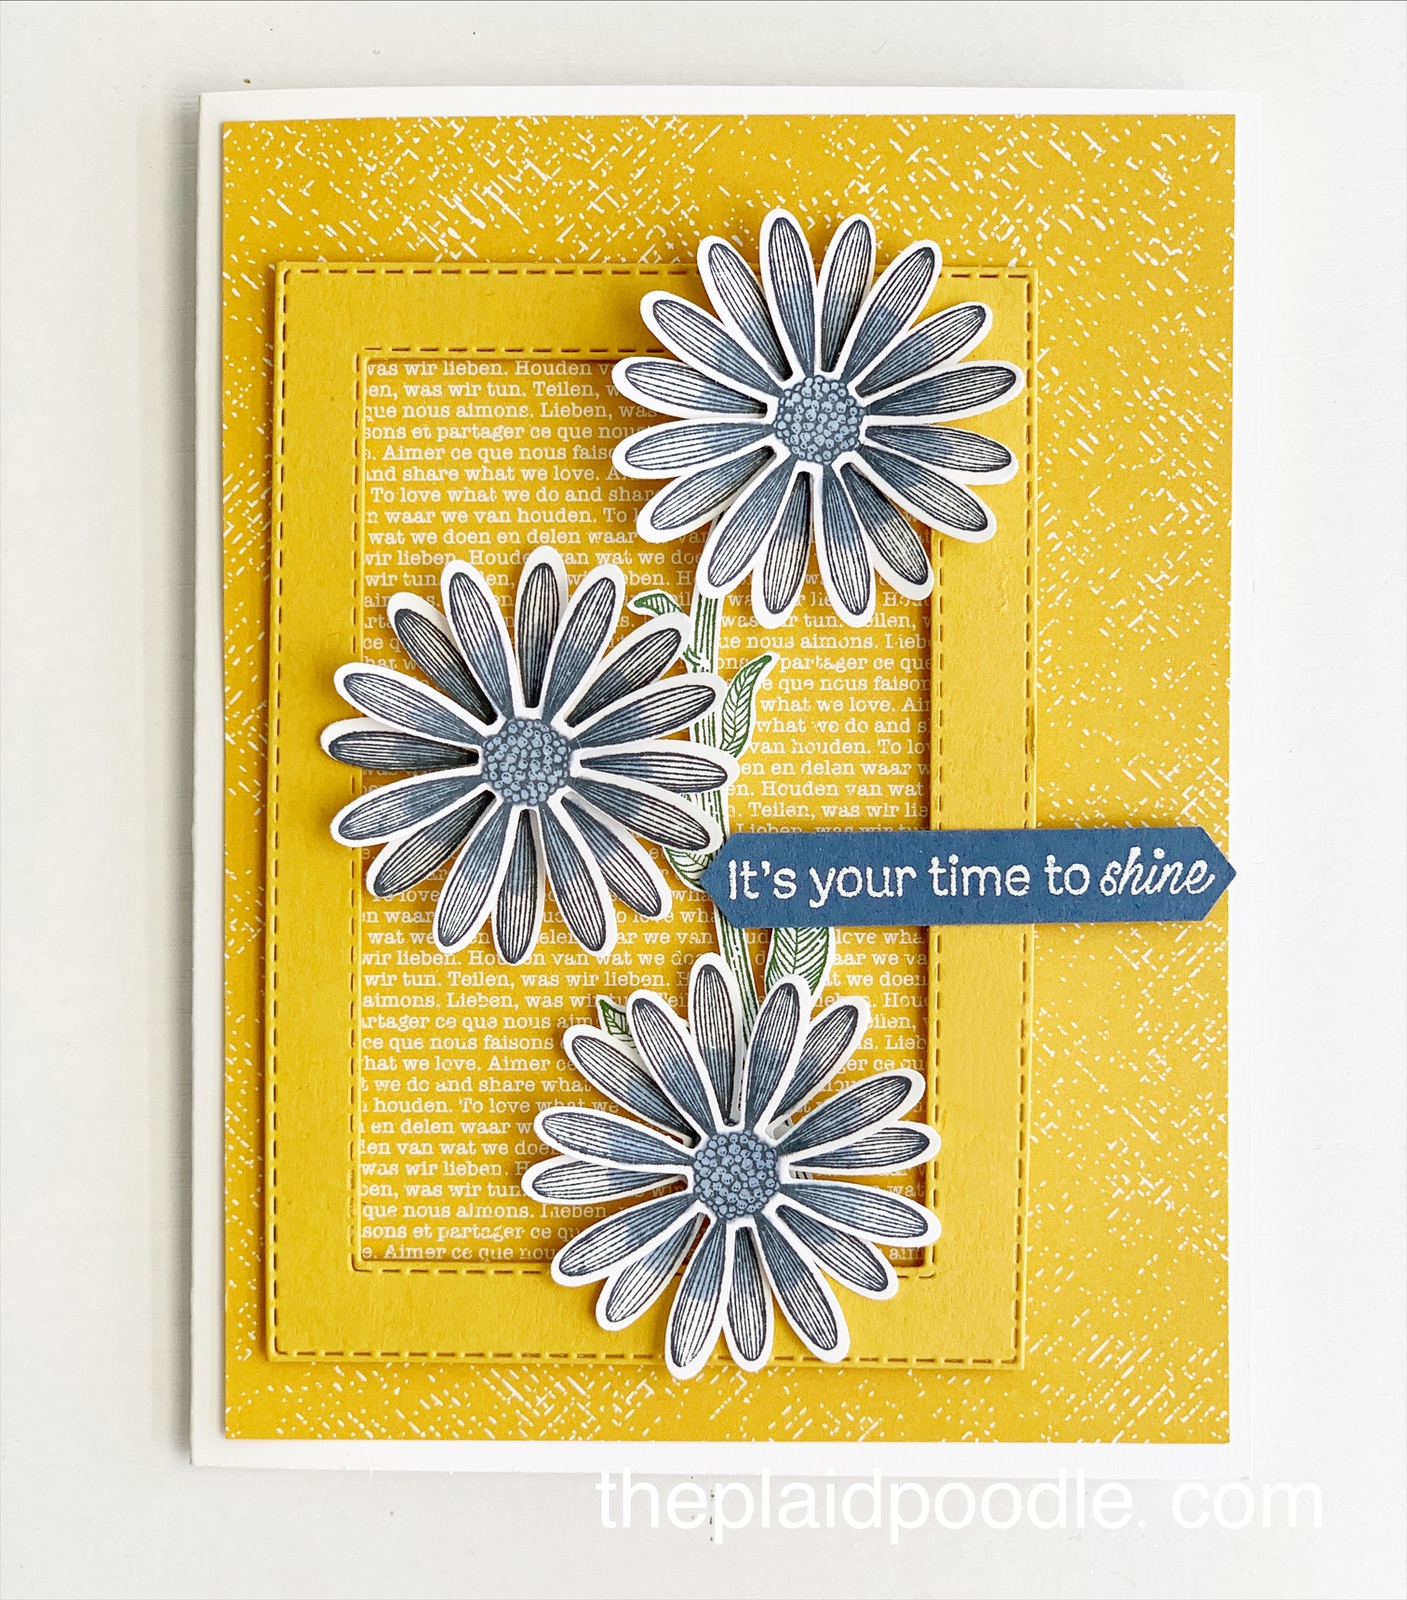
The spring weather here in Kansas City has me wanting to plant some flowers in the worst way! Our weather is very sneaky as it has been known to snow in April so I’m holding off. Our rule-of-thumb is to wait until Mother’s Day to plant and it cannot get here soon enough!
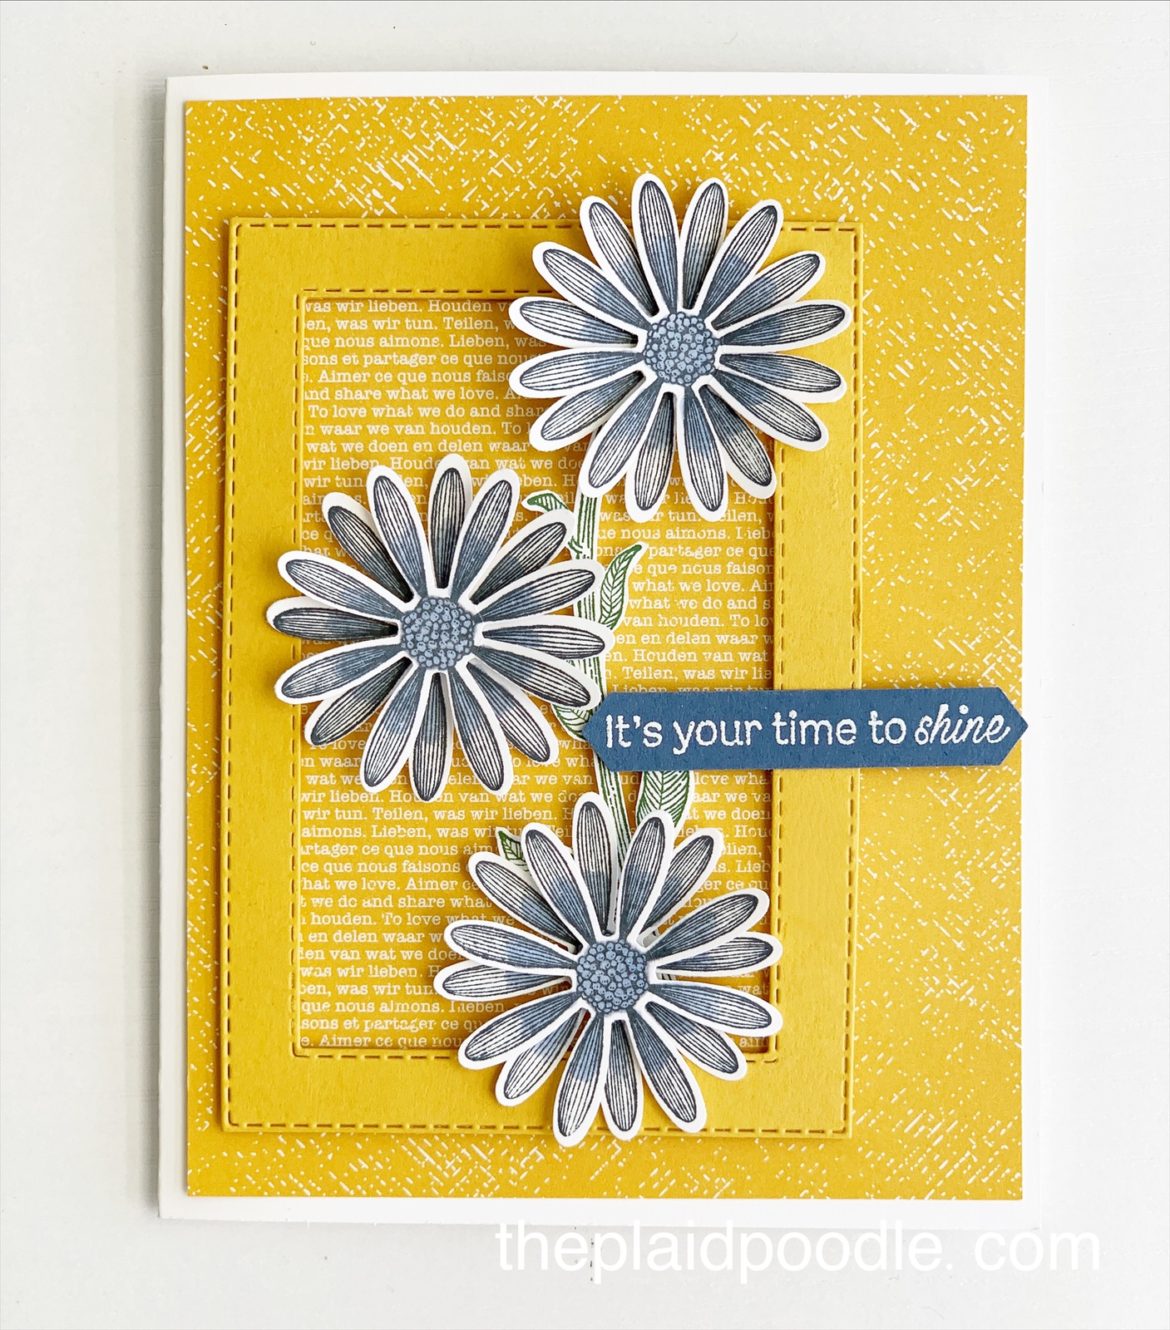
Just because we’re prevented from exercising our green thumbs doesn’t mean we can’t make something to scratch that itch though. Today, during my regular Wednesday Coffee & a Card Facebook Live we made this fun window card.
To make the card I die-cut a frame using the Stitched Rectangle Dies from Stampin’ Up! then popped it up on the card front to create the “window”. Next, I used the Daisy Lane stamp set and coordinating Medium Daisy Punch to make the stem of daisies growing from the window.
Cutting/Scoring Guide
Card Base = 8-1/2″ x 5-1/2″ piece of Basic White Thick cardstock scored at 4-1/4″ on the 8-1/2″ side
First Layer = 5-1/4″ x 4″ piece of 2020-2022 In-Color 6″ x 6″ Designer Series Paper
Second Layer = 4″ x 2-1/2″ piece of 2020-2022 In-Color 6″ x 6″ Designer Series Paper
Stitched Die-Cut Frame = 5″ x 3-3/4″ piece of Bumblebee cardstock
Stamped Images = 6-3/4″ x 3-3/4″ piece of Basic White cardstock
I hope you enjoyed today’s card. I know I shouldn’t plant flowers in March but that doesn’t mean I can’t gather some fun, spring-like supplies and “plant” as much as I want with stamps paper and ink!
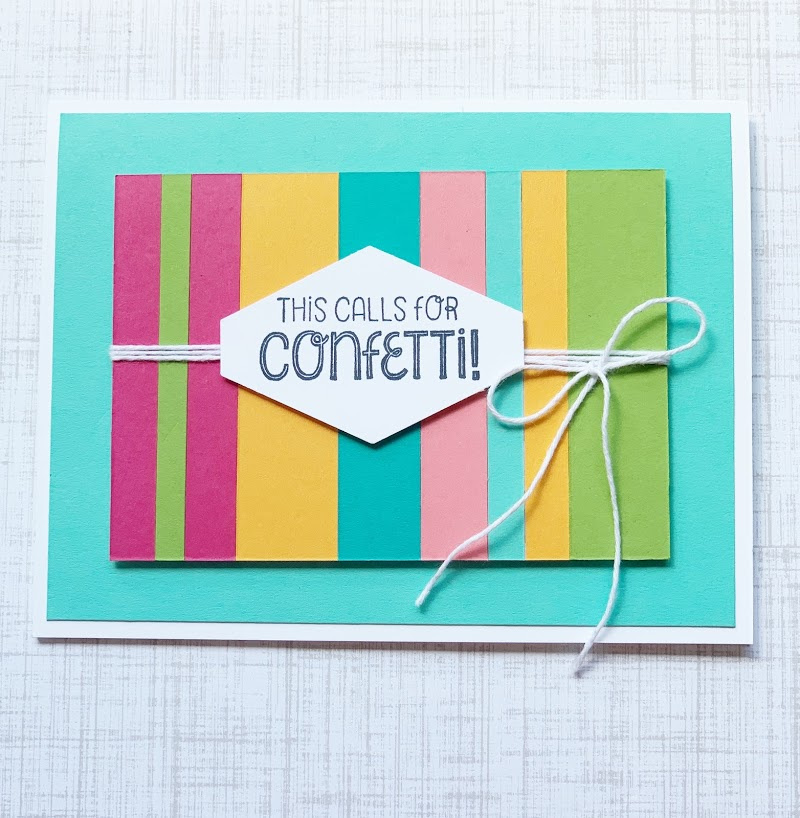
Today I demonstrated how to make a card using paper scraps on my Make-it-Monday Facebook Live. I love anything bright and cheery and we could all use a little bright and cheery right now.
The sentiment comes from the So Sentimental stamp set from Stampin’ Up! and it called for confetti so . . .
I organize my scraps by Stampin’ Up! color family and used scraps from my “Brights Family” scrap box to make this card. It’s so fun and easy to do. Here is the replay of today’s Make-it-Monday Facebook Live that shows how I made the card:
The card base is made using an 8-1/2″ x 5-1/2″ piece of Thick Whisper White card stock, scored at 4-1/4″ on the 8-1/2″ side then folded in half on the score line. I added a 5-1/4″ x 4″ piece of Coastal Cabana (one of my favorites) to the card base.
Next I adhered strips of card stock to a piece of 4-1/2″ x 3-1/4″ piece of whisper White card stock with Multipurpose Liquid glue. Once the strips were in place I trimmed the card stock down to 4-1/4″ x 3″. I wrapped baker’s twine around the card stock three times, tying it into a bow on the right-hand side then adhere it all to the card front using Stampin’ Dimensionals.
I stamped the “This Calls for Confetti!” sentiment from the So Sentimental stamp set onto a scrap of Whisper White card stock with Momento Tuxedo Black ink and punched it out using the Tailored Tag Punch. The tag is adhered to the card front using Stampin’ Dimensionals.
For the inside of the card I stamped the confetti images from the So Sentimental stamp set using Flirty Flamingo ink. The “Happy Birthday” sentiment is from the Itty Bitty Birthdays stamp set and is stamped with Momento Tuxedo Black ink.
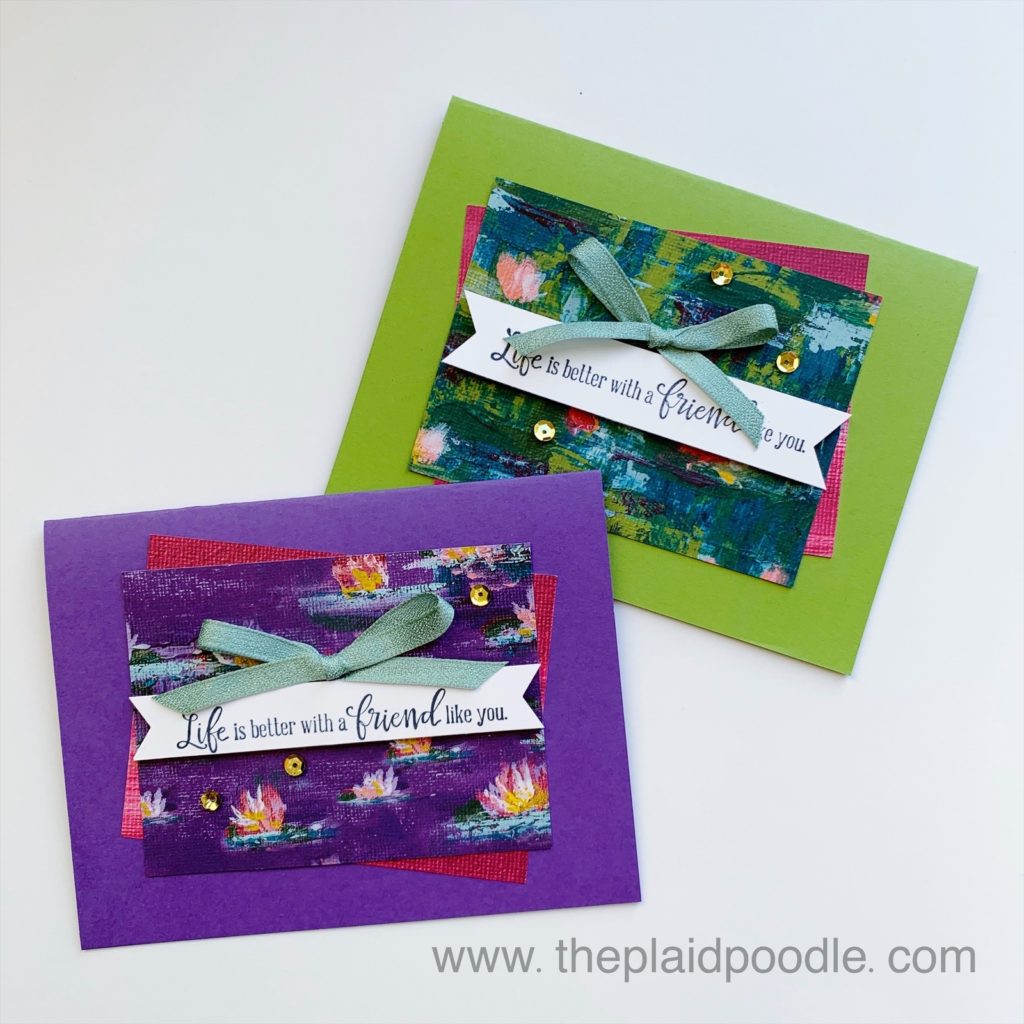
You might know that the acronym for K.I.S.S. is “Keep it simple sweetie”! In the card making world K.I.S.S. cards are life savers.
Keep It Simple Sweetie cards are great
when you’re in a hurry!
for beginning stampers/card makers.
when you need to make multiple cards.
when you want your crafting budget to go farther.
when you’re stuck and want to jump start your crafting mojo!
Here is an example of a K.I.S.S. card:
A simple, elegant card and sometimes, as in this case, less is more. All that is needed are a few basic paper crafting supplies – no special tools required. Here is video tutorial for the card that I shared during my Coffee & a Card Facebook Live today:
Directions:
Fold 8-1/2″ x 5-1/2″ piece of Gorgeous Grape or Grannie Apple Green card stock in half to create card base.
Adhere 4″ x 3″ piece of Lilly Impressions Designer Series Paper to center of card front at an angle using snail adhesive.
Adhere another 4″ x 3″ piece of Lilly Impressions Designer Series Paper to center of card front.
Stamp sentiment onto 5/8″ x 4″ piece of Whisper White card stock using Memento ink. Flag both ends of tag using the Banner Triple Punch. Adhere tag to center of card front using Stampin’ Dimensionals.
Tie a bow with Mint Macaron Textile Ribbon; adhere to card front using Mini Glue Dot.
Adhere sequins to card front using Multi-Purpose Liquid Glue.
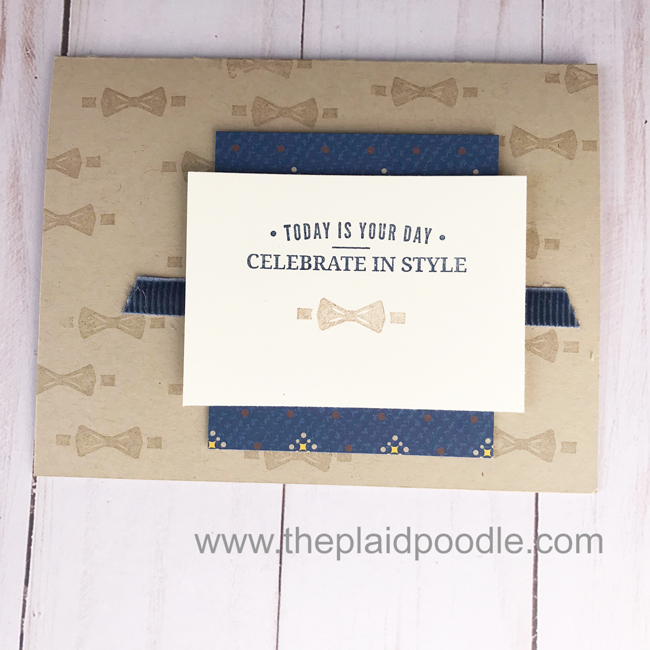
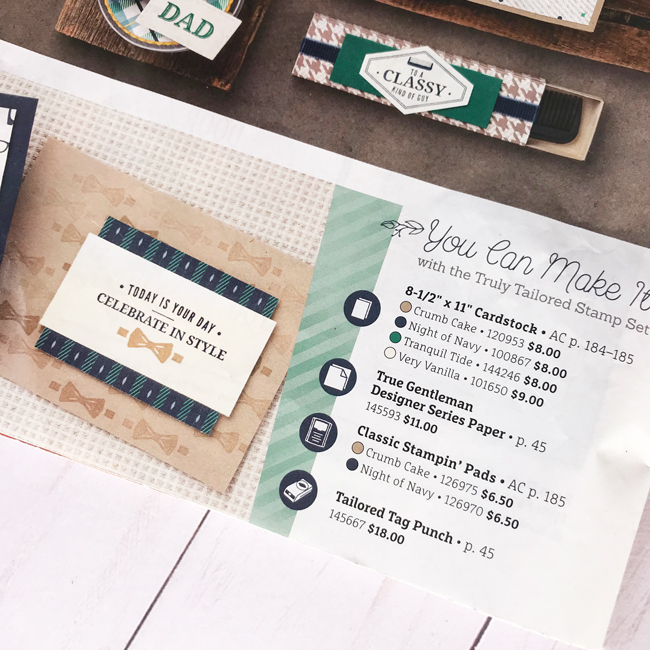
I needed a masculine birthday card to go out in today’s mail, so I whipped up this quick and easy card that I cased from the Stampin’ Up! 2018 Occasions Catalog. The card uses products from the True Gentlemen Suite. No special tools were required; just a Stampin’ Trimmer and adhesives. It’s the perfect type of card if you are a beginning card maker or are short on time like I was today.
Here is the card from the catalog:
My dimensions are probably not exactly the same as the one shown in the catalog and I couldn’t resist adding a length of the Corduroy Ribbon to mine, but you get the idea.
There are loads of ideas in the Stampin’ Up! catalogs to copy exactly or to use as a spring-board to make your own creations. You can view .pdf copies of the Stampin’ Up! catalogs HERE. If you don’t have an Occasions Catalog, and live in the United States, I would be happy to ship one to you. Just email your request with your name and address to Leslie@theplaidpoodle.com
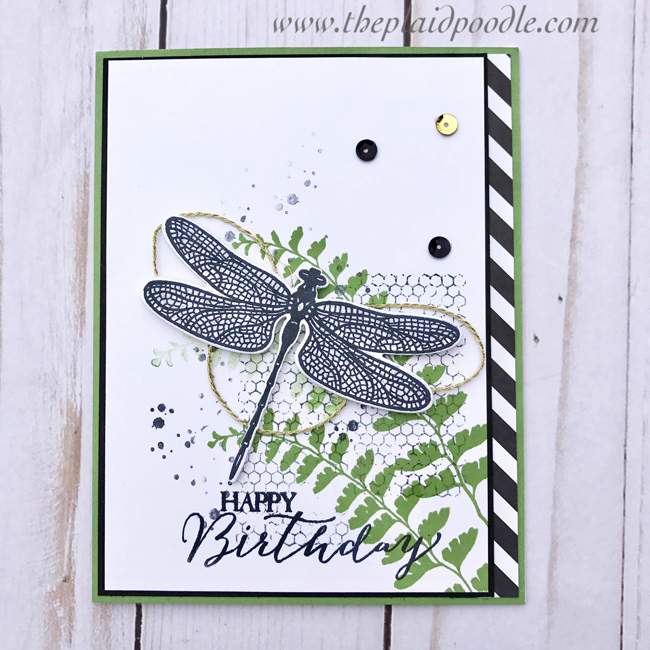
The best part of being a Stampin’ Up! Demonstrator is the lovely community that we belong to. I have met so many fantastic people and made some life-long friendships since joining Stampin’ Up! four years ago. One of those friends, Donna Mack, recently sent me this lovely artisan-styled card for my birthday. The background images from the Basic Butterfly stamp set highlight the die-cut dragonfly perfectly and the metallic thread and sequins add a little shine. It’s a versatile card that would work for many occasions just by changing up the sentiment.
Basic Butterfly with Dragonfly Dreams Card Recipe
Dimensions:
Card Base = 8-1/2″ x 5-1/2″ piece of Old Olive card stock scored at 4-1/4″ then folded in half on score line.
Basic Black card stock = 3-3/4″ x 5-1/4″
Neutrals Designer Series Paper Stack = 1/2″ x 5-1/4″
Whisper White card stock: Card Front = 3-1/2″ x 5″ Dragonfly Image = 3-1/4″ x 3″ Card Insert = 4″ x 5-1/4″


 Crinkled Seam Binding Ribbon")


")

")


 Designer Series Paper")


 Designer Series Paper")


")


")


 Textile Ribbon")