
We’ll be celebrating Easter in just over a month. I’m so happy that Winter is on the way out and Spring is on the way in! One of my favorite ways to celebrate Easter is by creating Easter Baskets. You are going to want to make your own Easter Basket when you find out how easy this one is to make:
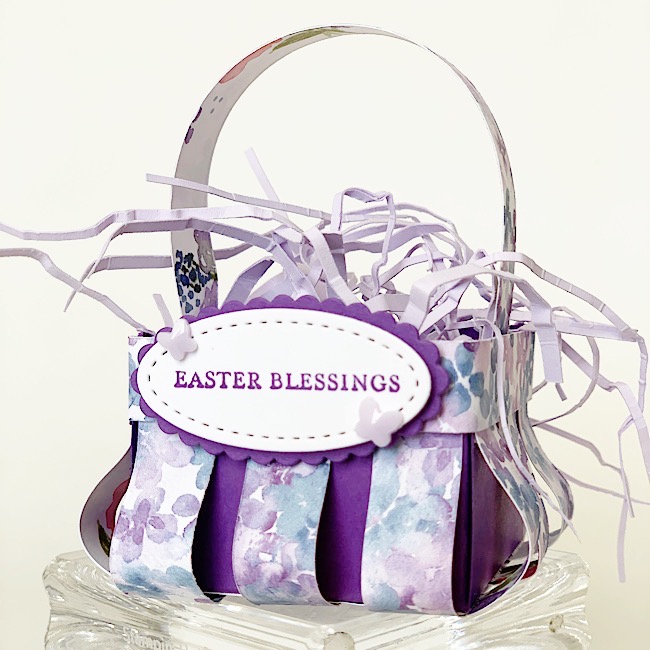
The basket measures 2″ x 2″ and reminds me of a berry basket. I used Gorgeous Grape cardstock for the base of the basket and embellished it with strips of Hydrangea Hill Designer Series Paper from Stampin’ Up!
The sentiment for the tag was stamped onto a scrap of Basic White cardstock then cut out with a die from the Stitched Shapes Dies. The stitched oval die-cut was adhered to a scallop oval die-cut using Mini Stampin’ Dimensionals.
I felt that the basket needed something “extra” and at the last minute added two Butterfly Gems to the tag. The sweet little resin butterflies in Purple Posey were just right for this project.
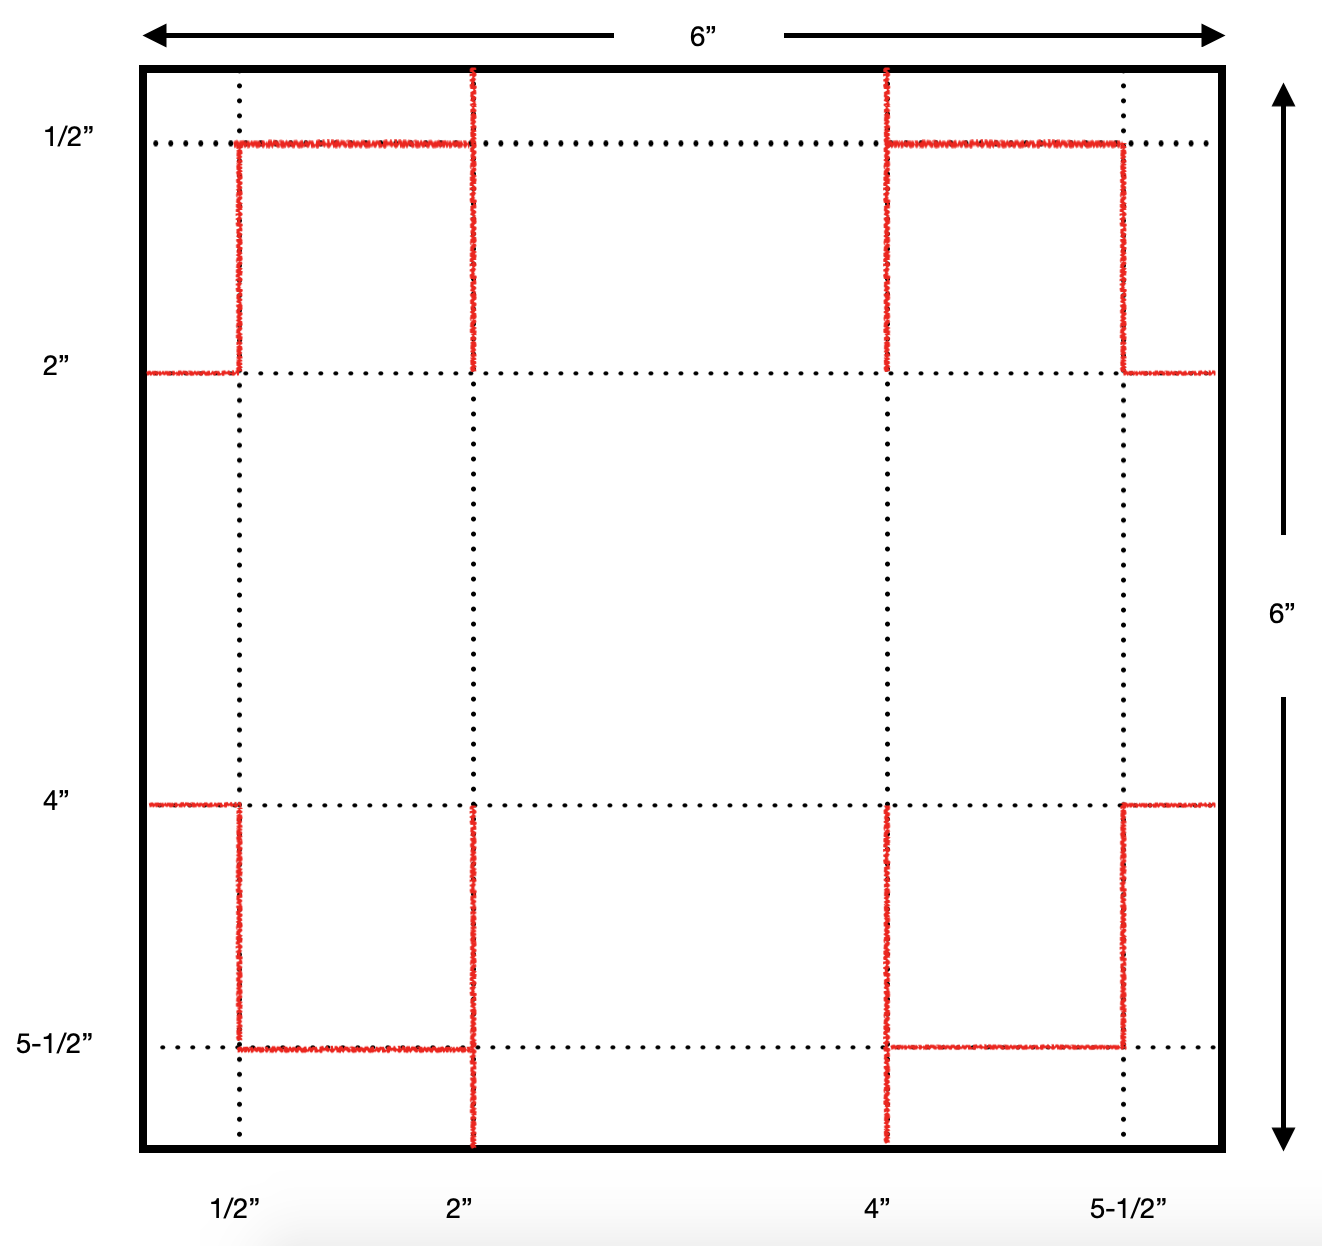
Cutting & Scoring
Basket Base = 6” x 6” piece of Gorgeous Grape cardstock scored at 1/2”, 2”, 4” and 5-1/2” on one side using the Simply Scored board, turn cardstock 45˚ and score at 1/2”, 2”, 4” and 5-1/2”
Basket Strips = 3” x 5” piece of Hydrangea Hill Designer Series Paper scored at 1-1/2” and 3-1/2” on the 5” side. Place Tear & Tape Adhesive on the top and bottom edges of 3” side. Cut into six 1/2” x 5” strips.
Basket Trim = 1/2” x 8-1/2” piece of Hydrangea Hill Designer Series Paper
Basket Handle = 1/2” x 6” piece of Hydrangea Hill Designer Series Paper
Basket Filler = crinkle several thin strips of Purple Posey cardstock.
Naturally Easter would be a great occasion to share these baskets but they would also make awesome party favors at bridal and baby showers as well as May Day baskets. Grab your supplies and start making your own Easter baskets now.