Fall/Halloween/Thanksgiving

Spooky Sweets Gift Tag

In addition to the awesome, one-of-a-kind products found inside the pages of a Stampin’ Up! catalog, there are great project ideas.  Crafters can copy the samples exactly as is or use them as a jumping off point to get the creative juices flowing.    I recently copied this “No Tricks just Treats” gift tag shown on page 51 of the 2018 Holiday Catalog.

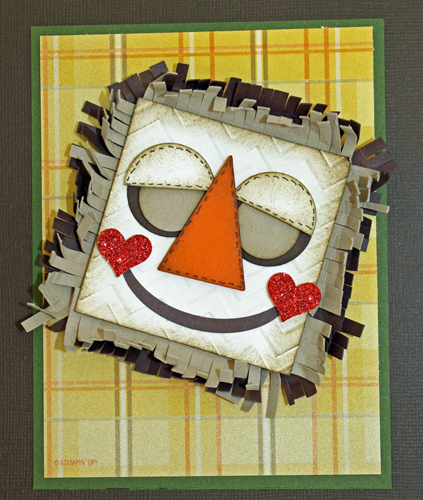
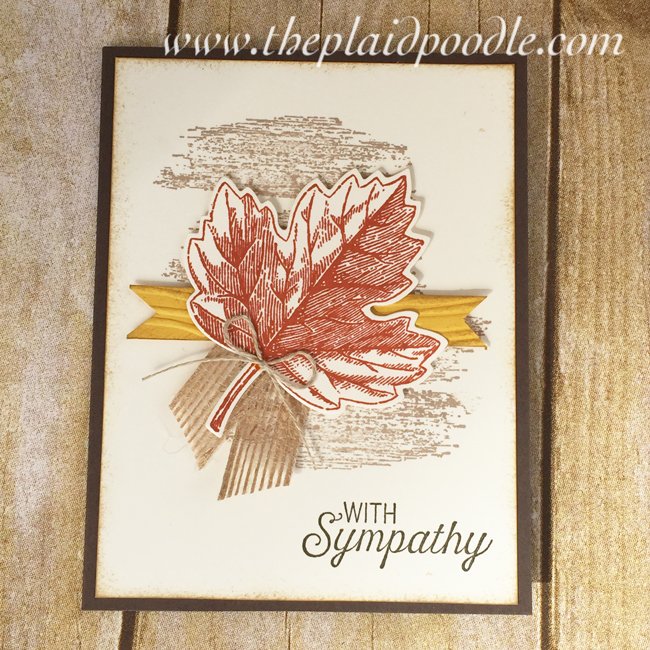
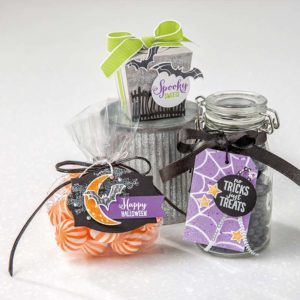
Of course I could not leave well enough alone and added a little something extra in the form of a spooky little bat.  Here is my version of the tag:

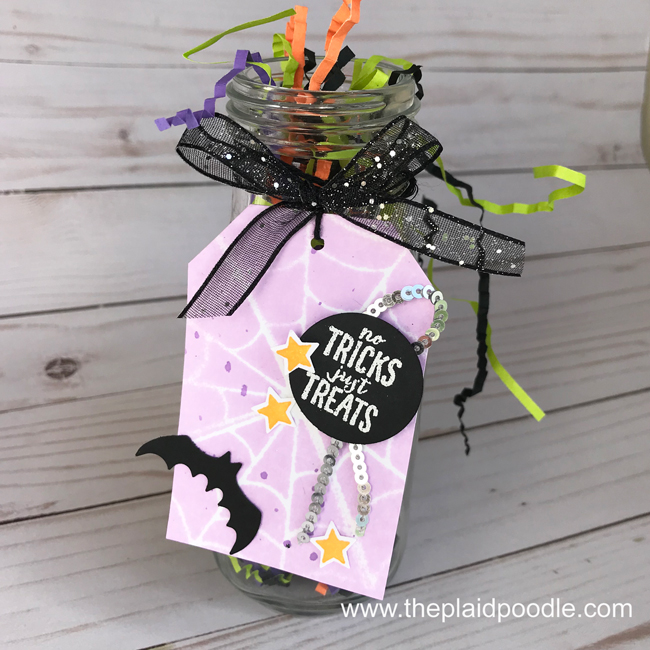
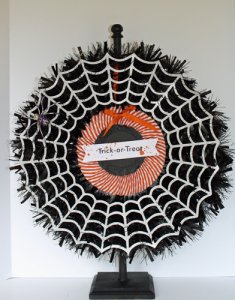
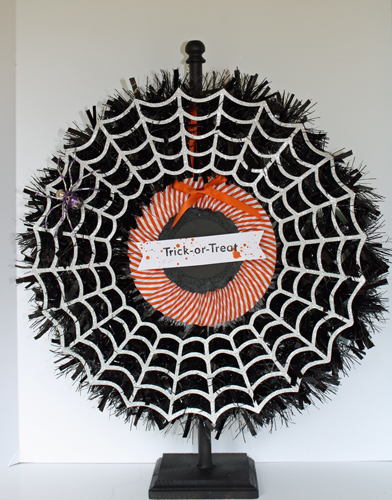
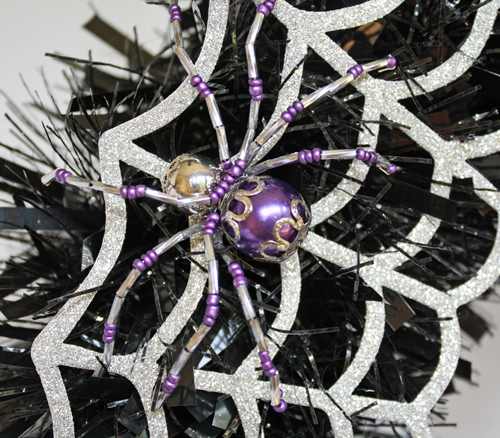
The tag was so much fun to make.  I mixed up a potion of rubbing alcohol with a few drops of Gorgeous Grape Ink Refill in a Stampin’ Spritzer.  I sprayed the mist over a spider web stencil made with the web die from the Cauldron Framelits to create the soft background for the tag.

I show how to create the Gorgeous Grape mist, the stencil and a tip for making the perfect tag top every time in my video tutorial below.

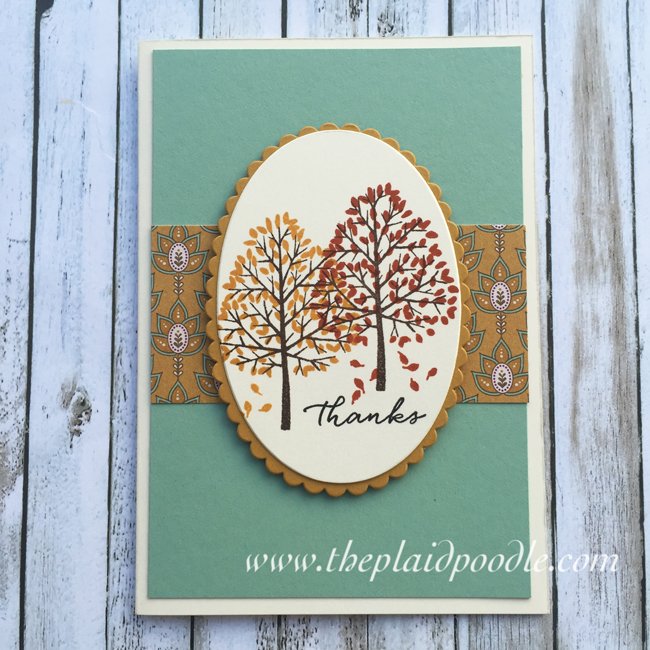
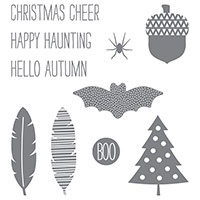
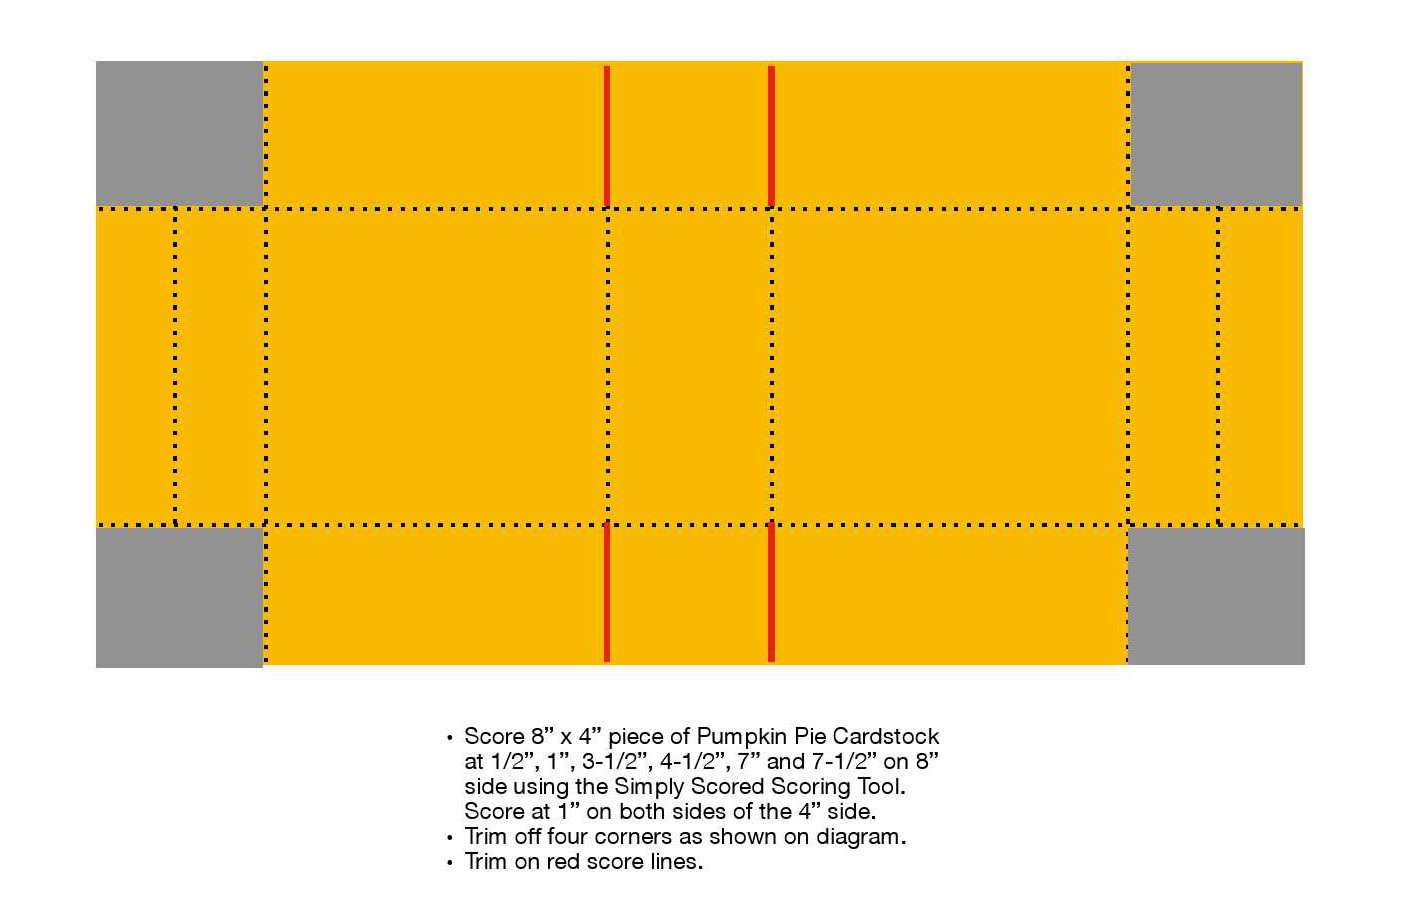
My tag is made with a  2-1/4″ wide x 3-1/2″ tall piece of Thick Whisper White card stock.  I used the Spooky Sweets stamp set for the sentiment and stars on the tag.  Here is the complete list of products I used to complete the project:

Product List


Thank you so much for stopping by my blog post today!  I hope you enjoyed the Spooky Sweets Gift Tag project.  If I can help you with your crafting needs please contact me through my Stampin’ Up! website.  It would be my privilege to assist you.

Frights & Delights Paper Pumpkin

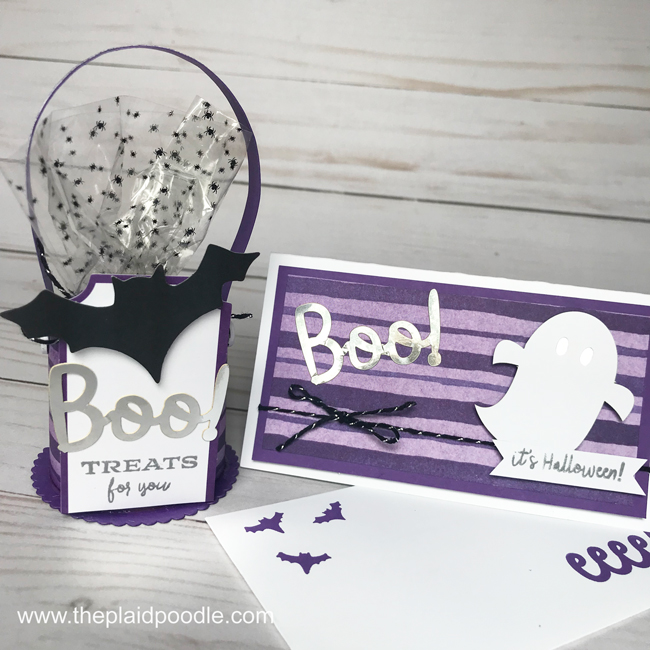
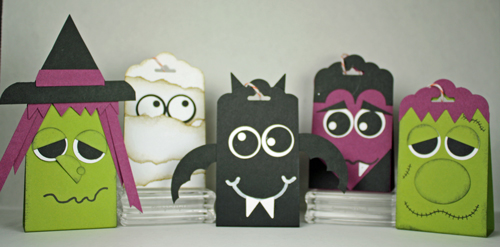
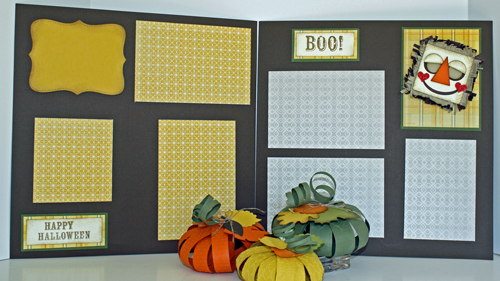
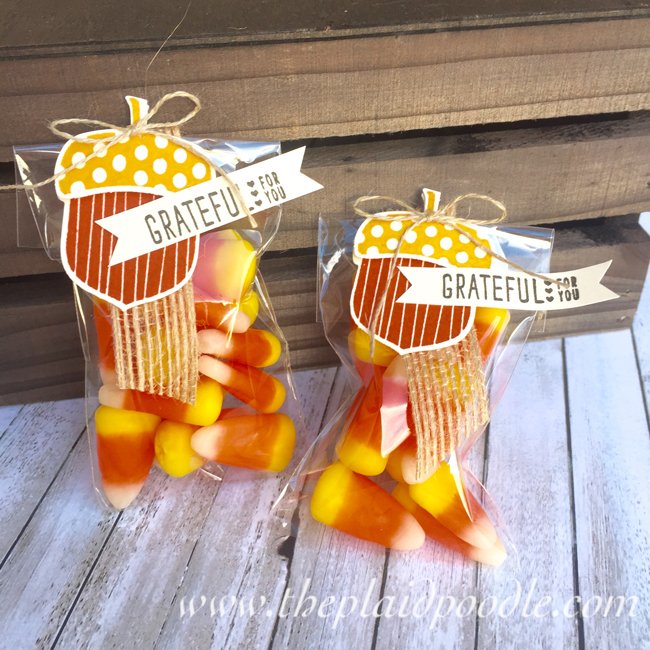
`The September Paper Pumpkin Kit from Stampin’ Up!, Frights & Delights, is so cute!  The kit comes with enough supplies and embellishments to make 24 treat bags. I didn’t need all 24 treat bags so I used products from the kit to make mini “Boo Baskets” and note cards.

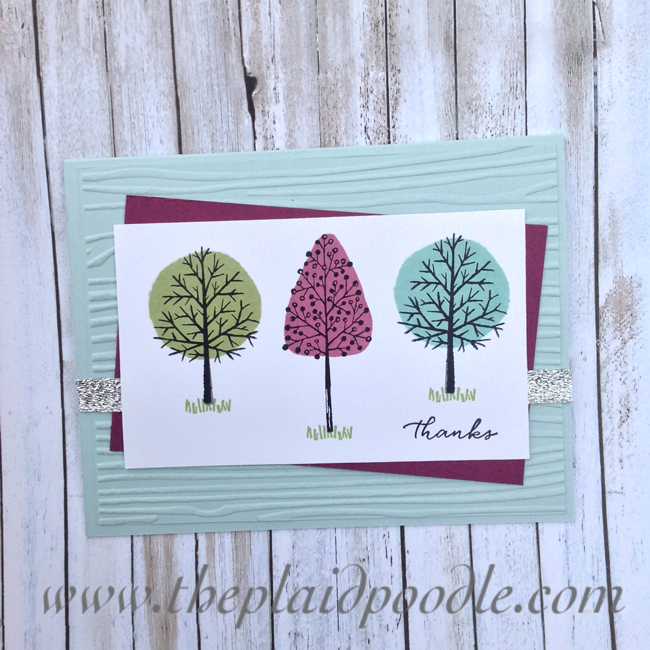
The narrow note cards from Stampin’ Up! are the perfect size to slip a gift card into.  Perfect for all those special, bigger Trick-or-Treaters in your life!  Click on the links below to get a full-color PDF tutorial for both projects.

Frights & Delights Halloween Basket Tutorial

Frights & Delights Narrow Note Card Tutorial


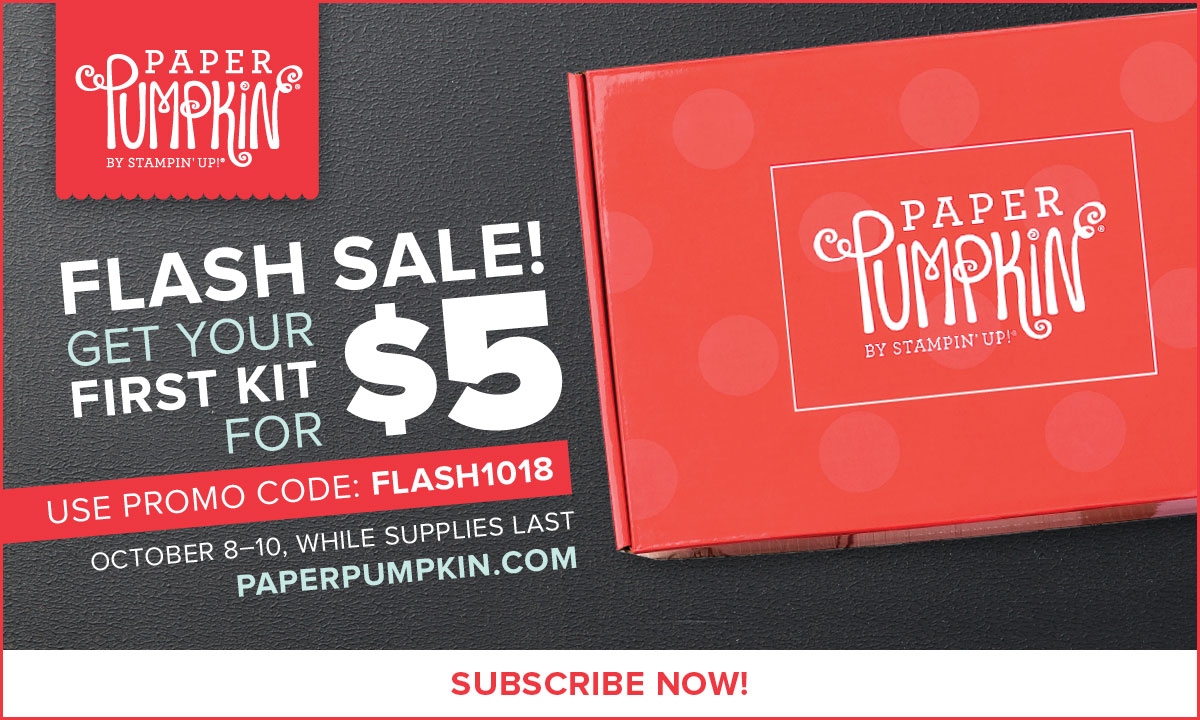
Now is a great time to give Paper Pumpkin a try because Stampin’ Up! is offering new subscribers the Frights & Delights Paper Pumpkin Kit for just $5!  But you have to hurry – today, October 10th is the final day to take advantage of the offer.
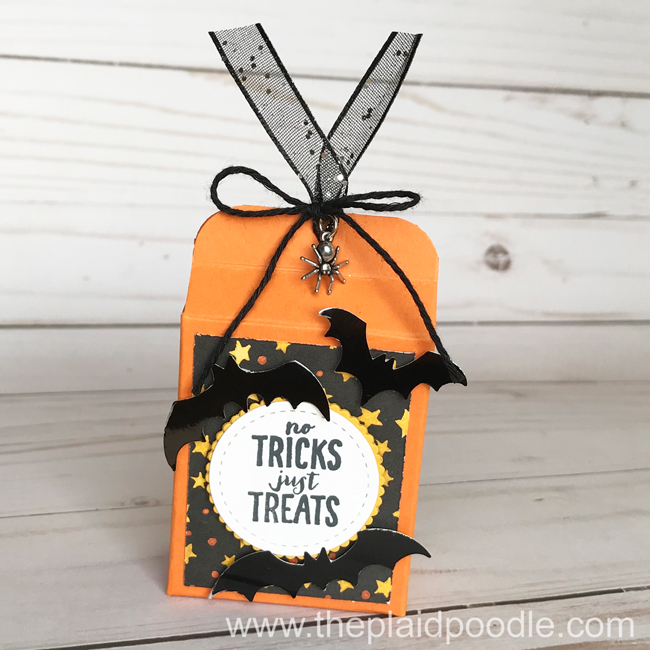
There is absolutely no risk – you can cancel or put a hold on your subscription at any time.  Click on the Paper Pumpkin box below and enter Promo Code FLASH1018 now to get your kit.

Save

Spooky Sweets Treat Box

Halloween is literally the sweetest time of year and this delightful little box makes sharing all the sweets, treats and candy so much fun!  It’s ideal for classroom favors and all those special Trick-or-Treaters in your life.  My favorite thing about this project?  That itsy bitsy spider trinket!

The box itself is simple to make and requires just a couple basic tools.  Once the box is assembled, the limit is your imagination as to how you embellish it.  I kept it simple by using the Spooky Sweets stamp set and coordinating Spooky Bats Punch (when you purchase the two in a bundle there is a 10% savings).   Learn how to make this box by watching the video below.


Project Recipe:

  • Pumpkin Pie Cardstock =  8″ x 4″ scored at 1/2″, 1″, 3-1/2″, 4-1/2″, 7″ and 7-1/2″ on the 8″ side.  Scored at 1″ on both sides of the 4″ side.
  • Toil & Trouble Designer Series Paper = 1-3/4″ x 2-1/4″
  • Crushed Curry Cardstock = 2″ x 2″
  • Whisper White Cardstock = 2″ x 2″
  • Black Foil Sheets = 3-1/4″ x 2-1/4″

Product List

Scoring Diagram

Totally Trees Card

You are, like totally, going to like this card!

I’m jumping out of my creative box with the card I’m featuring today.  Believe me it wasn’t easy and it took someone else to get me there!  I totally copied my Totally Trees card today from another totally awesome Stampin’ Up! Demonstrator, Mary Brown.  I would have never thought to put the colors she used in her card together and the result is amazing!  We made this card in my Fun & Fancy Card Classes this month and it received the most votes for “favorite card”.

16-oct-totally-trees-cardThe card has so much going on but it does not overwhelm.  First of all there are five different colors; some subtle, some bright and some regal, but they all work together.  The wood grain embossed background adds texture and the ribbon adds a little bling and shine to the card.  Not to mention the Totally Trees stamp set which has a pretty artsy, modern feel.  It’s bright and fresh and the kind of card that puts a smile on your face when you see it!

Enjoy the video!  The card dimensions and list of products used are below.

Project Dimensions:

  • Soft Sky Card Stock 8-1/2″ x 5-1/2″ scored at 4-1/4″, 4″ x 5-1/4″
  • Rich Razzleberry Card Stock 4-5/8″ x 2-7/8″
  • Whisper White Card Stock 2-3/4″ x 4-1/2″, 4″ x 5-1/4″ (for inside card)

Product List

Totally Trees Photopolymer Stamp Set

$26.00

Basic Black Archival Stampin’ Pad

$7.00

Wild Wasabi Classic Stampin' Pad

$6.50

Sweet Sugarplum Classic Stampin' Pad

$6.50

Pear Pizzazz Classic Stampin' Pad

$6.50

Pool Party Classic Stampin' Pad

$6.50

Soft Sky 8-1/2" X 11" Card Stock

$8.00

Rich Razzleberry 8-1/2" X 11" Card Stock

$8.00

Whisper White 8-1/2" X 11" Card Stock

$9.00

Woodgrain Textured Impressions Embossing Folder

$7.50

Big Shot

$110.00

3/8" (1 Cm) Glitter Ribbon Combo Pack

$6.00

Stampin' Pierce Mat

$5.00

Order Now Button_2-001

Paisleys & Posies Card

The project I’m sharing today is the second in my three-part autumn-themed series.  This card is super simple to make but looks anything but.  With the rich, autumn hued colors and the copper embossed sentiment it’s a classy little card.  I used several products from the Stampin Up! Petals & Paisleys suite featured in the 2016 Holiday Catalog.

I’ve said it before and I’ll say it again, Stampin’ Up! really takes the guess work out of coordinating elements for my paper crafting projects.  The problem of gathering pieces for a project that will look great together is handled for me and that rings true for this card.  It took me minutes to design the card and not much more to put it together from start to finish.

I chose to pull out one of the colors from the Petals & Paisleys Designer Series Paper and used Night of Navy for the card base, scallop circle and die-cut flourish.  To take the card up a notch on the fancy scale I used the Delightful Dijon ribbon from the 3/8″ Ribbon Trio Pack and heat embossed the sentiment using Copper Stampin’ Emboss Powder.

Enjoy the video and don’t forget to check out card #1 in the series HERE and return on Wednesday for the third card in my Autumn-themed series.

Project Dimensions

  • Night of Navy Cardstock:  8-1/2″ x 5-1/2″, 3-1/4″ x 2-1/4″, scrap
  • Petals & Paisleys Specialty Designer Series Paper:  5-1/2″ x 2″
  • Very Vanilla Cardstock:  3-1/4″ x 2-1/4″, 4″ x 5-1/4″

Product List

Big Shot

$110.00

Heat Tool

$30.00

Glue Dots

$5.25

Order Now Button_2-001

Vintage Leaves Card

It was bound to happen and it happened today.  I was forced to turn the furnace on.  Yep, just after firing up the Kuerig this morning I moseyed over to the thermostat and cranked that baby on!  It’s official, Autumn is here.

How appropriate that my card for today’s post just happens to be the first in my three-part series of Autumn-themed cards.  The sentiment comes from the Flourishing Phrases stamp set by Stampin’ Up!  I created it for a sympathy card but it would work for just about any occasion by changing up the sentiment and the Flourishing Phrases set covers most of them.

vintage-leaves-card The maple leaf image from the Vintage Leaves stamp set takes center stage for this card.  I added texture and dimension to the Crushed Curry pennant by running it through the Big Shot using the Woodgrain Textured Impressions Embossing Folder and popped it up on the card with Stampin’ Dimensionals.  The 5/8″ Burlap Ribbon and Linen Thread add even more texture.

Enjoy the video tutorial and don’t forget to check back on Monday for card number two in my Autumn-Themed series.

Project Dimensions:

  • Early Espresso Card Stock:  8-1/2″ x 5-1/2″ scored at 4-1/4″
  • Very Vanilla Card Stock:  2 pieces 5-1/4″ x 4″ each, 3-1/2″ x 3-1/2″
  • Crushed Curry Card Stock:  3-1/2″ x 1/2″

Product List

Big Shot

$110.00

Linen Thread

$4.50

Order Now Button_2-001

Acorny Thank You Treat Holder

When someone places an order with me I like to show my appreciation with a handmade card but every once-in-a-while I surprise them with a little something more.  In September I created these Autumn-themed treat holders for an event and loved them so much that I made up extras to slip in with my client’s orders.  These adorable bags could be filled with any kind of small candy but the stamp set I used is named Acorny Thank You so you know it had to be candy corn!


16-oct-acorny-thank-you-treat-bagAren’t they sweet?  They are quick and easy to make so I’ll be making up several to have on hand for many different events this fall.  They would be great to tuck in with a tip to hair dresser, manicurist and dog groomer as well as hostess gifts and table favors.

Here is a video tutorial for the Acorny Thank You Treat Holders and a full list of products used are listed below.


Product List

Linen Thread

$4.50

Glue Dots

$5.25


As an Independent Stampin’ Up! Demonstrator I’m here to be your creative coach, give you fun project ideas, share special offers, and, of course, teach you about fantastic stamping products. If you don’t already have a Demonstrator I would love to be yours. Contact me today at Leslie@theplaidpoodle.com

Order Now Button_2-001

Totally Trees

16-sep-just-trees-notecardSomeone needs to alert Mother Nature that tomorrow is the first day of fall because it was 94 degrees in Kansas City today! Add the heat index to that and I think it was something link a jilllion and ten outside!  Don’t get me wrong; I dearly love summer, especially after a long grueling winter, but fall must be my spirit season because a perfect day to me is a sunny, 72 degree day with ZERO percent humidity!  I hope I don’t offend, but humidity has to be from the devil!

My card today however doesn’t care what temperature it is outside.  It’s just busting with autumnal mood and color!  I used the Stampin’ Up! Totally Trees stamp set to create this card along with the Chocolate Chip, Delightful Dijon and Cajon Craze inks.  The inspiration behind this card was the little scrap of Petals and Paisleys Specialty Designer Series Paper.  I absolutely love that paper and only had a few snippets left so I used the left-over scraps to whip up a few of these adorable note cards.

Here’s a quick video tutorial for the card.  If you enjoy it why not slip over to Youtube land HERE and leave a comment?  While you’re there make sure to subscribe to my channel to receive upcoming videos.  Thanks!

Cardstock Dimensions:

        • Very Vanilla 5″ x 7″ scored at 3-1/2″, 3-3/4″ x 2-1/2″
        • Mint Macaron 3-1/4″ x 4-3/4″
        • Petals & Paisleys Specialty Designer Series Paper 3-1/4″ x 1-1/2″
        • Delightful Dijon 3-3/4″ x 2-1/2″


Product List

Big Shot

$110.00

Glue Dots

$5.25

Wicked Good Wreaths

Changing up a few things around my home with the seasons is something I enjoy doing but without a lot of time I keep it simple.  One of the easiest ways to update home decor with the changing seasons is with wreaths. Take one down and replace with another – even I have time for that.  And  what is better than a beautiful home decor piece?  Saying, “I made that” to your family and friends!

The Fancy option In my Fun & Fancy Class yesterday was the Season to Season Wreath Project Kit.  I was a little worried that our class time would not be adequate to finish the wreath but it was surprisingly easy to put together and my guests left with completed wreaths.  Happy guests and a big sigh of relief from me!

The wreath is so pretty with a soft, vintage feel and will look great wherever I decide to place it.  The finished size is pretty substantial – about 15″.  And – bonus – it is good to go until New Year’s because of the three interchangeable banners; Halloween theme, Autumn/Thanksgiving theme and Christmas theme.  Mine is all decorated for Halloween and looks great hanging on the $5 wreath holder I made last Fall.  See instructions for that HERE

Holiday15_p06_b

The supplies to make your own Season to Season Wreath are:

Built for Free Using: My Stampin Blog

Another fun option for Halloween decorating is the Frightful Wreath Simply Created Kit. It is currently on the Clearance Rack while supplies last.  The coordinating stamp set is not available but the Happy Haunting sentiment from the Cheer All Year Stamp Set would substitute in great!

Frightful-Wreath-on-Stand

I would love to hear from you about your seasonal decorating!  Do you change it up a little or a lot or not at all?  Do you decorate for Halloween?  Leave a comment and let me know.  Thanks!


A Lovely Thank-You

10-15-Front-Portch-Mums

It’s starting to get chilly here in my part of the world and feeling like Fall.  The cooler weather put me in the mood to plant some mums in my front porch pots and I even bought a pumpkin to plop in the middle of them.  I love the deep, rich colors of fall don’t you?

Just like red and green say, “Christmas” the deeper yellows, oranges and reds say, “Autumn”.  Today’s card uses those colors along with some rustic elements making it a great card to send this time of year.  I used the thank-you sentiment from the A Whole Lot of Lovely stamp set but by changing up the sentiment this card would work for any occasion.  It’s also a very neutral card that any man or woman would enjoy receiving.

My favorite parts of this card are the Designer Series Paper – it’s from the Season of Cheer Designer Series Paper collection, a Christmas paper – always love products that do double duty.  Also can’t stand how cute that little wooden acorn is!

10-15-A-Whole-Lot-of-LovelyIf you would like to receive a free full-color project sheet for this project sign up for my mailing list and I’ll get one off to you.  In the mean time here is the list of supplies I used:

Built for Free Using: My Stampin Blog

Cheer All Year – Really!

image

The card I’m sharing with you today was created by the Stampin’ Up! Creative Design Team.  It uses the Cheer All Year stamp set from the Stampin’ Up! Holiday Catalog and gives your projects some seasonal flair. At first look this is a holiday stamp set but as this card shows, you don’t have to put it away at the end of the year.  Just a simple “Hello” sentiment makes this a fun feathery card you can share all year long!  My favorite thing . . . the gold embossed feather tip!


image

Cheer All Year Stamp Set


Card Supplies:

Cheer All Year Stamp Set; Watermelon Wonder, Whisper White, and White Vellum Cardstock; Fancy Foil Designer Vellum; Basic Black Archival Stampin’ Pad; Watermelon Wonder Classic Stampin’ Pads; VersaMark Pad; Gold Stampin’ Emboss Powder; Gold Metallic Thread; Vintage Faceted Designer Buttons; Stampin’ Dimensionals; Banner Triple Punch; Big Shot; Lots of Labels Framelits Dies

Order Now Button_2-001


Halloween Treat Creature Feature

TRICK OR TREAT!

Halloween-Treat-Creatures

Aren’t these scary creatures just the cutest?  They’re not only adorable but they hold a delicious chocolate treat. Wouldn’t they make the sweetest party favors for the classroom, coworkers, neighbors and friends?! I hung them on this tree I found at Michael’s and placed them on my entry table ready to hand out to those special trick-or-treaters who show up on All Hallows Eve!

Halloween-Treat-Creatures-o

Directions:

Cardstock:  Basic Black, Pumpkin Pie, Whisper White, Old Olive, Elegant Eggplant

Ink:  Momento

Accessories:  Tag Topper Scallop Punch, 3/4″ Circle Punch, 1/2″ Circle Punch, Large Oval Punch, Small Oval Punch, Cupcake Builder Punch, Project Life Journaling Pens, Glue Dots

Treat Holder:  The treat holder is made using a piece of card stock measuring 2″ x 7-3/4″ that is punched on both ends with the Tag Topper Scallop Punch.  Score the strip of card stock at 3-3/8″ from each end, fold at the score lines then adhere the tag together at the top using Glue Dots.  The little slot in the middle of the tag is the perfect size for a chocolate nugget candy which I attached with a Glue Dot.

Faces:  The eyes are made using the 3/4″ Circle Punch for the eyeball and the 1/2″ Circle Punch for the iris.  I used the Cupcake Builder Punch for the small dots in the eyes.  For the witch’s and monster’s eyelids I used the 3/4″ Circle punch cutting the circle in half.  The witch’s nose is a 1/2″ circle cut in half with a small dot made from the Cupcake Builder Punch for her wart.  The monster’s nose is made using the Small Oval Punch.

Monster:  Frankie’s hair was made by punching a scrap of Elegant Eggplant cardstock with the Tag Topper Scallop Punch and fringing the other end with scissors then gluing it on the tag.  His mouth and scars were drawn with a Project Life Journaling Pen.

Witch:  The witch’s hair was made by punching a scrap of Elegant Eggplant cardstock with the Tag Topper Scallop Punch and fringing the other end with scissors then gluing it on the tag.  A few other strips of cardstock were then glued on the edges.  Her hat is a triangle with a rectangular strip of paper with two rounded corners made using the corner rounder punch.  The hat band was a smaller rectangle with rounded corners.  The witch’s mouth is drawn with a Project Life Journaling Pen.

Mummy:  The mummy is “wrapped” by using three 2″ strips of Whisper White cardstock that are torn and sponged on the edges using Momento ink then glued on.

Bat:  The bat’s wings are made using the Large Oval Punch and the 1/2″ Circle Punch.  His teeth and ears are small triangles and I drew his mouth with a chalk pen that I had in my stash.

Vampire:  The Count’s hair line was made by punching a scrap of Basic Black cardstock with the Tag Topper Scallop Punch and the 1/2″ Circle Punch.  His cape, teeth and eyebrows are made by cutting triangles.  The Count’s mouth is drawn with a Project Life Journaling Pen.

Sweet Scarecrow Card & Memory Keeping Pages

Scary-Scarecrow

My thanks to fellow Stampin’ Up! Demonstrator Diana Ball for her original design that I CASED for this cute scarecrow!  I ended up making two of the darling faces and used one for a card and one for a scrapbook page layout:

Scary-Scarecrow-CardSweet Scarecrow Card


Scary-Scarecrow-Page-LayoutSweet Scarecrow Double Page Scrapbook Layout

Directions:

The scarecrow’s face is a 2-1/2″ x 2-1/2″ square of Very Vanilla Cardstock that I embossed with the Chevron Embossing Folder then sponged the edges with Early Espresso Ink.  The 1″ Circle Punch and the 3/4″ Circle Punch were used for her eyes and eyelids and the heart punch from the Itty Bitty Accents Punch Pack for her rosy cheeks.  I cut a triangle for her nose and used the Extra Large Oval Punch for her mouth.  Her eyelids, nose and cheeks are adhered using Stampin’ Dimensionals.    The “straw” surrounding her face was made with a 3-1/2″ x 3-1/2″ square of Crumb Cake and Early Espresso Cardstock that were fringed on the edges with Fringe Scissors.  I glued the two pieces of “straw” squares together with Snail Adhesive then attached the face to the “straw” with Stampin’ Dimensionals.

Frightful Wreath and DYI Wreath Stand

Frightful-Wreath-on-Stand


Fright-Wreath-Spider

Frightful Wreath Simply Created Kit

We’re entering that Bootiful time of the year when I like to pull out my Halloween decorations.  This wreath was assembled in about 30 minutes using Stampin’ Up!’s Frightful Wreath Simply Created Kit and the coordinating stamp set Frightful Wreath.  I love the bling of the beaded spider – so cute!  The 17″ wreath is perfect for hanging on a door, window or a mirror but I wanted to place it on my entry table and after seeing this pin on Pinterest I decided to get my power tool self on and assemble my own wreath stand.

The materials for the wreath stand are simple and inexpensive.  I found everything I needed at Hobby Lobby or in our garage and probably invested less than $5 .  Here are the materials needed:

Wreath-Stand-Materials


5/8″ Dowel Rod

5″ x 5″ Wooden Base

1″ Wooden Doohickey for the top of the stand

Extra-Strength Adhesive

Small Flat Head Screw (not shown)

Small Cup Hook (not shown)

Flat Black Spray Paint (not shown)


First I cut the dowel rod 20-inches long using a small saw.  Then I drilled a hole in the base to place the dowel rod. ( I would recommend a drill bit the same size as your dowel but since we didn’t have a 5/8″ bit mine was slightly larger than the rod.)   Next I  placed the adhesive into the drilled hole and set the dowel into it.  The topper doohickey was glued on at this time as well.  After letting the adhesive dry overnight, to give the stand a little more stability, I decided to drill a flat head screw through the bottom of the base.  If your drill bit is the same diameter as your dowel this step is probably not necessary.  After spray painting the stand flat black and letting it dry completely  I added a small cup hook to hang the wreath on.

Wreath-Stand-BaseWreath-Stand-Cup-Hook

Without counting drying time it probably took me about an hour to assemble the wreath stand.  I’m really happy with the results and it was so easy to make I’m thinking maybe a gold one for Christmas decorating is in order!

Order Now Button_2-001