3-D Projects

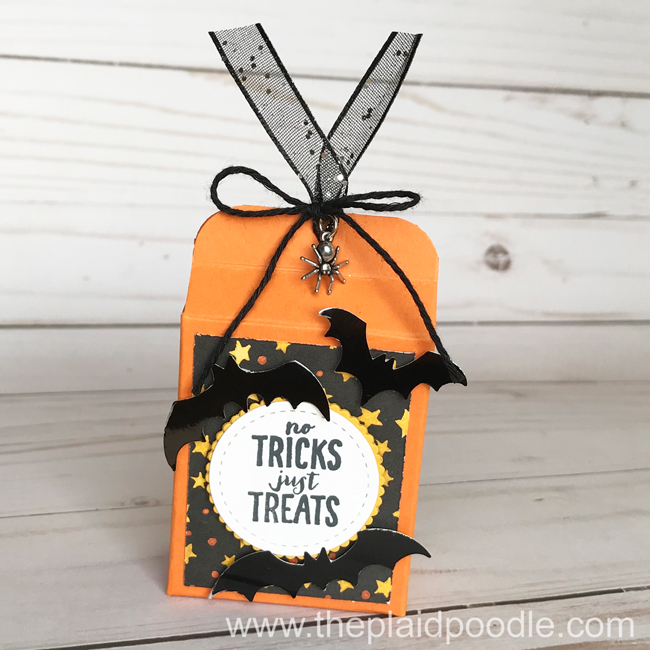
Cauldron Bubble Halloween Lanterns

I participated in a vendor fair this fall and one of the items at my booth were these cute Halloween Lanterns.

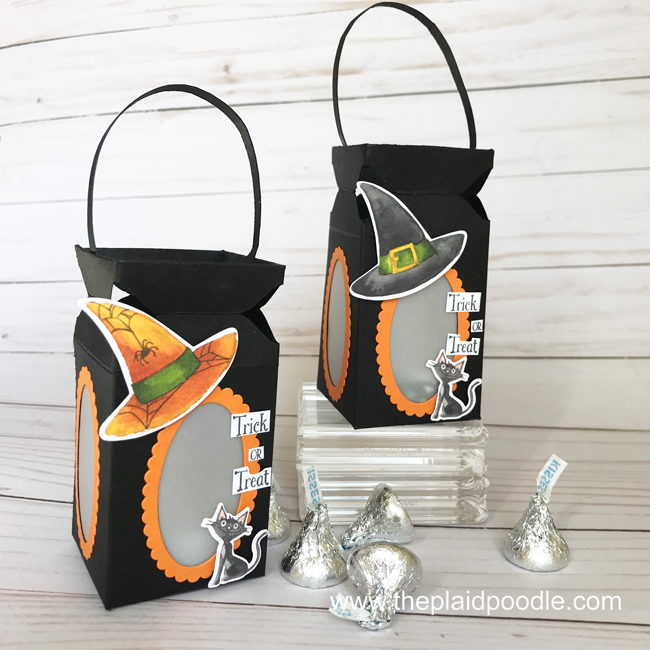
Aren’t they sweet?  I placed a small, cellophane bag with chocolate kisses inside the lanterns for gifting along with a flameless tealight candle.  When you remove the candy and insert the flameless candle the lanterns really glow!  I show the lanterns in action at the end of my video tutorial below.

This project is probably considered intermediate skill required but only because of the tools used and the folds required.  It really is a pretty simple and straight forward project to complete.  I’ve included the card stock dimensions along with a list of the products used to create these lanterns below.

Project Recipe

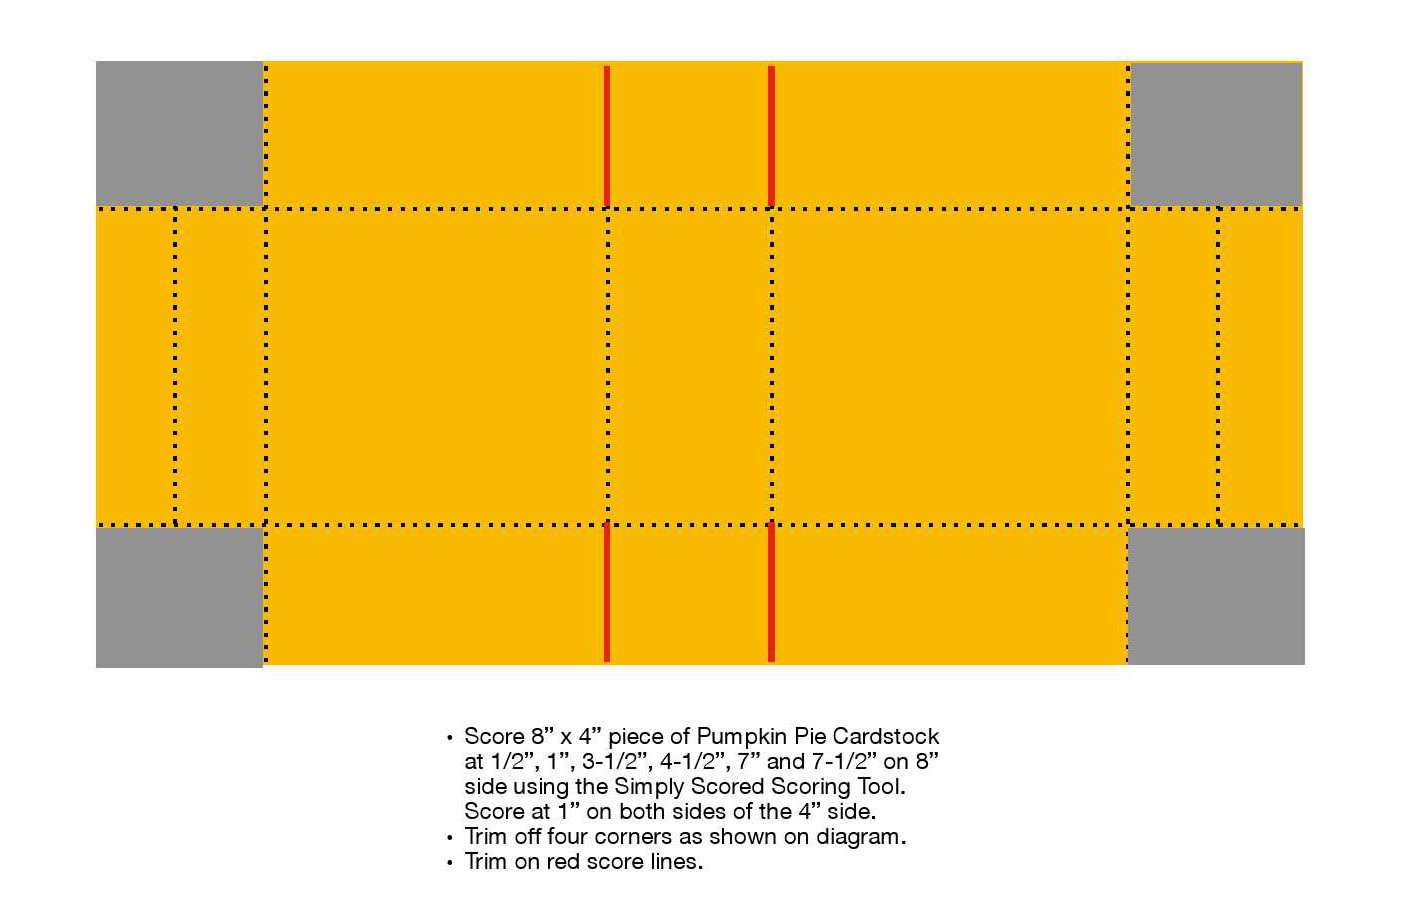
  • Basic Black card stock = 8-1/2″ x 6″ scored on the 8-1/2″ side at 2″, 4″, 6″ and 8″.  Score on the 6″ side at 1/4″, 7/8″, 1-1/2″ and 4-1/4″
  • Basic Black card stock = 6-1/2″ x 1/4″ (lantern handle)
  • Vellum = four pieces 2-1/2″ x 1-3/4″ each
  • Pumpkin Pie card stock = 7-1/2″ x 3-1/2″
  • Toil & Trouble Designer Series Paper (witches hat and cat die-cut)
  • Whisper White card stock = scrap

Product List

Thank you for stopping by my blog today!  It would be my pleasure to assist you with your paper crafting needs.  Click on the button below to contact me.

Peaceful Noel Mini Gift Box

Today’s project is another version of the Spooky Sweets Treat Box I shared HERE.  This elegant little box would make the perfect table favors at your holiday meal.  It would also make a sweet hostess gift.  The box is so simple to assemble you could have several on-hand for those last minute holiday guests.

Metallics are very on-trend right now and the copper foil used in the Joyous Noel Suite by Stampin’ Up is spot on! I used Merry Merlot card stock for the box and adhered Joyous Noel Specialty Designer Series Paper to the front and back.  Then, to accent the copper foil in the Designer Series Paper, I punched two springs from the Joyous Noel Glimmer Paper using the Sprig Punch.  For the tag I stamped the sentiment with Merry Merlot ink onto the stitched circle and adhered it to a scallop circle cut from the glimmer paper.

To close the box, I tied a Snowflake Wire Element to the beautiful Merry Merlot & Copper 5/8″ Reversible Ribbon that I threaded through a hole punched in the box top.

I’m very happy with the results and think the box turned out beautifully!  Here is the video showing how to make the box ( prerecorded Facebook Live) and the Project Recipe with all the dimensions is posted below.

Project Recipe:

  • Merry Merlot Cardstock =  8″ x 4″ scored at 1/2″, 1″, 3-1/2″, 4-1/2″, 7″ and 7-1/2″ on the 8″ side.  Scored at 1″ on both sides of the 4″ side.
  • Joyous Noel Specialty Designer Series Paper = Two pieces 1-3/4″ x 2-1/4″ each
  • Joyous Noel 6″ x 6″ Glimmer Paper = 2″ x 2″ for the scallop circle, 3″ x 2″ for the sprigs
  • Crumb Cake Cardstock = 2″ x 2″

Product List

Spooky Sweets Treat Box

Halloween is literally the sweetest time of year and this delightful little box makes sharing all the sweets, treats and candy so much fun!  It’s ideal for classroom favors and all those special Trick-or-Treaters in your life.  My favorite thing about this project?  That itsy bitsy spider trinket!

The box itself is simple to make and requires just a couple basic tools.  Once the box is assembled, the limit is your imagination as to how you embellish it.  I kept it simple by using the Spooky Sweets stamp set and coordinating Spooky Bats Punch (when you purchase the two in a bundle there is a 10% savings).   Learn how to make this box by watching the video below.


Project Recipe:

  • Pumpkin Pie Cardstock =  8″ x 4″ scored at 1/2″, 1″, 3-1/2″, 4-1/2″, 7″ and 7-1/2″ on the 8″ side.  Scored at 1″ on both sides of the 4″ side.
  • Toil & Trouble Designer Series Paper = 1-3/4″ x 2-1/4″
  • Crushed Curry Cardstock = 2″ x 2″
  • Whisper White Cardstock = 2″ x 2″
  • Black Foil Sheets = 3-1/4″ x 2-1/4″

Product List

Scoring Diagram

Stampin’ Up! Sweet Stack Mini Chocolate Pocket

Call me weird but I have a habit of wandering candy aisles looking for sweet treats that might call to me for some crafty packaging.  As soon as I came upon these Ghirardelli Mini’s I knew a pretty little packet was called for and this is what I came up with using the Sweet Stack stamp set by Stampin’ Up!

It looks like a mini traveler’s notebook doesn’t it?  There’s a little pocket for the chocolate and the inside cover is perfect for leaving a small note to the recipient.  These treat pockets don’t use a lot of supplies and are a snap to make.  Check out my video tutorial below to see how easy-peasy they are to create.

Sweet Stack Mini Chocolate Pocket Video Tutorial


Project Dimensions and Supplies

Dimensions:

      • 7-1/2″ x 3″ piece of Designer Series Paper scored at 2-1/2″ at both ends of the 7-1/2″ side.
      • Cucumber Crush Cardstock = 2″ x 2″
      • Whisper White Cardstock = 2″ x 2″

Product List :


Save


Save

Save

Save

Save

Save

Save

My Hero Matchbook Treat Holder

Today’s project is a quick and easy treat holder perfect for Easter giving. A snap to reproduce, you can make four of these cute little favors out of one 8-1/2″ x 11″ piece of card stock.

 Project Recipe:

  • Score 7-1/2″ x 2-1/2″ piece of Melon Mambo card stock on the 7-1/2″ side at 3/4″, 4-1/4″ and 4-1/2″ using the Simply Scored Tool.  Fold on score lines and burnish with the Bone Folder.
  • Adhere 2-3/4″ x 2-1/4″ and 2-1/4″ x 1/2″ pieces of Designer Series Paper onto matchbook cover using adhesive.
  • Cut square from 2-1/2″ x 2-1/2″ piece of Melon Mambo card stock using die from the Layering Squares Framelits using the Big Shot.
  • Stamp sentiment onto 2″ x 2″ piece of Whisper White card stock with Melon Mambo ink.  Cut out with die from the Stitched Shapes Framelits using the Big Shot.  Adhere to Melon Mambo square.  Adhere completed tag to matchbook using Stampin’ Dimensionals.
  • Staple candy inside matchbook.  Tie a bow with Melon Mambo 1/8″ stitched ribbon then adhere over staple using a Glue Dot.

Product List

Save

Acorny Thank You Treat Holder

When someone places an order with me I like to show my appreciation with a handmade card but every once-in-a-while I surprise them with a little something more.  In September I created these Autumn-themed treat holders for an event and loved them so much that I made up extras to slip in with my client’s orders.  These adorable bags could be filled with any kind of small candy but the stamp set I used is named Acorny Thank You so you know it had to be candy corn!


16-oct-acorny-thank-you-treat-bagAren’t they sweet?  They are quick and easy to make so I’ll be making up several to have on hand for many different events this fall.  They would be great to tuck in with a tip to hair dresser, manicurist and dog groomer as well as hostess gifts and table favors.

Here is a video tutorial for the Acorny Thank You Treat Holders and a full list of products used are listed below.


Product List

Linen Thread

$4.50

Glue Dots

$5.25


As an Independent Stampin’ Up! Demonstrator I’m here to be your creative coach, give you fun project ideas, share special offers, and, of course, teach you about fantastic stamping products. If you don’t already have a Demonstrator I would love to be yours. Contact me today at Leslie@theplaidpoodle.com

Order Now Button_2-001

New Stampin’ Up! Catalog Reveal Party

I held my June Fun & Fancy Stamp Classes on Monday and everyone in attendance received a copy of the new Stampin’ Up! Annual Catalog.  A new catalog is always something to celebrate so a party was in order.  The theme for the party was Flip-Flops and Flamingos.  As mentioned in my blog post HERE I have fallen in love with the new Pop of Paradise Stamp Set and I’m finding Flamingos everywhere these days!

Here are a couple photos from the party:

16-JUN-Catalog-Reveal-Decor16-JUN-CupcakesMy cupcakes were Tropical Mango and coordinated perfectly with one of the new In-Colors, Peekaboo Peach.  I made the cupcake picks by stamping the pineapple image from the Pop of Paradise stamp set onto Peekaboo Peach card stock using Basic Black ink.  I punched the pineapples out with the 1-1/2″ Circle Punch then adhered two circles together with a toothpick in the center using Fast Fuse Adhesive.  It was a last-minute idea and I put them together just 30 minutes before the party started!

Floral Wings Easter Basket

16-MAR-Floral-Wings-Easter-BasketWe will be hosting 10 for Easter dinner this Sunday and I have been busy this week preparing.  One of my favorite things to do for holiday dinners is to set a fun table and this Easter I wanted to place a basket filled with sweets at each place setting.  My time is short so I needed something quick and easy and came up with these cuties.  I’m really happy with how they turned out and think they scream, “Spring is finally here!”.   They would also make great favors for all the upcoming Spring events; baby showers, bridal showers, May Day, and Mother’s Day to name a few.

I was able to make three baskets from one sheet of 12″ x 12″ Designer Series Paper and they were super simple to put together.  The basket is made from a piece of 6″ x 6″ Designer Series Paper and the handle is a 6″ x 3/4″ piece of Designer Series Paper.  I used a 4″ x 3″ piece of Whisper White card stock to stamp the butterfly image onto and the lacy butterfly was cut from a 2-1/2″ x 2″ piece of Vellum.  Here is a video I created to show you how the baskets are made.  Enjoy!


Product List

Big Shot

$110.00

Glue Dots

$5.25


Order Now Button_2-001

Envelope Punch Board Treat Box

16-FEB Env Punch Board Treat Box

An envelope is an envelope is an envelope except when it isn’t.  I made this cute little treat box using the Envelope Punch Board by Stampin’ Up!  I love using the Envelope Punch Board to create coordinating envelopes in any and all sizes for my card projects but I probably use it more often for 3-D paper projects.  Take a browse around Pinterest and you will see a great variety of ideas using the Envelope Punch Board.  It’s a great addition to any craft room and it’s on sale thru February 22, 2016.

The box is pretty simple to put together; just a few folds here and a few trims there.  If you’re a visual learner like me though, this quick video tutorial will be helpful.  And when you’re finished viewing take a minute to check out all the Weekly Deals below.


Weekly Deals