I made this charming card during my weekly Coffee and a Card series today. It has all the things; a lovely floral print, dainty bow and petite butterflies that shine. My favorite thing about the card however, is the sentiment. Here is the inside of the card.
Isn’t that the perfect sentiment? Such a kind word to send to one or all of your besties.
Here is the video tutorial for the Beauty Abounds card along with a list of supplies I used.
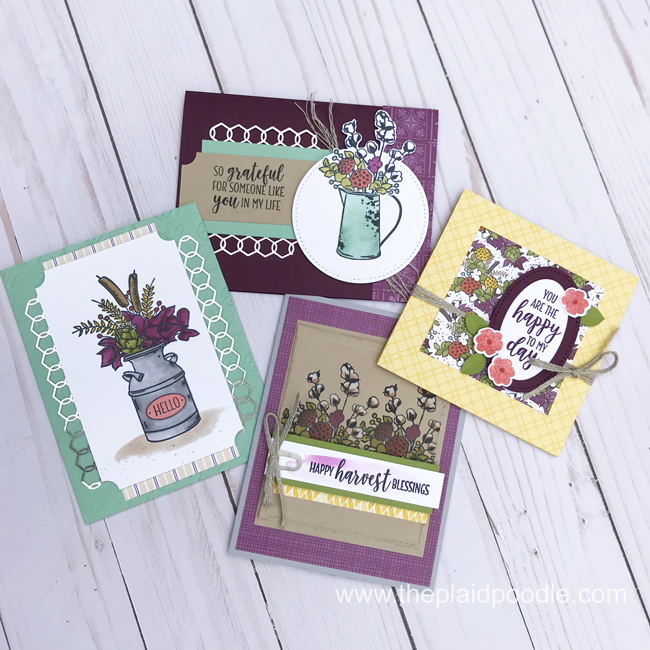
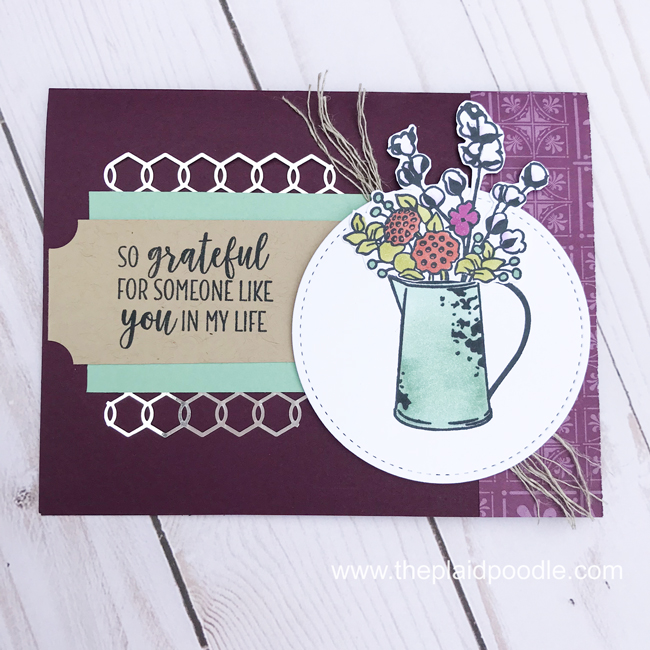
The cards I’m sharing with you today were made using products from the Country Lane Suite by Stampin’ Up! I’m a city girl but these cards create the feel of country comfort wherever you live! I created these cards by copying the samples on page 42 of the 2018 Holiday Catalog.
The sweet enamel pitcher, the milk can and the fall foliage photopolymer stamps in this set takes us back to a simpler time. The colors used, like Blackberry Bliss, Cajun Craze and Crushed Curry, are perfect for the Fall Season that we are in right now. The country imagery on the Country Lane Designer Series Paper is right on-trend.
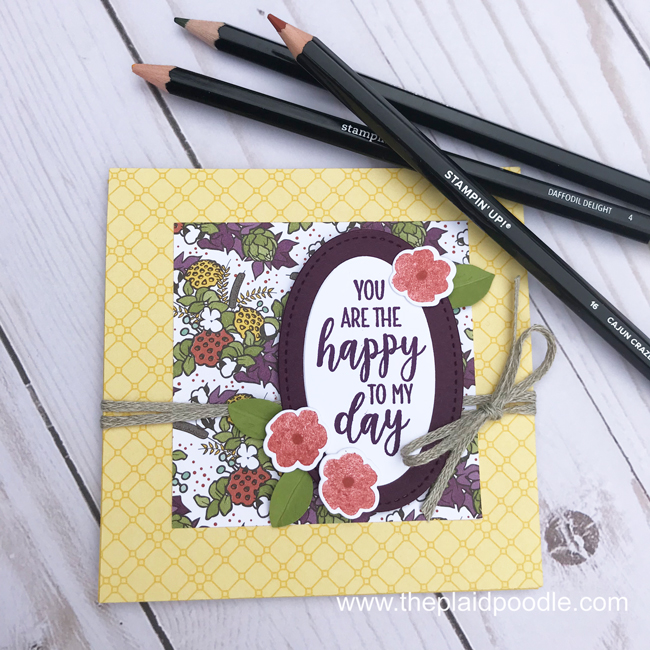
In addition to the products from the Country Lane Suite, I stamped the flower images for this sweet 4-1/4″ x 4-1/4″ note card with a stamp from the Jar of Love stamp set and cut them out with the coordinating Everyday Jars Framelits. The leaves were punched from a scrap of Old Olive with the Leaf Punch. One of my favorite elements in this little note card is the 3/16″ Braided Linen Trim. It really ties the whole card together – lol!
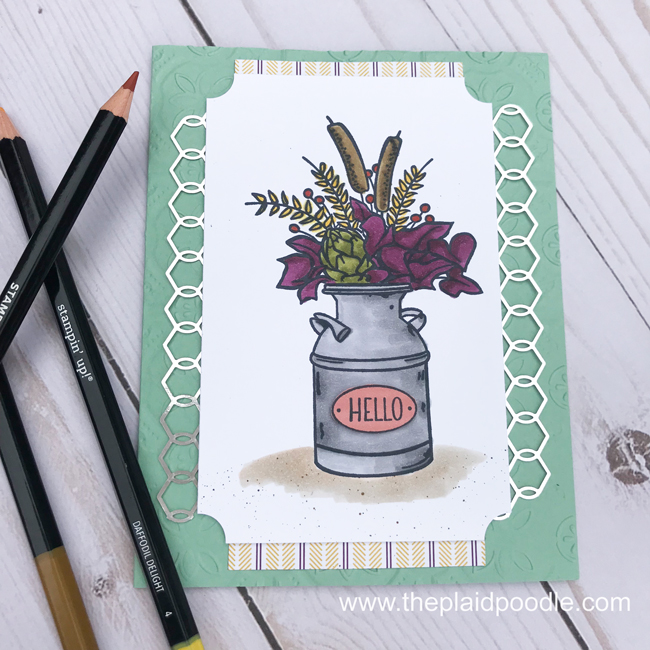
This next card is the type of card I send out most. The sentiment is appropriate to send to anyone for any occasion. The milk can is just too cute and the texture from the Tin Tile Dynamic Textured Impressions Embossing Folder is beautiful!
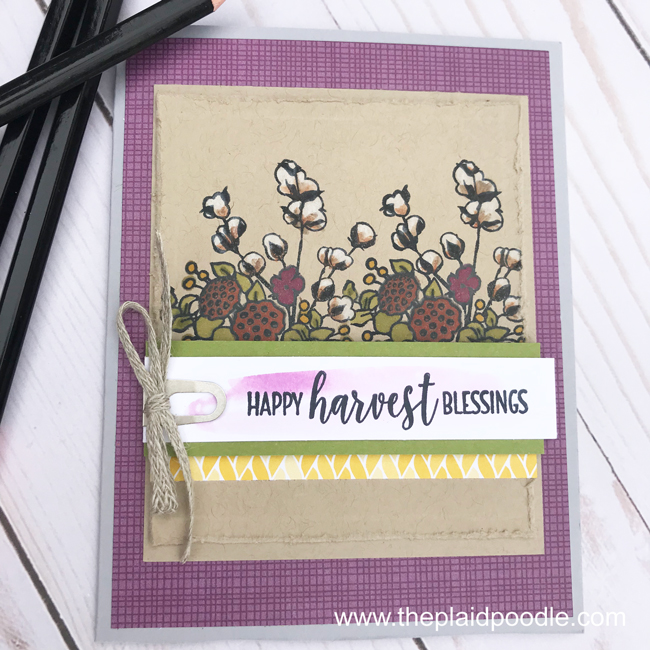
The Gray Granite card base on this next card is not something I would have chosen myself but it totally works. That’s what is so great about the Stampin’ Up! catalogs. The catalogs are full of samples and ideas to push us out of our creative boxes and try something new. I would be happy to send a catalog out to you. Click on the Catalog link in the menu above for details.
My last card uses the Braided Linen Trim again. I used a paper piercer to unravel the ends of the trim. I used a 3/4″ Circle Punch to notch out the corners of the Crumb Cake rectangle that the sentiment is stamped on.
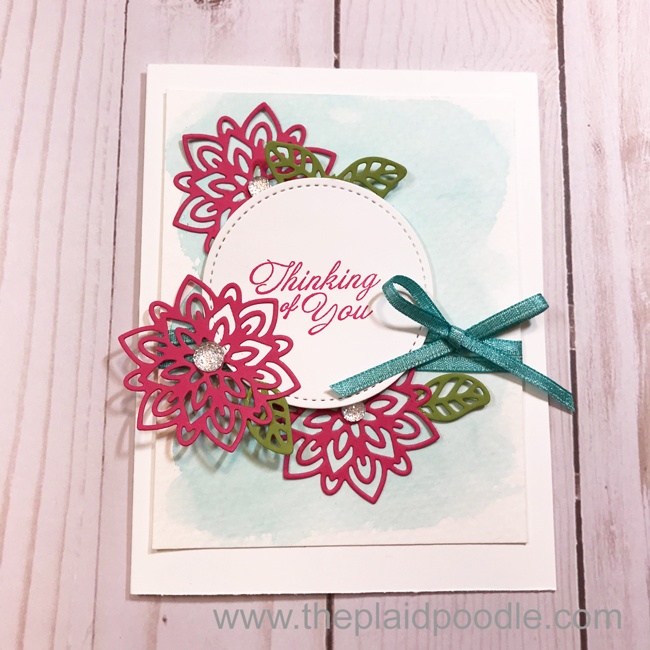
This is such a pretty card with layers, bits of ribbon and sparkle! The softness of the water color makes a sweet background for the intricate floral dies and the shimmery ribbon and gems add just enough dazzle.
If you want to step-up your paper crafting game, a die-cutting machine such as the Big Shot used to cut the floral dies from the Flourish Thinlits is a must. Using the right tools and a few fun techniques make creating this fancy card a breeze.
When you place an order with me of $50 or more (before tax and shipping) using Hostess Code 3SDF7H9F before midnight tonight, Friday, February 23, 2018. I will send you a FREE pack of Clear Faceted Gems. Place a $100 order and I will send you packages of both the Clear and Gold Faceted Gems. This offer is my personal gift* to you and will be in addition to the FREE Sale-a-Bration gift(s) that your $50 or $100 order will qualify for with Stampin’ Up! Read about the wonder that is Sale-a-Bration and view all the great stamp sets and other freebie choices by clicking on the brochure images below.
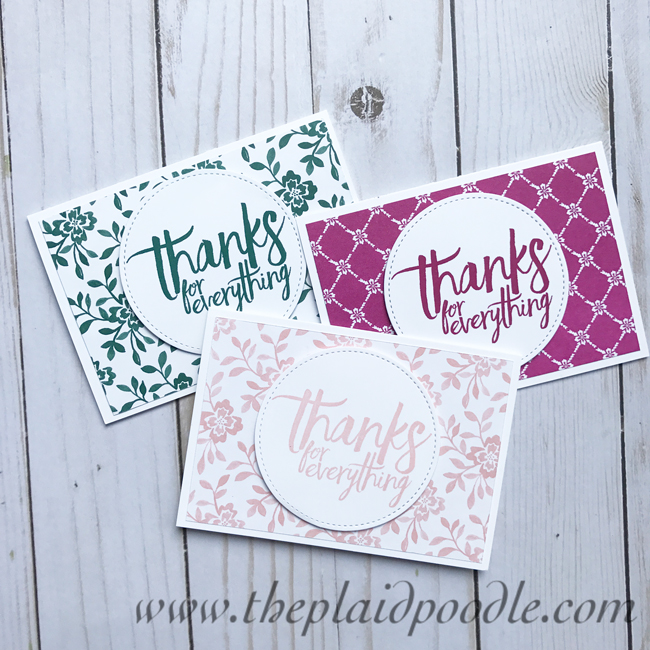
I’m sharing a pretty little card today that you can make in a matter of minutes. I call it a Make-it-in-Minutes project. Let’s face it, life is sometimes busy. Okay maybe life is mostly busy but making one or several of these cards to have on hand is not going to put a huge dent in your schedule. And imagine the smile it will bring to the faces of the recipients!
The Whisper White Note Cards and Envelopes from Stampin’ Up! is key to giving this project a quick head start. The All Things Thanks stamp set is a great set to have in your collection. It’s one you’ll own forever because it can be used over and over again. That, along with the coordinating inks and Designer Series Paper, make putting this card together a snap! Here’s my Make-it-in-Minutes video tutorial for the card:
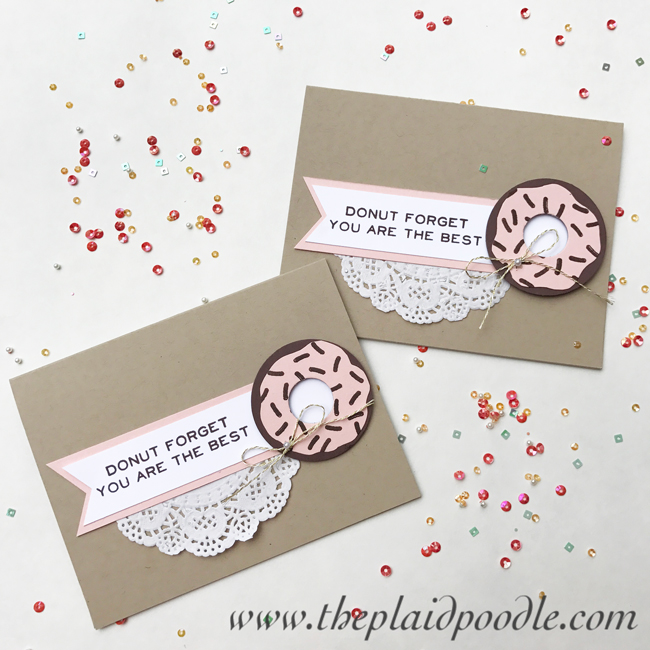
Each month in my Paper Pumpkin kit, I receive a brand new exclusive stamp set to add to my collection. It’s one of my favorite things about Paper Pumpkin. Here is a card I created with a stamp and a few left-over embellishments from this month’s kit:
If you’re wondering how I made that little chocolate donut here is a video tutorial:
Card Dimensions:
Card base = 8-1/2″ x 5-1/2″ piece of Crumb Cake card stock scored at 4-1/4″ then folded in half on the score line.
Donut: 2-1/2″ piece of Chocolate Chip card stock, 2-1/2″ piece of Powder Pink card stock
Tag: 1-1/4″ x 5-1/4″ piece of Powder Pink card stock, 1″ x 4-3/4″ piece of Whisper white card stock
If you haven’t heard of Paper Pumpkin, it’s a subscription kit by Stampin’ Up! With Paper Pumpkin, you’ll save time and money while you build a collection of crafting supplies. Every month you’ll receive a unique stamp set with an ink spot (that won’t repeat a color in a 12-month period). In no time at all, you’ll have a variety of stamps and ink to use on other projects. In addition, your first kit includes a free clear stamping block that you’ll use every month.
Now is a great time to give Paper Pumpkin a try. First-time subscribers who subscribe by June 10th get the June, July, and August kits at 25% off. Want to add a little creativity to your life? Click on the little orange box below to subscribe now and don’t forget to use the promo code STARTHERE to save 25% off!
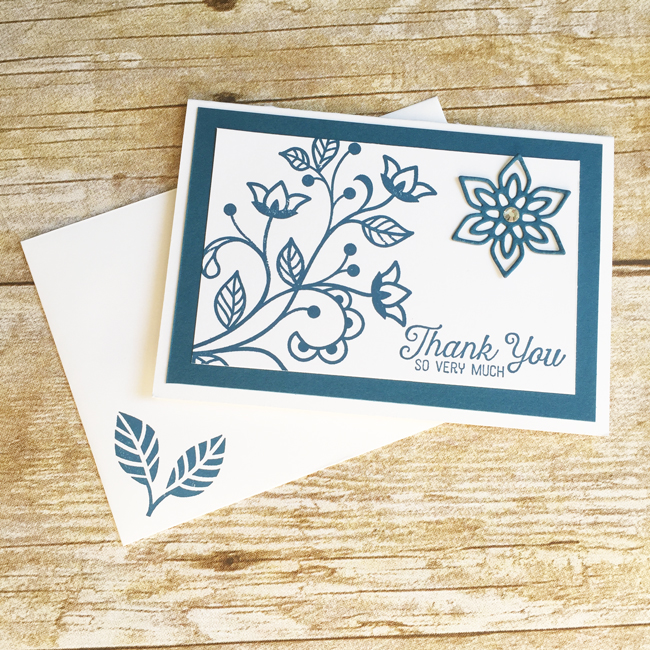
In yesterday’s post I shared a 4-1/4″ x 4-1/4″ square card. I made a square envelope with a liner that coordinated with my card using the Envelope Punch Board by Stampin’ Up! I used simple printer paper for the envelope and a piece of Blooms and Bliss Designer Series Paper for the envelope liner.
Here is a quick video tutorial that includes a tip to estimate what size Designer Series Paper your envelope requires for a liner:
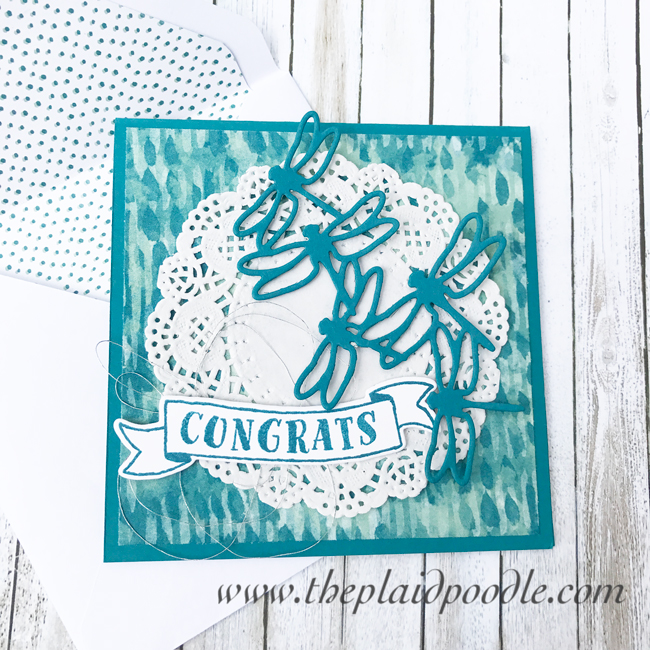
I decided to think outside-the-box today by creating a square card. (Did you see what I did there?) I’ve been going through my Designer Series Paper listed on the Stampin Up! Retiring List to make room for new, and the beautiful colors and impressionistic style of my selection from the Blooms and Bliss Designer Series Paper called to me. The blues and greens in this paper combined with the Island Indigo card base look fantastic!
The card has a lot of elements but is actually very simple and quick to put it together. Here is my video tutorial:
To create the card base I cut an 8-1/2″ x 4-1/4″ piece of Island Indigo card stock, scored it at 4-1/4″ then folded it in half. The Designer Series Paper is cut at 4″ x 4″ which means you can make nine of these cards out of one 12″ x 12″ piece of paper! The “Congrats” tag is stamped onto a piece of 1-1/2″ x 3-1/2″ piece of Whisper White card stock and the dragonflies are cut from a piece of 4-3/4″ x 2-3/4″ piece of Island Indigo card stock. I cut a piece of 4″ x 4″ piece of Whisper White card stock for the card insert.
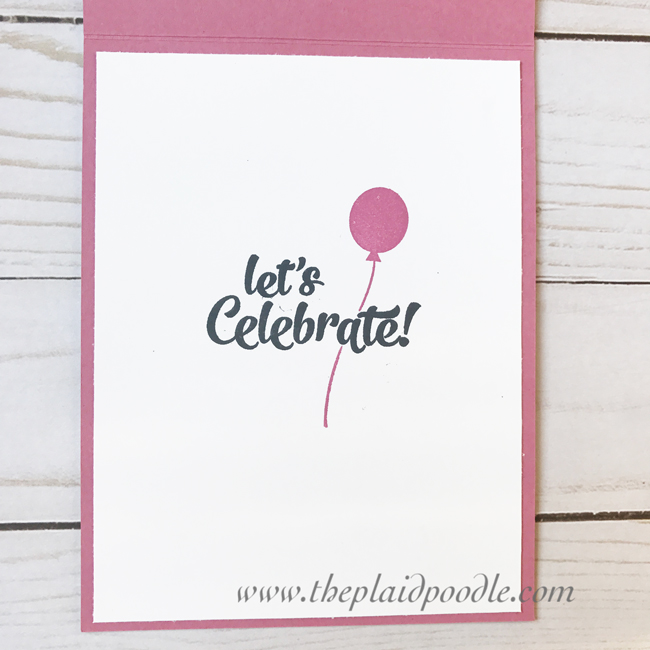
My inspiration for today’s card came from the 6″ x 6″ Glimmer Paper Assortment Pack from Stampin’ Up!. Bermuda Bay is one of my favorite Stampin’ Up! colors and having it in glimmer paper is such a treat! I used the Reverse Words stamp set for the front of the card and Confetti Celebration for the inside. The sentiments are perfect for any celebration – birthdays, anniversaries, graduations and Fridays just to name a few!
The glimmer paper and Reverse Words stamp set are part of the Stampin’ Up! Sale-A-Bration promotion. These products, along with a lot of other awesome paper crafting products, are FREEwith a $50 Stampin’ Up! Purchase. Sale-A-Bration ends on March 31st. You can learn all about Sale-A-Bration HERE.
My video tutorial for this card includes a “masking” technique – watch it here:
Reverse Words Card Recipe:
Dimensions: Card Base = Sweet Sugarplum 8-1/2″ x 5-1/2″, 4″ x 3″, Rich Razzleberry 3″ x 4-1/4″, Pink Pirouette 2-1/2″ x 4-1/4″, Sweet Sugarplum Glimmer Paper 2″ x 4-1/4″, Whisper White 4″ x 3″, 4″ x 5-1/4″ Product List
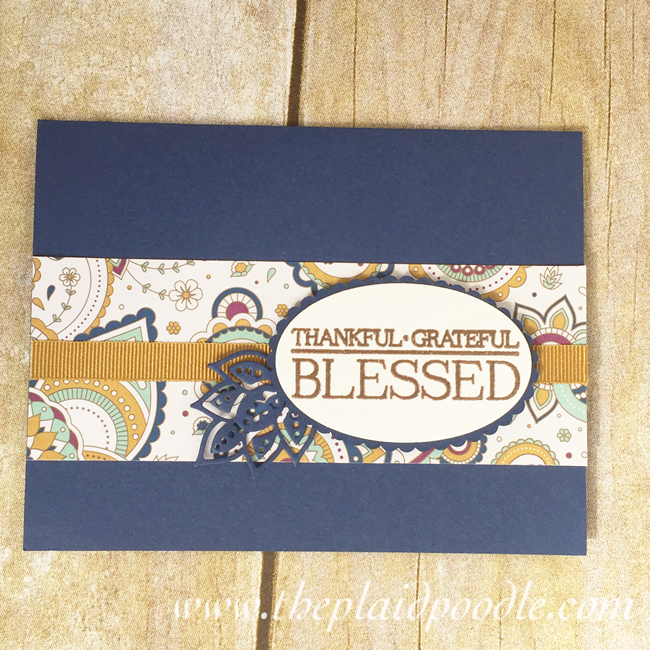
The project I’m sharing today is the second in my three-part autumn-themed series. This card is super simple to make but looks anything but. With the rich, autumn hued colors and the copper embossed sentiment it’s a classy little card. I used several products from the Stampin Up! Petals & Paisleys suite featured in the 2016 Holiday Catalog.
I’ve said it before and I’ll say it again, Stampin’ Up! really takes the guess work out of coordinating elements for my paper crafting projects. The problem of gathering pieces for a project that will look great together is handled for me and that rings true for this card. It took me minutes to design the card and not much more to put it together from start to finish.
It was bound to happen and it happened today. I was forced to turn the furnace on. Yep, just after firing up the Kuerig this morning I moseyed over to the thermostat and cranked that baby on! It’s official, Autumn is here.
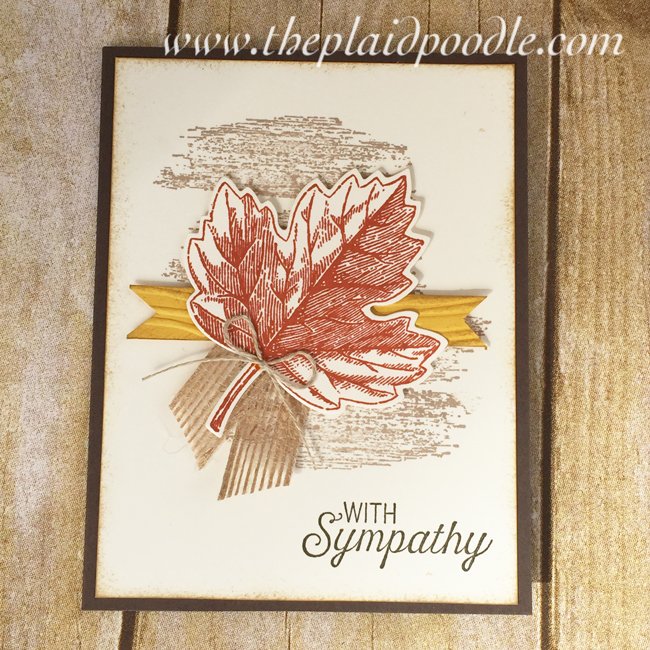
How appropriate that my card for today’s post just happens to be the first in my three-part series of Autumn-themed cards. The sentiment comes from the Flourishing Phrases stamp set by Stampin’ Up! I created it for a sympathy card but it would work for just about any occasion by changing up the sentiment and the Flourishing Phrases set covers most of them.
The maple leaf image from the Vintage Leaves stamp set takes center stage for this card. I added texture and dimension to the Crushed Curry pennant by running it through the Big Shot using the Woodgrain Textured Impressions Embossing Folder and popped it up on the card with Stampin’ Dimensionals. The 5/8″ Burlap Ribbon and Linen Thread add even more texture.
Enjoy the video tutorial and don’t forget to check back on Monday for card number two in my Autumn-Themed series.
Project Dimensions:
Early Espresso Card Stock: 8-1/2″ x 5-1/2″ scored at 4-1/4″
Very Vanilla Card Stock: 2 pieces 5-1/4″ x 4″ each, 3-1/2″ x 3-1/2″
Someone needs to alert Mother Nature that tomorrow is the first day of fall because it was 94 degrees in Kansas City today! Add the heat index to that and I think it was something link a jilllion and ten outside! Don’t get me wrong; I dearly love summer, especially after a long grueling winter, but fall must be my spirit season because a perfect day to me is a sunny, 72 degree day with ZERO percent humidity! I hope I don’t offend, but humidity has to be from the devil!
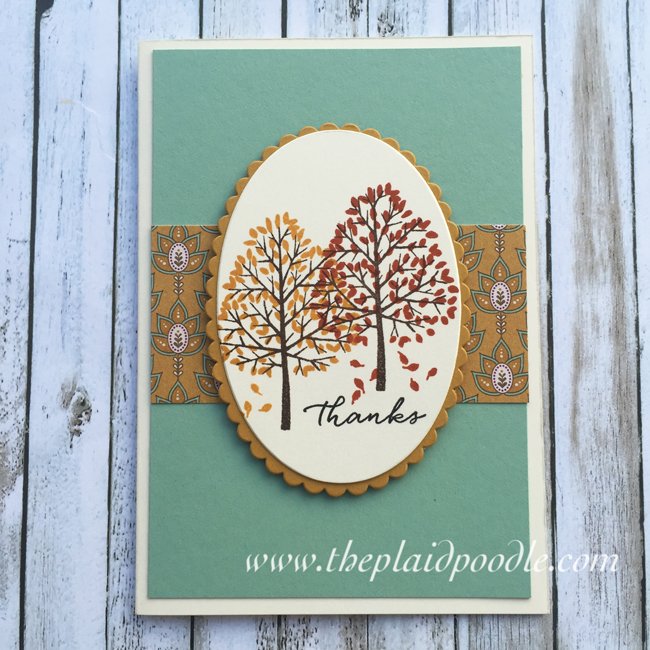
My card today however doesn’t care what temperature it is outside. It’s just busting with autumnal mood and color! I used the Stampin’ Up! Totally Trees stamp set to create this card along with the Chocolate Chip, Delightful Dijon and Cajon Craze inks. The inspiration behind this card was the little scrap of Petals and Paisleys Specialty Designer Series Paper. I absolutely love that paper and only had a few snippets left so I used the left-over scraps to whip up a few of these adorable note cards.
Here’s a quick video tutorial for the card. If you enjoy it why not slip over to Youtube land HERE and leave a comment? While you’re there make sure to subscribe to my channel to receive upcoming videos. Thanks!
Cardstock Dimensions:
Very Vanilla 5″ x 7″ scored at 3-1/2″, 3-3/4″ x 2-1/2″
Mint Macaron 3-1/4″ x 4-3/4″
Petals & Paisleys Specialty Designer Series Paper 3-1/4″ x 1-1/2″
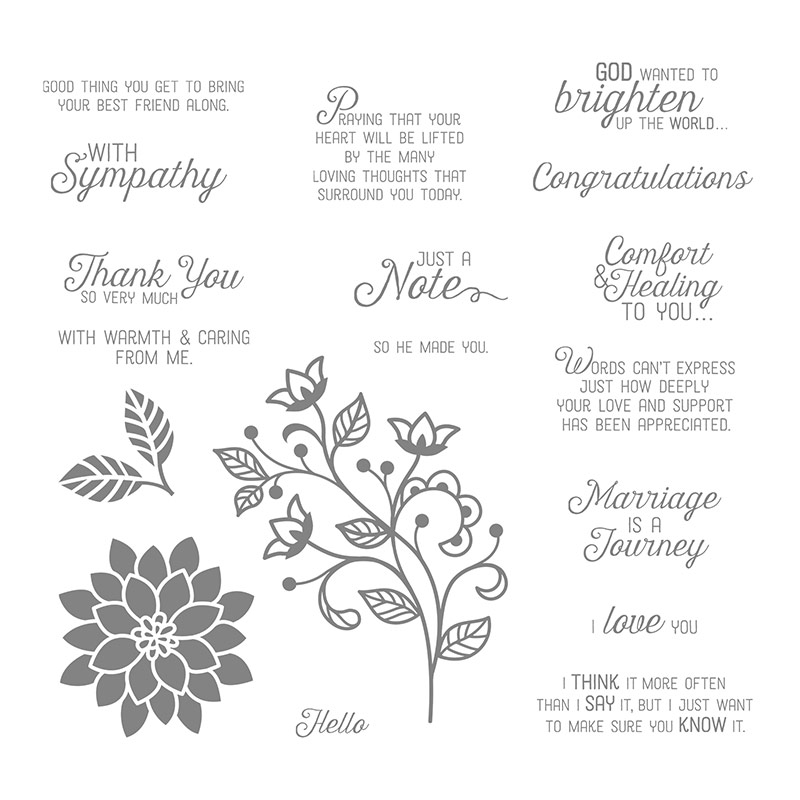
At the very least I always send a thank-you card to my clients along with every order. This month I used one of my favorite stamp sets from the new annual catalog, Flourishing Phrases. This stamp set appealed to me because of the coordinating FlourishThinlits Dies and I saved 10% by purchasing the stamps with the dies in a bundle. But what really sold me on this set was that i fell in love with the gorgeous fonts and sentiments in the stamp set.
Aren’t they great? So much variety making it a great value. I can use it for so many occasions. I used the Note Cards & Envelopes from Stampin’ Up! to make my cards which made the project quick and easy. Here is a video tutorial and I’ve listed the supply list along with all dimensions below.
Card Stock Dimensions
Dapper Denim: 4-3/4″ x 3-1/4″, 2″ x 2″, Whisper White: 4-1/4″ x 2-3/4″
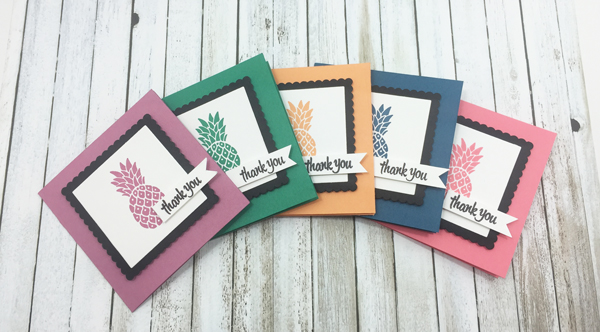
Summer has arrived! Time for flip-flops and tropical drinks with little umbrellas in them! The Pop of Paradise Stamp Set from Stampin’ Up! is ideal for all our Summer celebrations. It’s images of flamingos, palm leaves and pineapples remind me of vacations spent at the beach. Just look at these lush projects from the new Stampin’ Up! Catalog and Idea Book:
Are you in love? The projects above are paired with the new Pop of Pink Specialty Designer Specialty Paper. You just can’t miss with the gold/black/pink combination however I wanted to feature the fabulous new Stampin’ Up! In-Colors for 2016-2018 in today’s post so my project uses those. I created this sweet little set of 3″ x 3″ note cards using all five of the new colors.
From left to right the new 2016 In-Colors are: Sweet Sugarplum, Emerald Envy, Peekaboo Peach, Dapper Denim and Flirty Flamingo! Can you just? I used the charming pineapple image from the Pop of Paradise Stamp Set for the cards’ focal point and the thank you sentiment is from another new stamp set, Thoughtful Banners. And, how about those perfectly square and framed layers? I used the new Layering Squares Framelits along with the Big Shot Die-Cutting Machine to cut those out.
Here is a quick video tutorial showing how I put these cuties together:
Dimensions:
Card Base: 6″ x 3″ scored at 3″ on the 6″ side
Basic Black Layer: 3″ x 3″
Whisper White Layer: 2-1/4″ 2-1/4″
Whisper White Tag: 1-1/2″ x 3/8″
Whisper White Inside Layer: 2-3/4″ x 2-3/4″
Products Used:
The combination packs of card stock and ink pads for the new In-Colors are linked below but each color can also be purchased alone. Please visit my STORE HERE to view those.
Everything old is new again. Just when I get used to skinny jeans the bell-bottoms start creeping back. I can’t imagine I’ll be getting on that train. Don’t they say if you lived through a trend once you’re probably too old to give it a go again next time around? Fortunately some things are timeless and never go out of style.
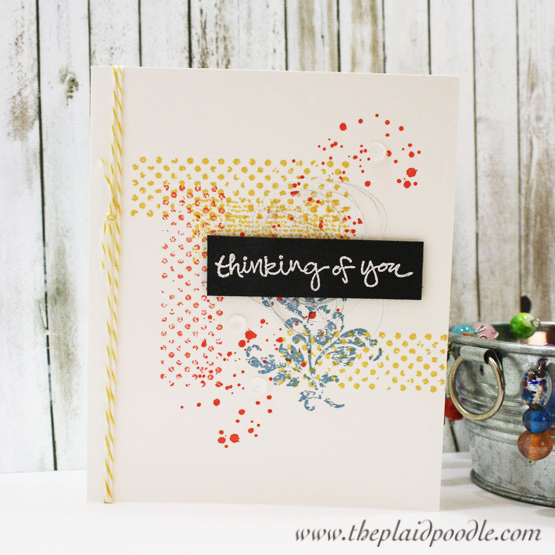
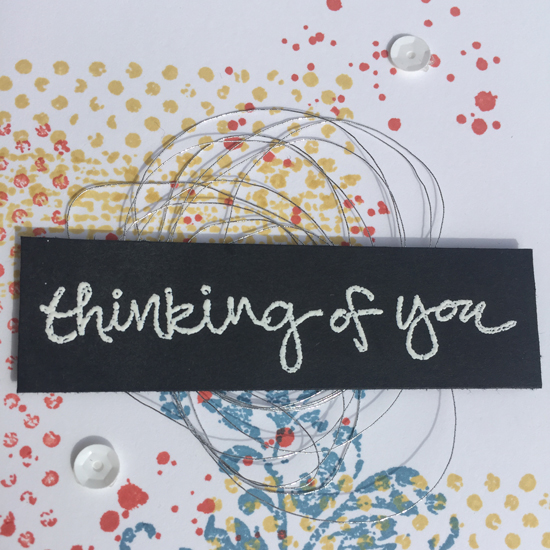
Speaking of timeless, my card today is made using the Timeless Textures Stamp Set by Stampin’ Up! This hand-stamped card is shabby chic and modern and colorful all at once! The stamped images make a super background for the “thinking of you” sentiment, and just like jewelry completes an outfit, the added frills of Silver Thread and Metallic Sequins on this card help make it extra special.
I chose the “thinking of you” stamp from the Sheltering Tree Stamp Set for the sentiment which I heat embossed using VersaMark Ink and White Stampin’ Emboss Powder. The black and white of the sentiment is a contrast to the subtle ink colors of the background making it just pop! It reminds me of the retro label makers with the plastic tape and rotary dials that I used back in-the-day. Anyone else remember using one of those? I think they’re coming back. Everything old is eventually new again folks!
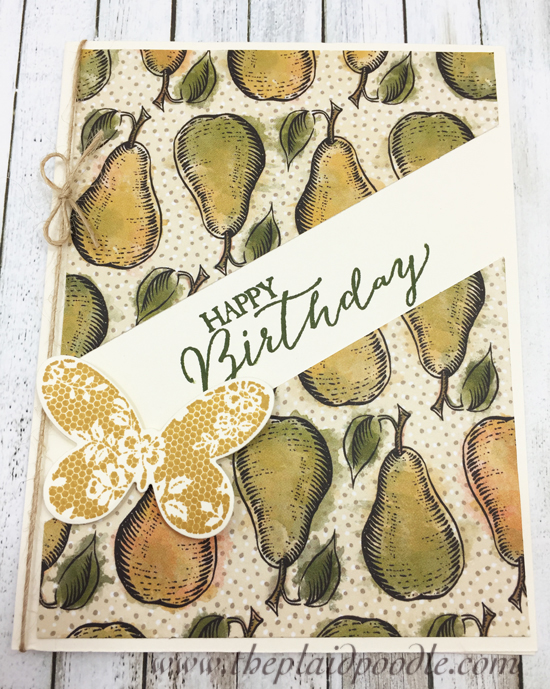
My hand-made card today is reminiscent of slower days, sipping iced-tea on a hot day and visiting the county fair at summer’s end. It’s one of the cards we made during my In-Studio Fun & Fancy Card Classes this month and if I had to choose a favorite this would be it! I used the soon-to-retire Farmers Market Designer Series Paper that I love, love, love! The card couldn’t be easier to assemble. I used an 8-1/2″ x 5-1/2″ piece of Very Vanilla card stock for the base then cut a 4″ x 4″ piece of Designer Series Paper in half on a diagonal. The open space left in-between the Designer Series Paper is perfect for the Happy Birthday sentiment from the Butterfly Basics Stamp Set. The little lacy butterfly image is adorable and the fact that there is a matching Framelit from the Butterflies Thinlits is a bonus! I wrapped a bit of Linen Thread around the card at the last minute but I think it’s a nice touch.
When you purchase the Butterfly Basics Stamp Set + Butterflies Thinlits Dies Bundle before June 1, 2016 there is a 15% savings. And don’t forget, customers that have ordered with me in the past year will receive the new Stampin’ Up! Idea Book and Catalog for FREE so place your order today!


 Designer Series Paper")


 Designer Series Paper")
 Braided Linen Trim")


 Shimmer Ribbon Pack")


")
")


 Glimmer Paper Assortment Pack")


 Trio Pack")


 Burlap Ribbon")


 Ruched Ribbon")