Shaker cards are crowd pleasers but they can be tricky to put together. The project I’m sharing with you today is an easy alternative to traditional shaker cards.
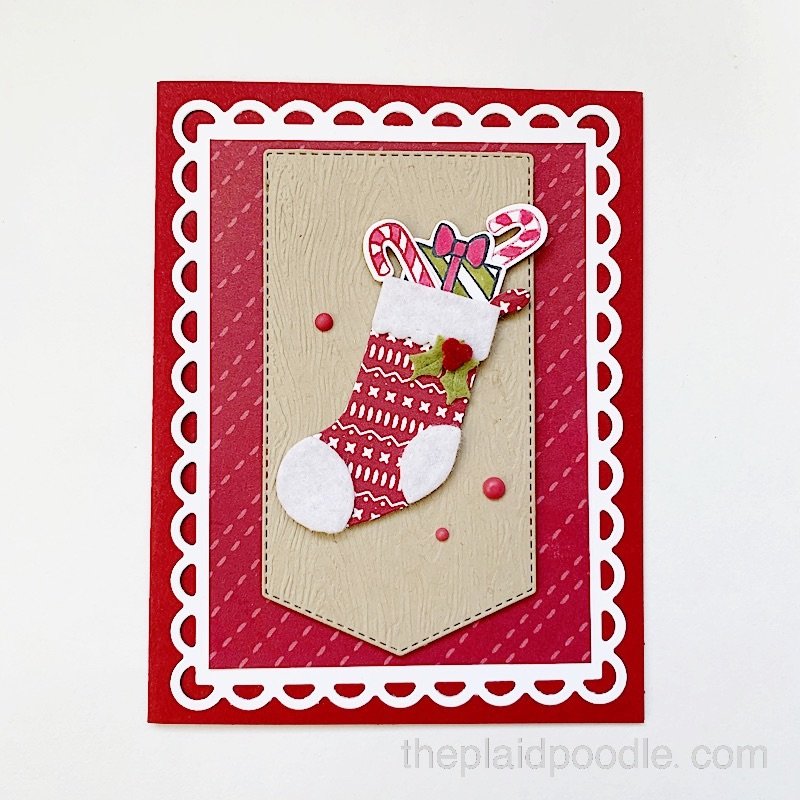
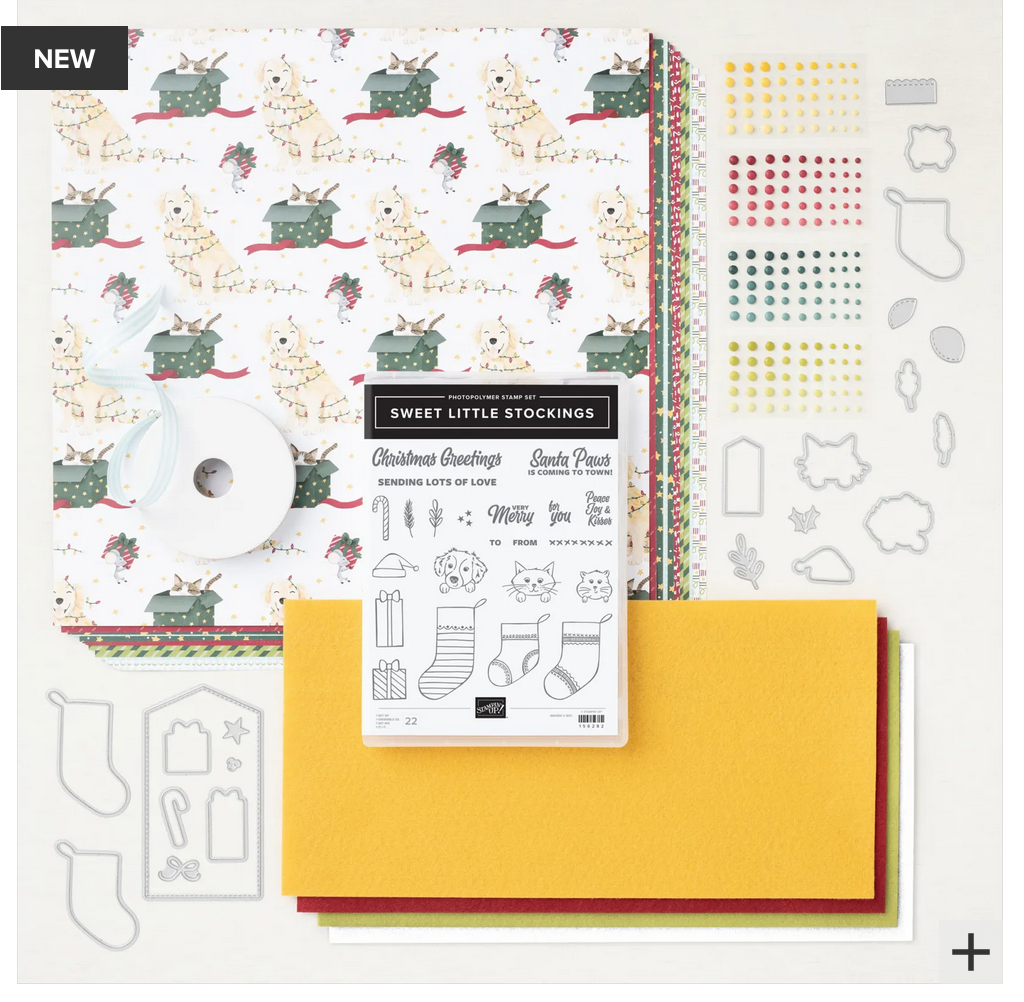
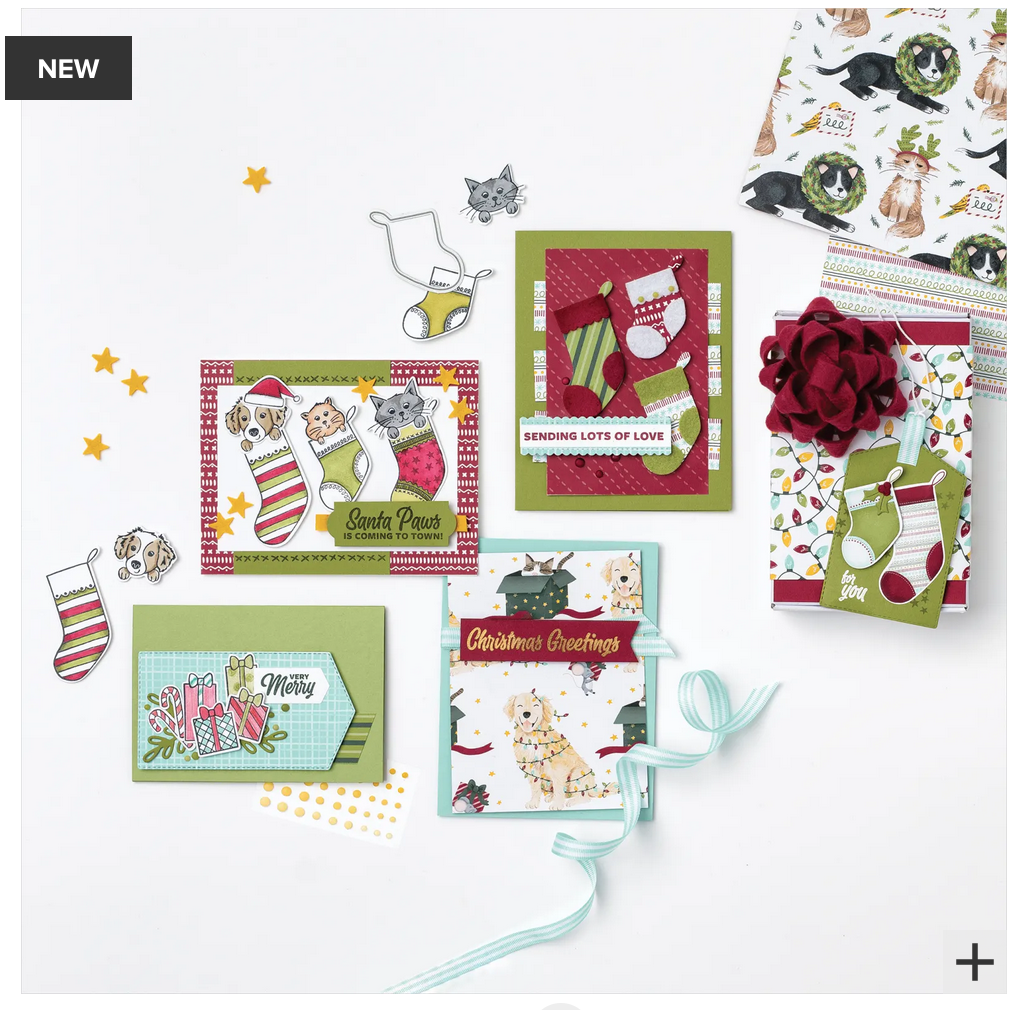
Although I’m a dog lover and the critters highlighted in this product suite are the cutest, that is not why I purchased this suite. It was the sweet stocking images that attracted me.
Here is the card I demonstrated during today’s Coffee & a Card Facebook Live using the products in the Sweet Stockings Suite.
My mom has had some health problems and I’ve been acting as her care giver for the last few weeks. It’s a new dynamic for me and I’m having to rearrange my routines and schedule to meet her needs. Because my focus has been on her I’ve been having trouble finding my crafting mojo lately.
Whenever I’m at a stall creativity-wise I sometimes find it helpful to use sketches to get back on track. Sketches are like blueprints for card making. You can grab a pad and pencil to make your own sketch or find lots of them by googling “card making sketches”.
A sketch gives you a plan and once you have a plan you can start building your card. Here’s a sketch I came up with this morning to use during my Make-it-Monday Facebook Live.
As you can see, the sketch has all the card basics planned out for me. By looking at the sketch I already know I want to find some coordinating card stock and Designer Series Paper. I also know I’m going to add a die-cut and a sentiment tag to the card front. From here I can choose the different elements.
How Sketches Work in Real Life
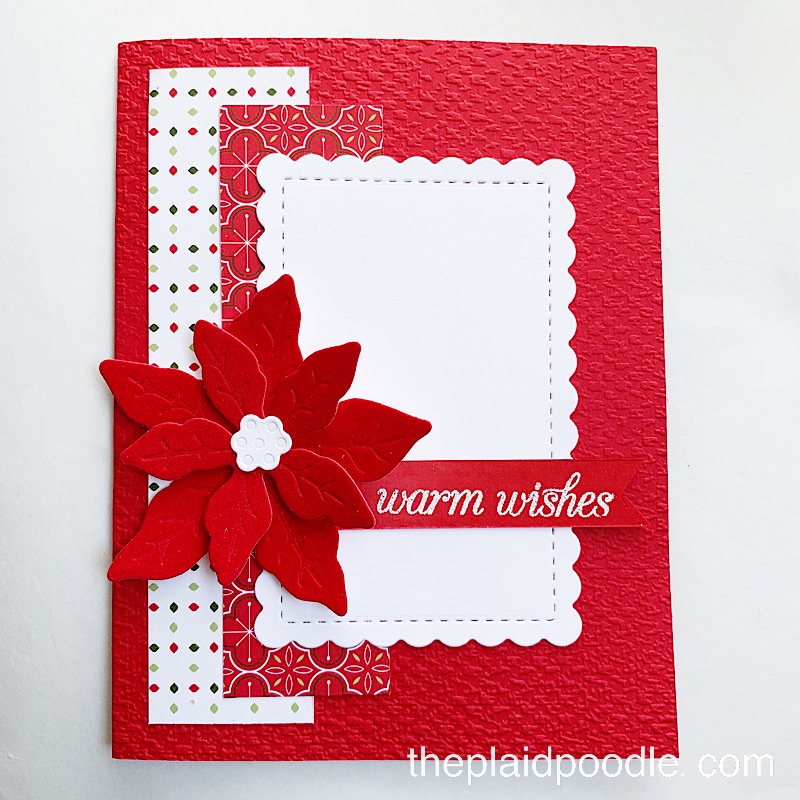
Here’s a card I created using the above sketch. I always like to add a little texture to a project so I embossed the card front with the Tasteful Textile 3D Embossing Folder. I then adhered two corodinating strips of Heartwarming Hugs Designer Series Paper onto the card front. Next, I decided to use a die-cut for the 2.25″ x 3″ layer on the sketch and chose a die from the Scalloped Contours Dies to cut a stitched, scalloped rectangle. See how I improvised there?
A card sketch can be copied exactly or you may want to alter it. You will notice I took creative liberty and replaced the circle element from the sketch with a die-cut poinsettia I cut from Red Velvet Paper using dies from the Poinsettia Dies. Finally I heat embossed “warm wishes” onto the sentiment tag using a stamp from the Poinsettia Petals stamp set .
Video Tutorial
Sometimes looking at a pile of paper crafting products can stymie our creative efforts. I hope you can see how helpful a sketch can be as a jumping off point. Sketch out your plan first then elect the elements and finally, execute the plan!
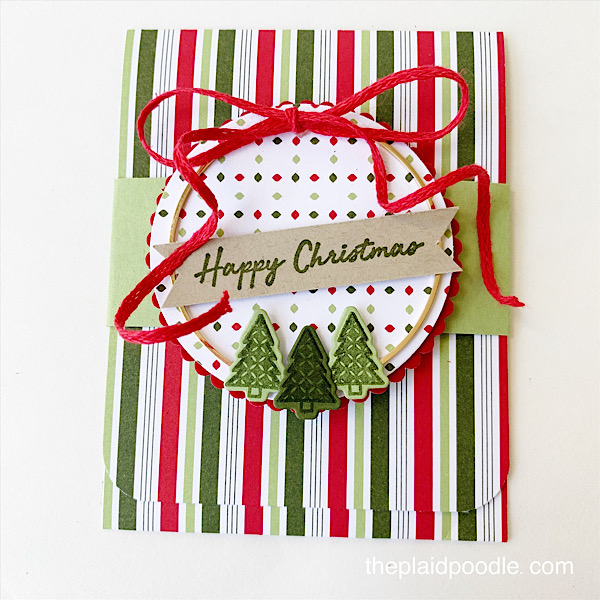
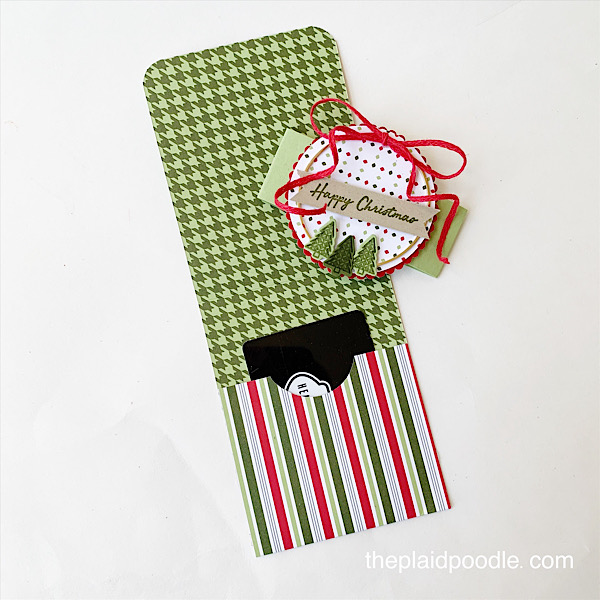
I’m one of those people who likes a beautifully wrapped present almost as much as the gift that is inside! I’m also one of those people who gives gift cards. It’s hard to present a gift card in a “wow” package, but with a little paper, stamps and ink, you can create something fun to slip a gift card into.
This gift card holder is a simple 11″ x 3-1/4″ piece of designer series paper scored and folded to create a pocket to slip a gift card into. I added an embellished belly band and some ribbon to close it up.
The Heartwarming Hugs Gift Card Holder will fit in a standard A2 size envelope but will also slip into a note card sized envelope perfectly.
Watch the replay of my Coffee & a Card Facebook Live where I demonstrate how to make this project.
Thanks for stopping by my little place on the interwebs. I hope I have given you some ideas to create your own Heartwarming Hugs Gift Card Holder using paper, stamps and ink!
The project I’m sharing today is this miniature milk carton treat box. I used products from the Wonder of the Season Suite by Stampin’ Up!
These little mini milk carton treat boxes are quick and easy to make and do not require any special tools. I did use my Simply Scored Tool because the project requires a lot of scoring but if you have a Paper Trimmer with a scoring blade you can make this box.
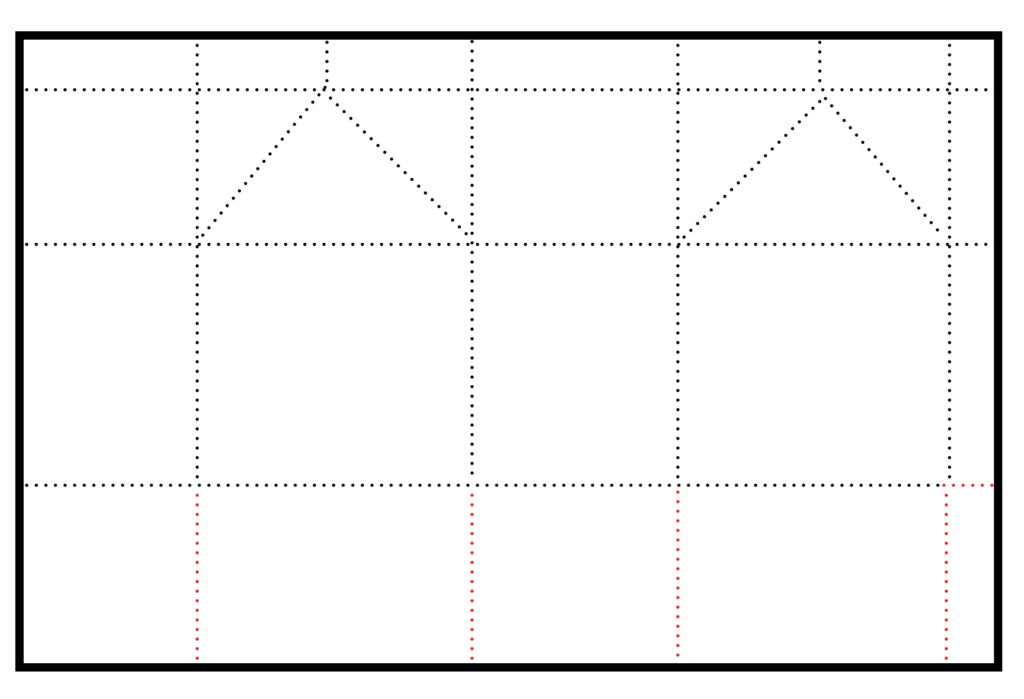
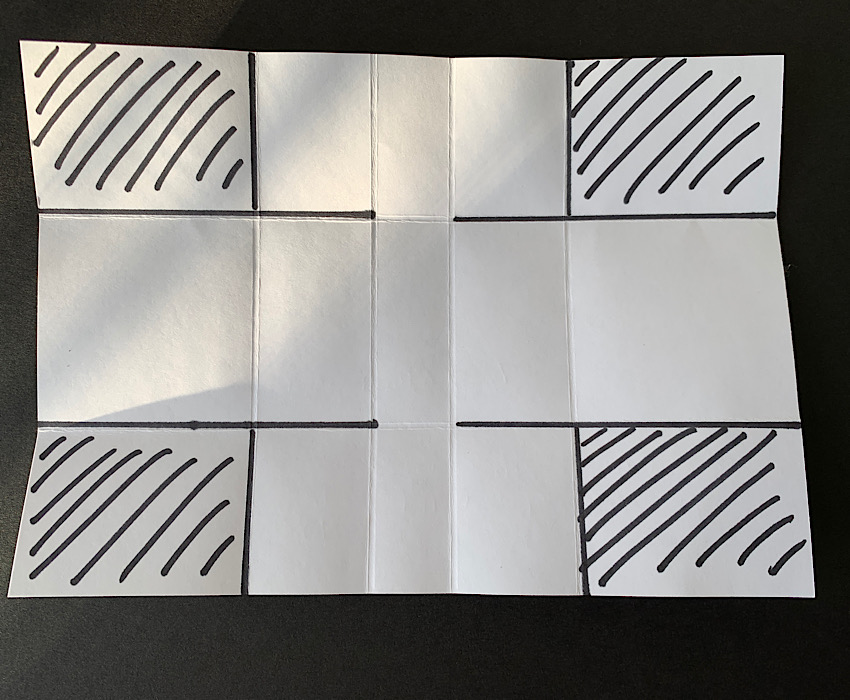
Scoring Guide: Start with an 8-1/2″ x 5-1/2″ piece of Cherry Cobbler card stock.
Score at 2″, 4″, 6″ and 8″ on the 8-1/2″ side of card stock.
Score at 1/2″, 2″ and 4″ on the 5-1/2″ side of card stock.
Score at 1-1/2″ and 5-1/2″ on the top of 1/2″ tab of carton.
Score two diagonal lines per the diagram below.
Trim on red score lines.
Here is the replay of today’s Facebook Live where I demonstrated how to assemble the box:
I hope I have given you everything you need to create your own mini milk carton creations! Don’t forget about the Giant Year-End Closeout. There are some great deals to be had but grab them quick because it is a “while supplies last” sale only.
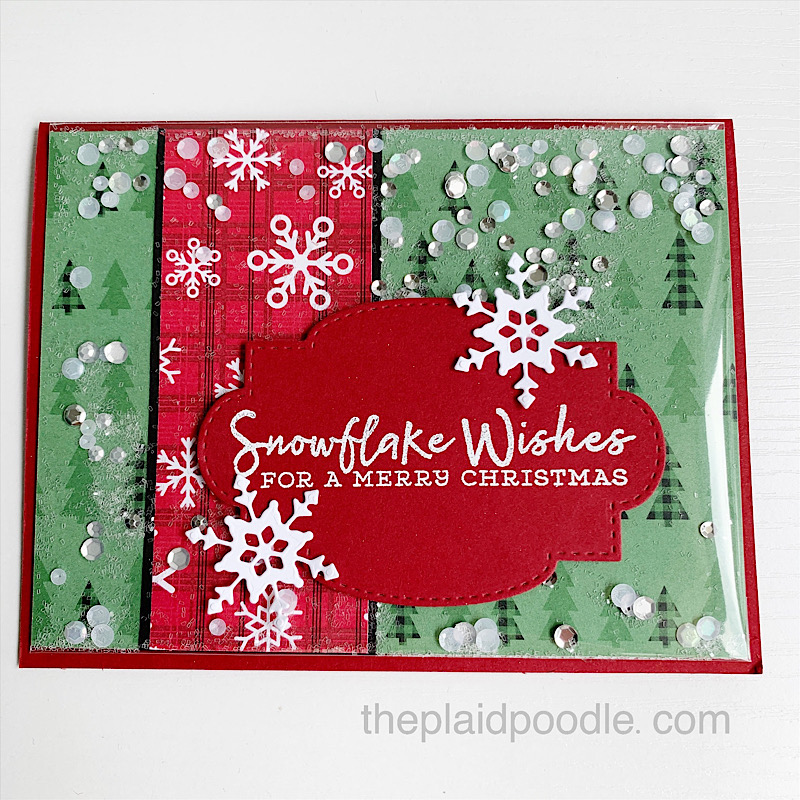
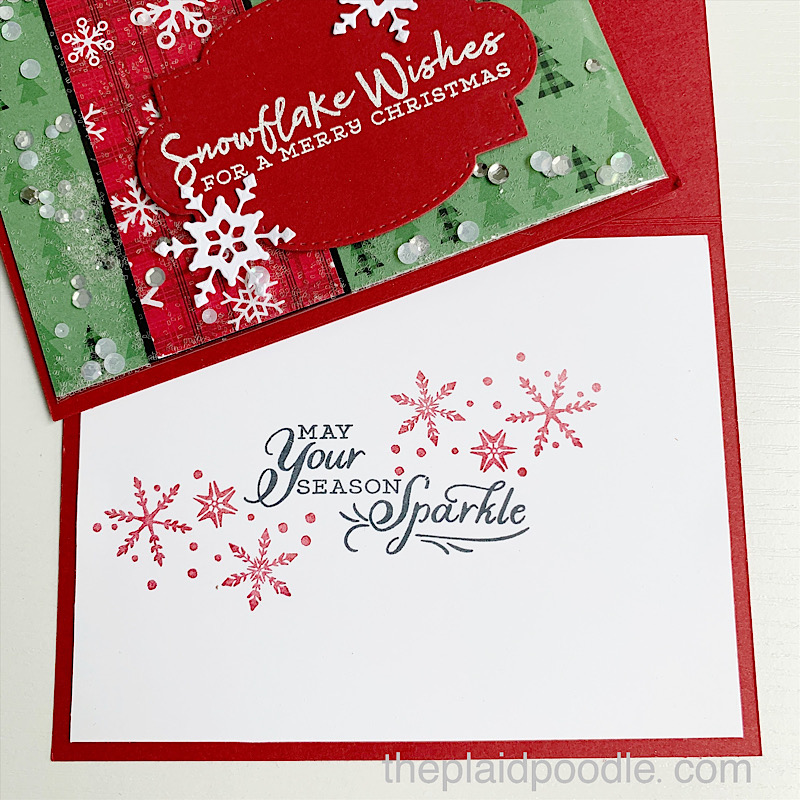
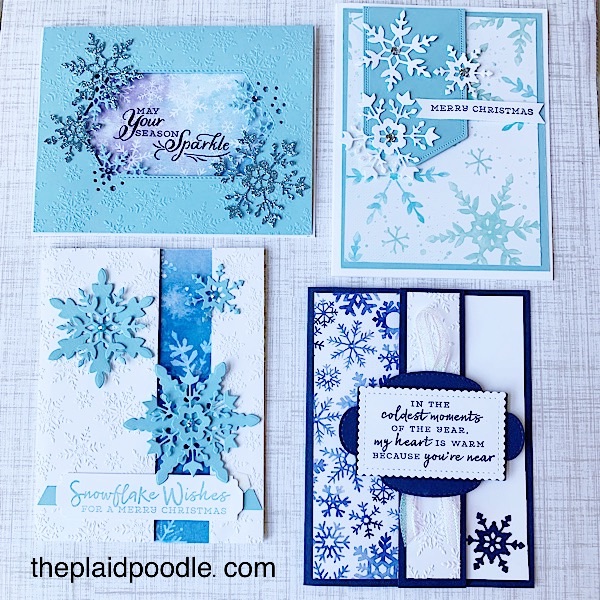
I’m excited to announce the Snowflake Wishes online class! This class is FREE when you make a $50 product purchase (before tax & shipping) thru my online store during the month of November using the Host Code DMPGNKAY.
To receive the FREE Snowflake Wishes class, place any $50 product order (before tax and shipping) in my online store. You may order the products I used to create the projects exactly as shown or you may order any other products you’d like. Make sure to use the CLASS HOST CODE: DMPGNKAY when placing your order so that you will receive access to the online class***.
YOU WILL RECEIVE:
FREE full-color PDF tutorials for five (5) different cards which include step-by-step instructions, multiple pictures of each card, cutting dimensions and a complete list of the supplies.
FREE videos to stamp right along with me that includes lots of tips! Stop and start as often as you’d like to work at your own pace.
Your card making class tutorial and video link will be emailed to you within 48 hours of your online order notification. Information is sent to the same email address used for your online order. The supplies needed to complete this card class exactly as shown, are indicated below but you are welcome to use what you have at home and order whatever you’d like!
***Note: do not use the host code if your order is over $150. You will qualify for hostess rewards as well as receiving the online class for FREE!)
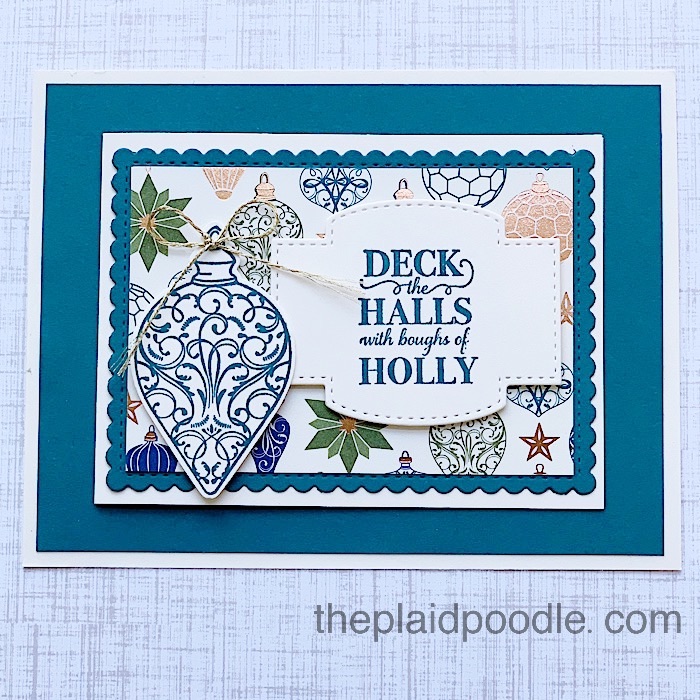
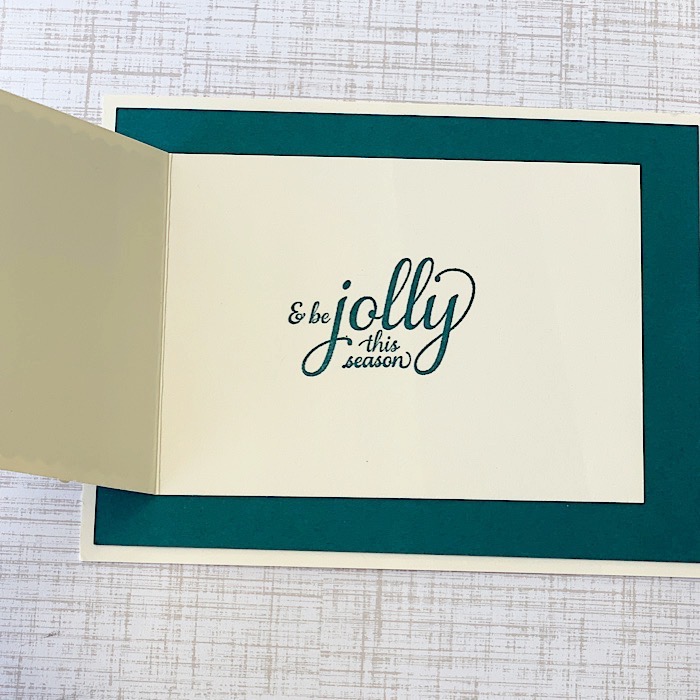
Today’s project is a traditional style Christmas card with a fun little fold. I used returning favorites from last year to make this Christmas Gleaming fun fold card.
The card base for my project today is not your traditional A2 card. A smaller, 4-1/4″ x 3-1/8″ card is adhered to a a single piece of 5-1/2″ x 4-1/4″ base. I layered my base with a piece of Pretty Peacock cardstock.
Watch this video replay of today’s Coffee & a Card Facebook Live to see how I assembled this card:
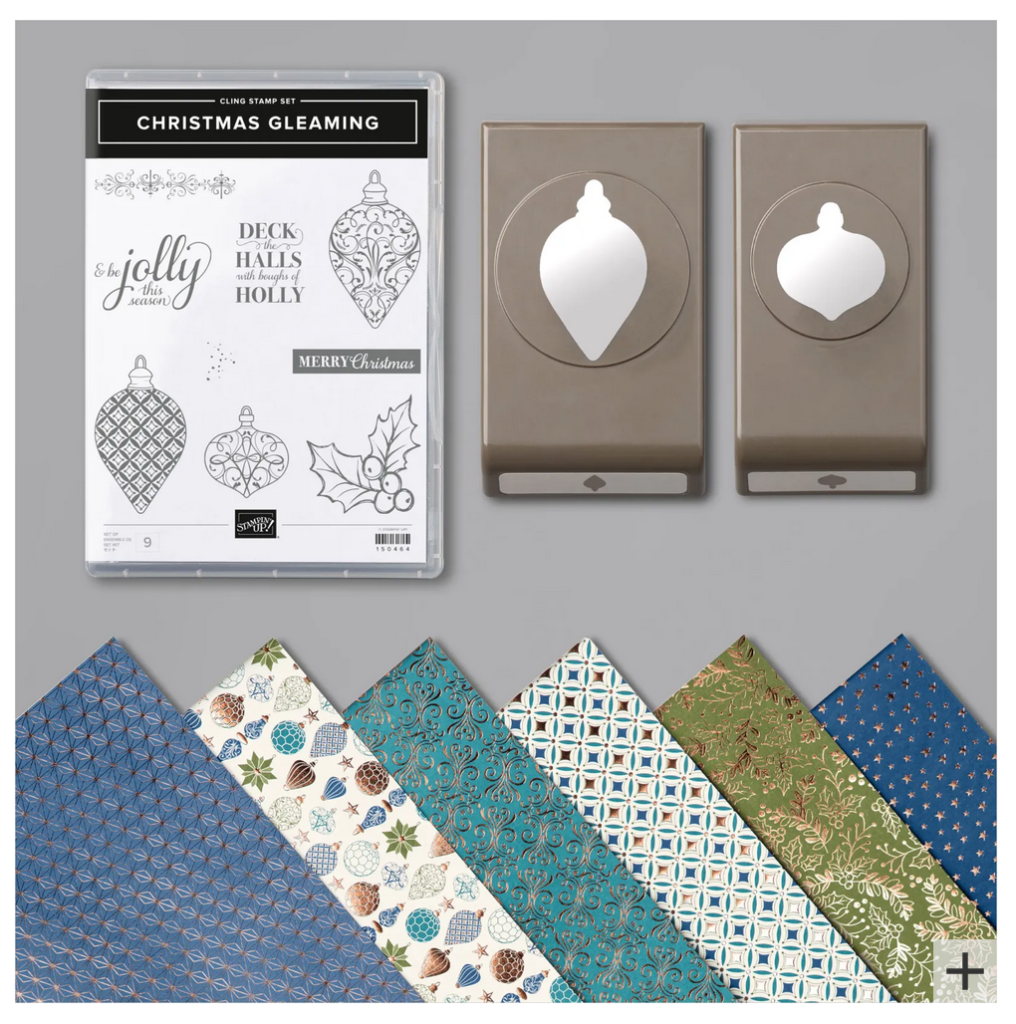
One of my guests said during today’s Facebook Live, “It looks complicated but not really too hard”. She’s right, it is a great card to make when you want to make a good impression but don’t have a lot of time for complicated. And the images in the Christmas Gleaming stamp are awesome traditional images. It will be a set you’ll keep and use year after year. Click on the images below to grab the Christmas Gleaming Variety Bundle for yourself.
Today I’m sharing this sweet little box that is just the right size to hold two Ghirardelli chocolate squares. It would probably work for other mini candy bars and for sure a pair of earrings!
These boxes would be so fun to place at each place setting at your holiday dinner or as favors for your friends and coworkers. There is some scoring and cutting involved to create the miniature box but overall it is a pretty easy project to make.
Cutting & Scoring Guide:
Treat Box = 5” x 7” piece of Real Red card stock. Score at 1-1/2” and 3-1/2” on the 5” side. Score at 2”, 3-1/8”, 3-7/8” and 5” on the 7” side.
Designer Series Paper = 6-1/4” x 1-1/4”
Very Vanilla Cardstock = 5-1/2” x 4-1/4” (stamped images), 7/8” x 3” (tag)
Gold Foil Sheets = 1/4” x 3”
Refer to above photo to create your Poinsettia Petals Ghirardelli Chocolate Box. Score a 5″ x 7″ piece of cardstock at 1-1/2” and 3-1/2” on the 5” side. Score at 2”, 3-1/8”, 3-7/8” and 5” on the 7” side. Fold on score lines then cut along the score lines referenced in black which will remove the four outer rectangular panels.
Here is a video that shows how to put your box together:
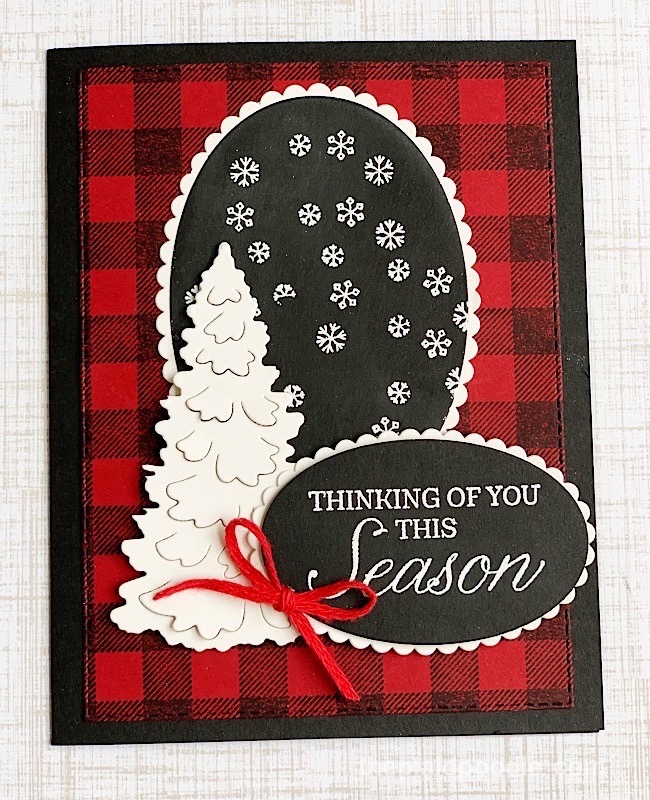
Doesn’t this card make you want to put on your favorite flannel shirt and sit around a fire-pit roasting marshmallows and drinking hot cocoa? The buffalo check background gives this card it’s ambiance.
The Buffalo Check background stamp from Stampin’ Up! is an old favorite of mine. I stamped it onto a stitched rectangle die-cut piece of Cherry Cobbler card stock with Memento Tuxedo Black Ink to make the background layer.
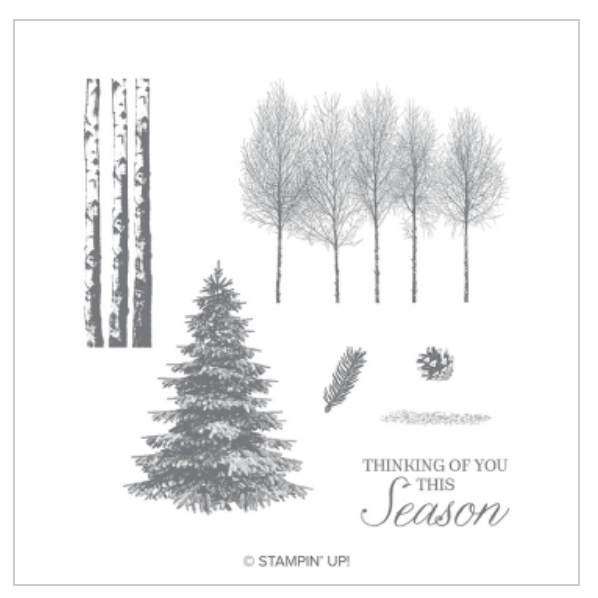
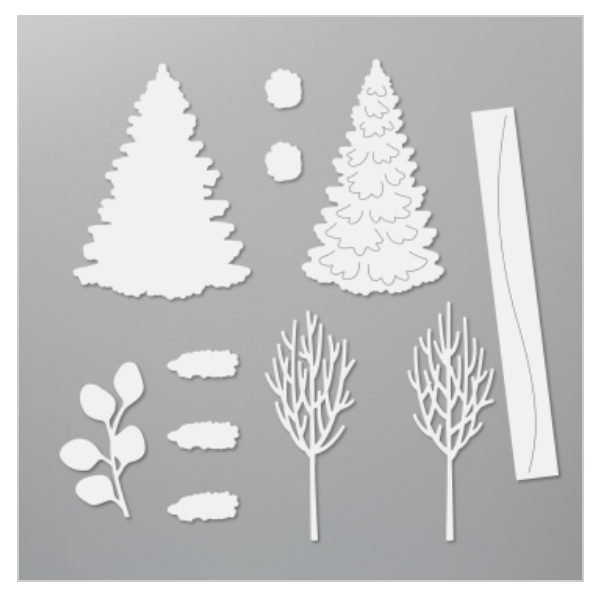
The textured tree die-cut was cut from Shimmery White cardstock using a die from the In the Woods Dies. The dies coordinate with the Winter Woods stamp set.
I also grabbed a snowflake image from the Freezin’ Fun stamp set and heat embossed snowflakes onto the black oval on the card front using White Stampin’ Emboss Powder. I did the same with the sentiment.
Here is the replay of today’s Coffee & a Card Facebook Live where I demonstrated how to put this card together.
Using different stamps with different patterns and colors can set the mood of a card. Today’s card is putting off a “cabin in the woods” kind of vibe. I hope it inspires you to think about the spirit you are trying to convey with your project.
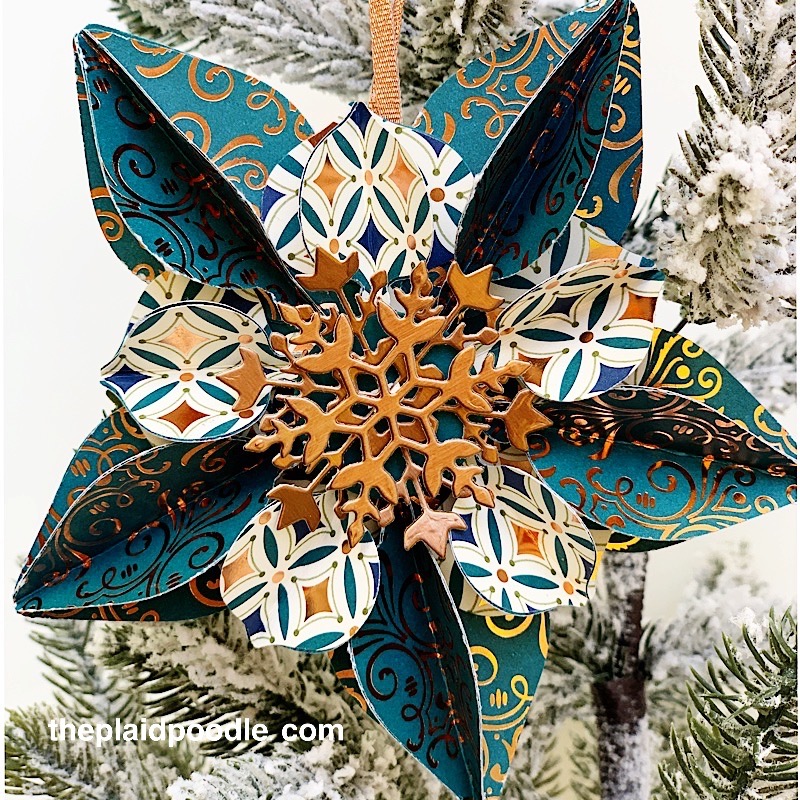
Today’s project is a 3-dimensional Christmas ornament made using the Gleaming Ornaments Punch Pack from Stampin’ Up! The ornaments are quick and easy to make.
The snowflake die-cuts at the center of the ornament were cut using the So Many Snowflakes Dies. The ornaments are really quick and easy to make and would make great package toppers in place of bows.
Product List
Cutting Guide
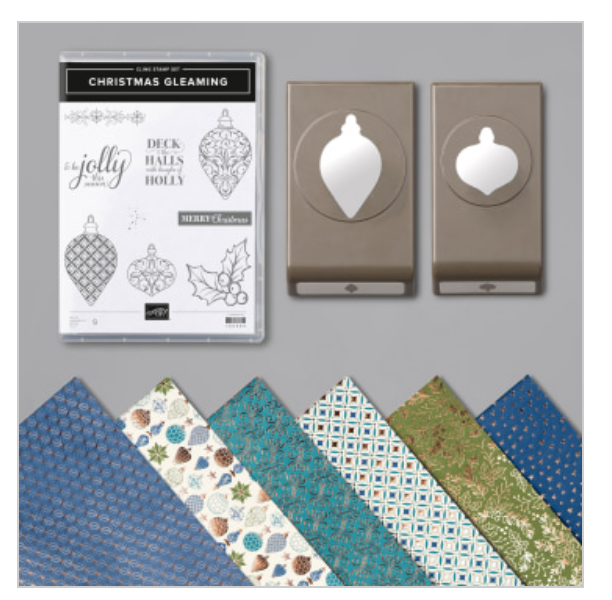
I hope you’re inspired to make your own Gleaming Ornaments Punch Pack Christmas Ornaments. When you purchase the Christmas Gleaming Variety Bundle you receive the Christmas Gleaming Stamp Set, the Gleaming Ornaments Punch Pack and the Brightly Gleaming Specialty Designer Series Paper and save 10%!
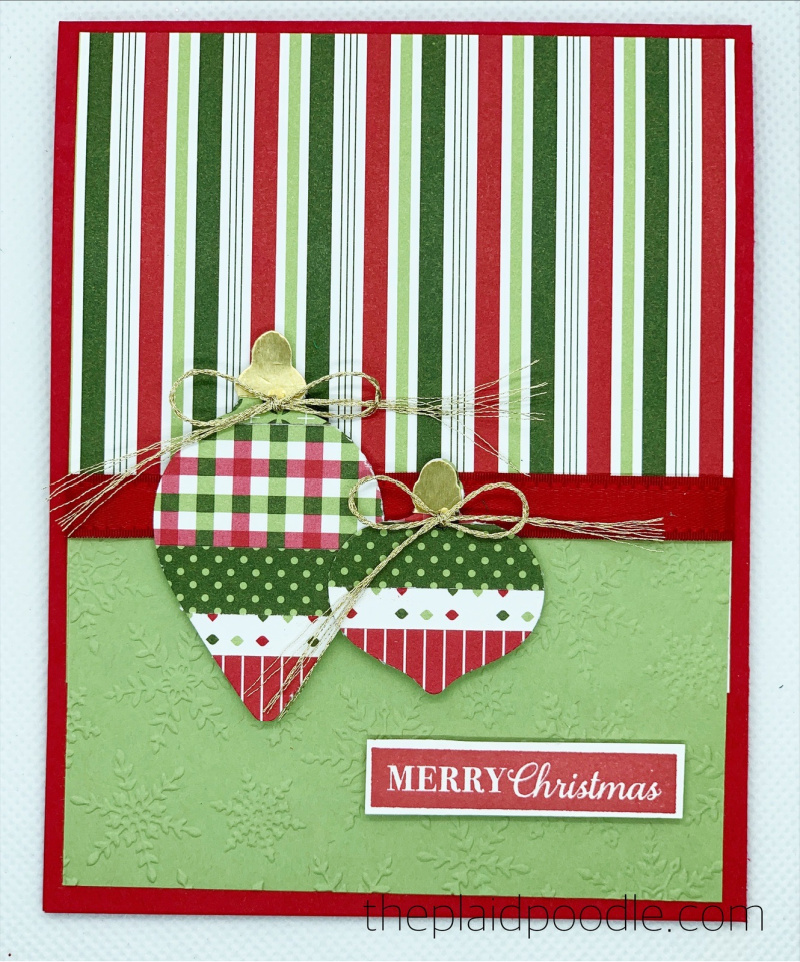
We made this farmhouse chic style Christmas Gleaming card during this week’s Coffee & a Card Facebook Live.
Using just a few elements this card was a snap to put together. Punches always speed up the process and the patchwork ornaments on this card were punched out using the Gleaming Ornaments Punch Pack. The technique I used for the ornaments is a great way to use up all the little leftover scraps you may have. Watch the video replay to see how I accomplished the patchwork look on the ornaments.
Paper Dimensions
Card Base = 4-1/4″ x 11″ piece of Real Red Cardstock scored at 5-1/2″
Heartwarming Hugs Designer Series Paper = 4″ x 3-3/4″
Ornament Punches = scraps of Heartwarming Hugs Designer Series Paper
Pear Pizzazz Cardstock = 2-4/14″ x 4″
Whisper White = 4″ x 5-1/4″ (card insert), 1/2″ x 2-1/4″ (sentiment tag)
I hope you enjoyed the Christmas Gleaming Card and the patchwork technique. The technique would be easy to use on many types of cards using either punches or dies. I hope today’s project gives you the urge to create your own patchwork cards!
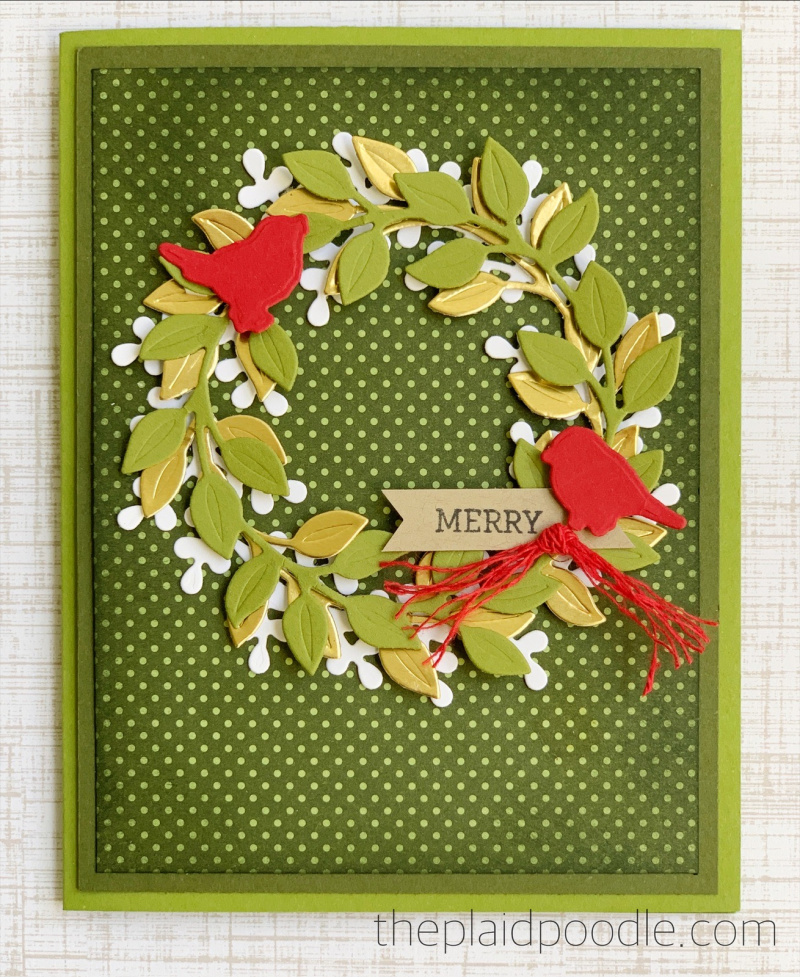
I’m sharing a little sneak peek of new product coming in November on today’s Arrange a Wreath Christmas card. The little red birds on the wreath are from a new bundle from Stampin’ Up!
I’ll be sharing more on that later but in the meantime how about this card?! I love it! I sponged the edges of the Heartwarming Hugs Designer Series Paper layer on the card front with Mossy Meadow ink adding a little dimension.
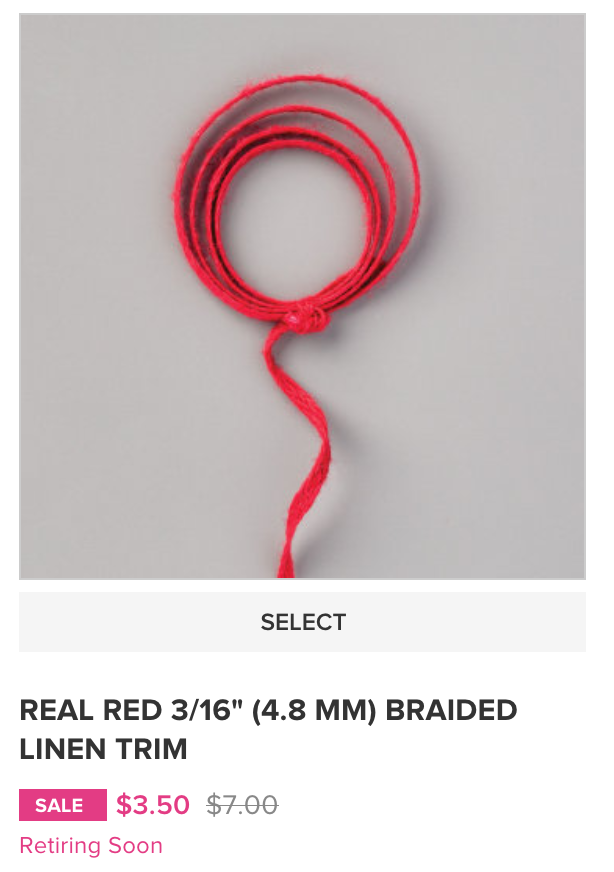
Let’s count the layers shall we? Three stacked wreath die-cuts under a sentiment tag under those sweet little die-but birds. A little texture was added to the card front with a knot of Braided Linen Trim. I unraveled the trim thinking it looked like something the birds would like to decorate their nest with.
Watch the Coffee & a Card Facebook Live video replay to see how I put this adorable Arrange a Wreath Christmas Card together. All the products used in today’s project are below the video along with project dimensions.
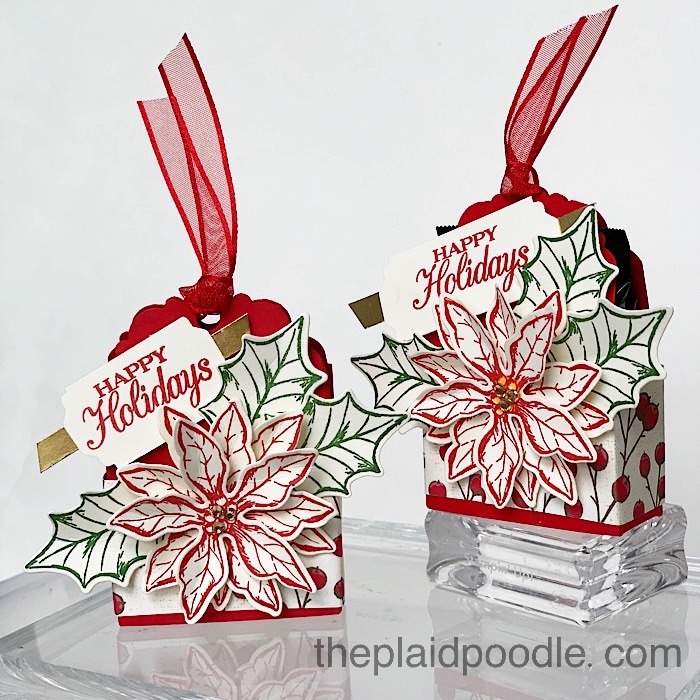
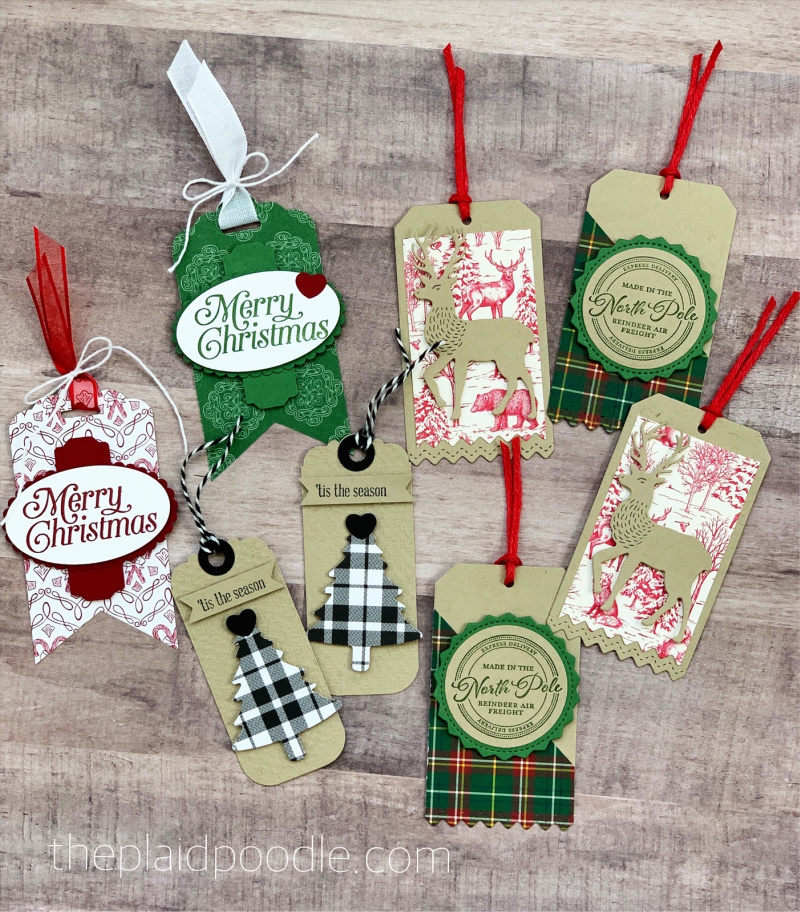
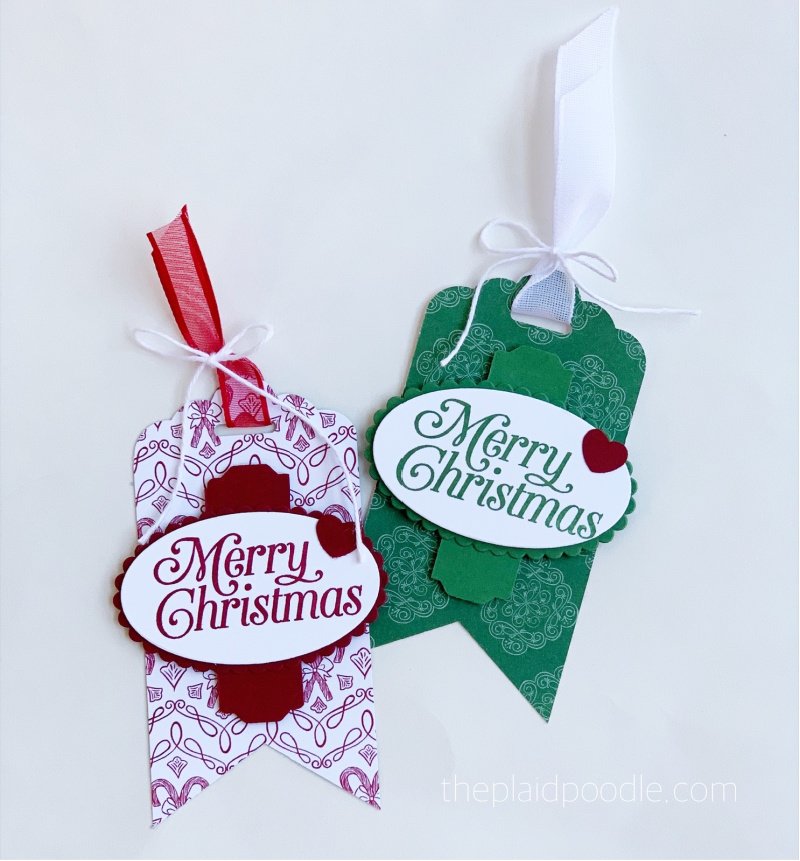
Why buy Christmas tags when you can create your own! I always want to make what’s on the outside of my gift packages as beautiful as what’s on the inside and using a fancy, dimensional tag is a great start! I demonstrated how to make these gorgeous tags during today’s Make-it-Monday Facebook Live.
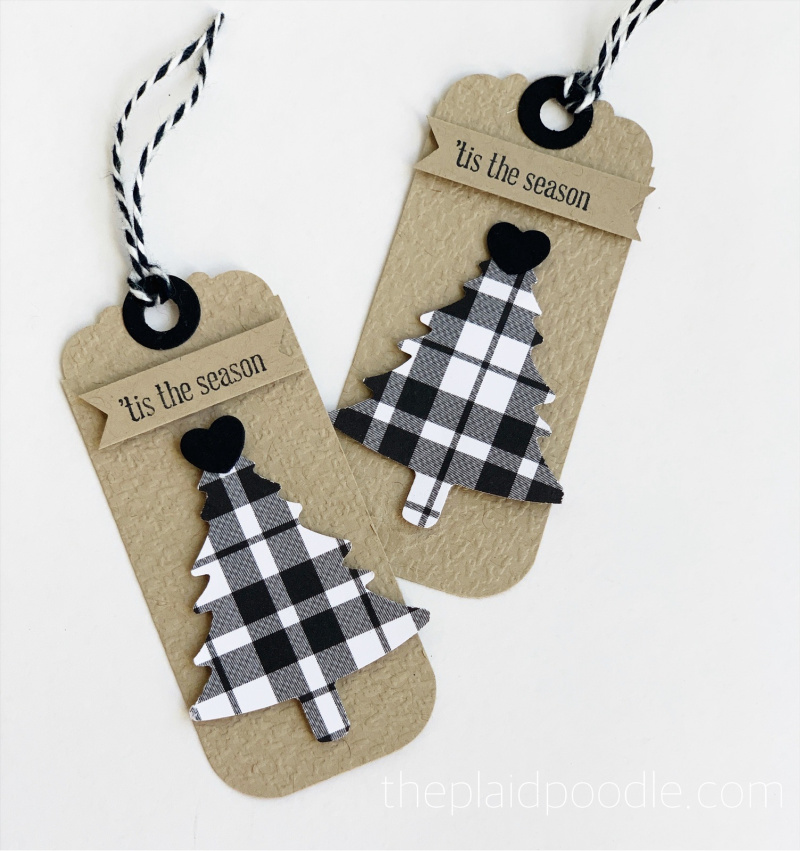
Which one is your favorite? I love, love, love the buffalo check Christmas tree tags. Imagine wrapping gifts in brown shipping paper from Dollar Tree, adding some black ribbon and using these adorable little tags. How pretty would those packages look under your tree?!
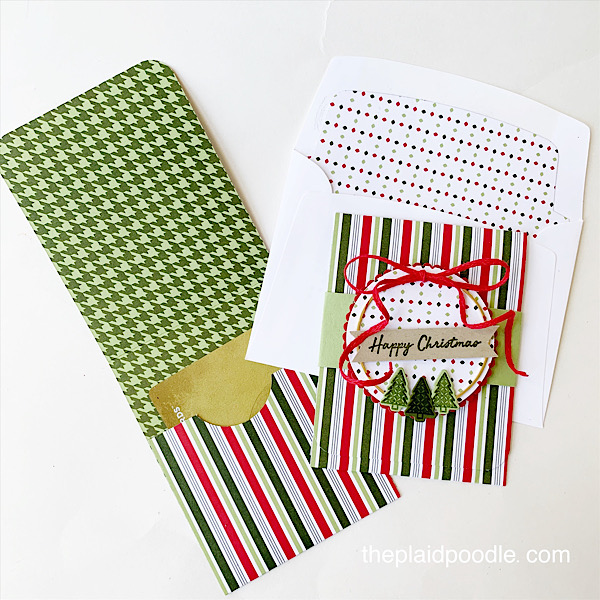
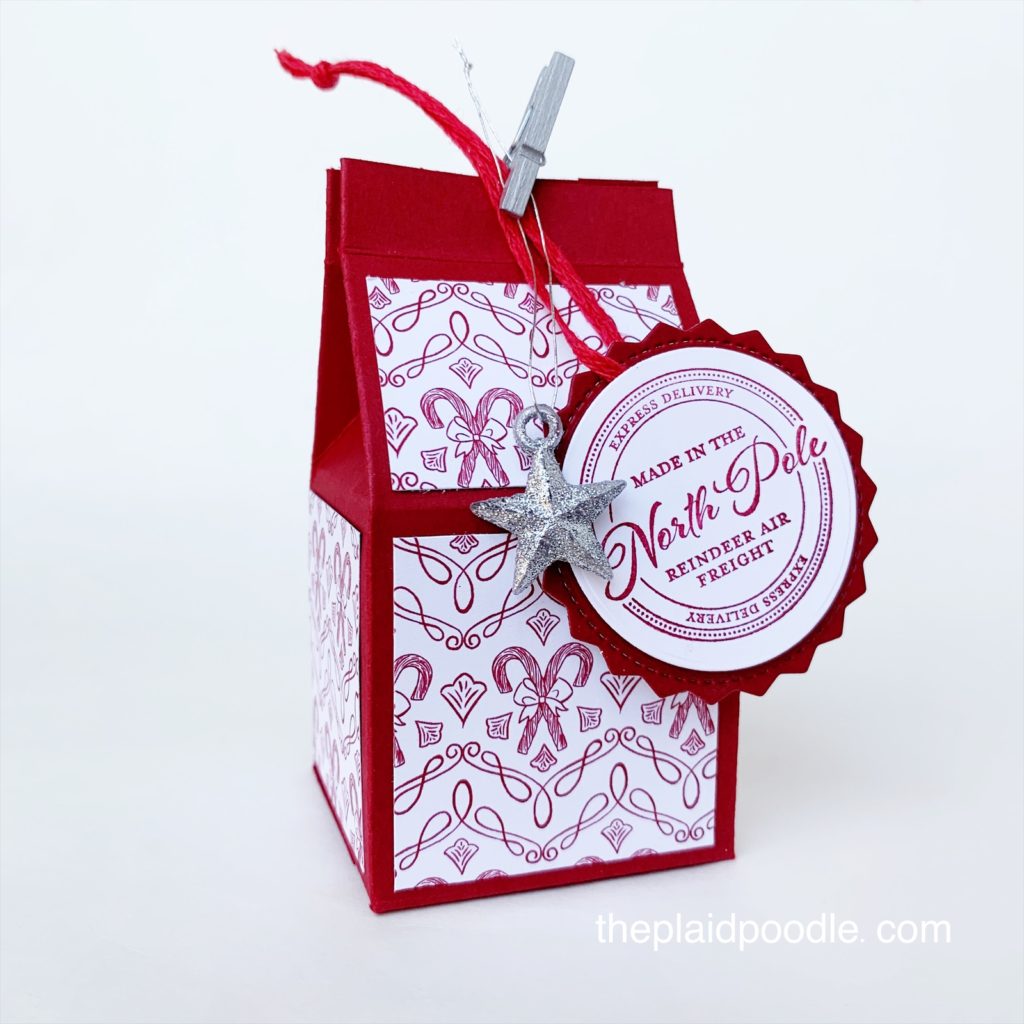
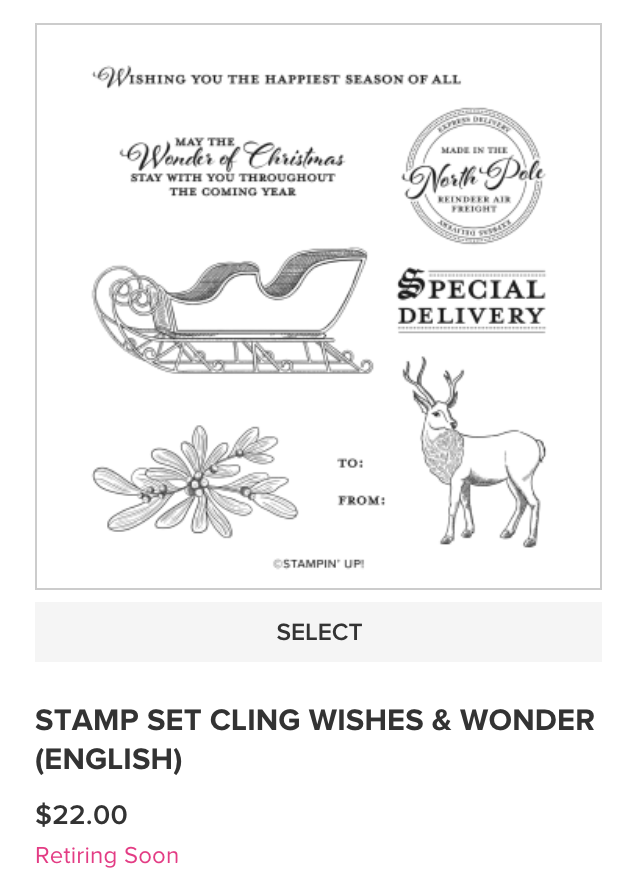
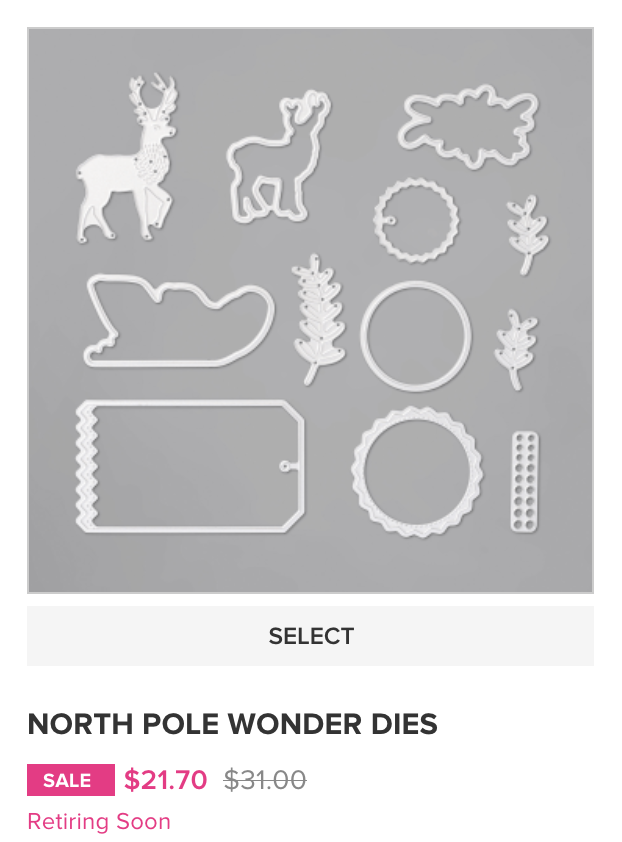
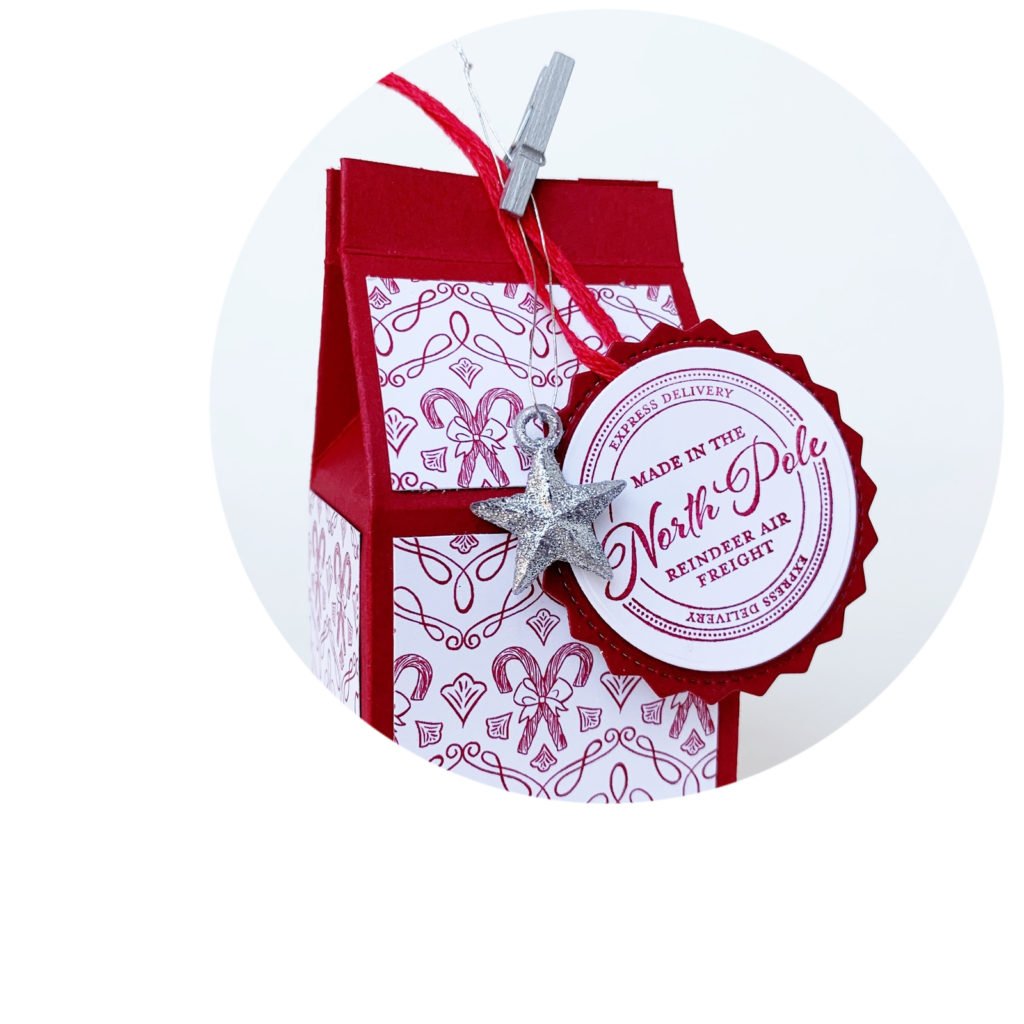
The tags made with the Wishes & Wonder Bundle are another favorite of mine. That stately stag die-cut adds a touch of class and the “made in the North Pole” label reminds me of simpler times. The Wishes & Wonder Bundle pairs beautifully with the Toile Tidings and Plaid Tidings Designer Series Paper from Stampin’ Up!
These final two tags are perfectly traditional. They use traditional red and green Christmas colors but they are anything but boring. Look at all those layers. Using these tags will make your packages look like you care about the recipient so much!
Gift tags are one of my favorite paper crafting projects to make. To learn how I made the Christmas tags in today’s post watch the replay from Make-it-Monday.
The Designer Series papers I used to make these projects are 15% off during the month of October. Click on the images below to grab a pack for yourself and make your own beautiful Christmas tags.
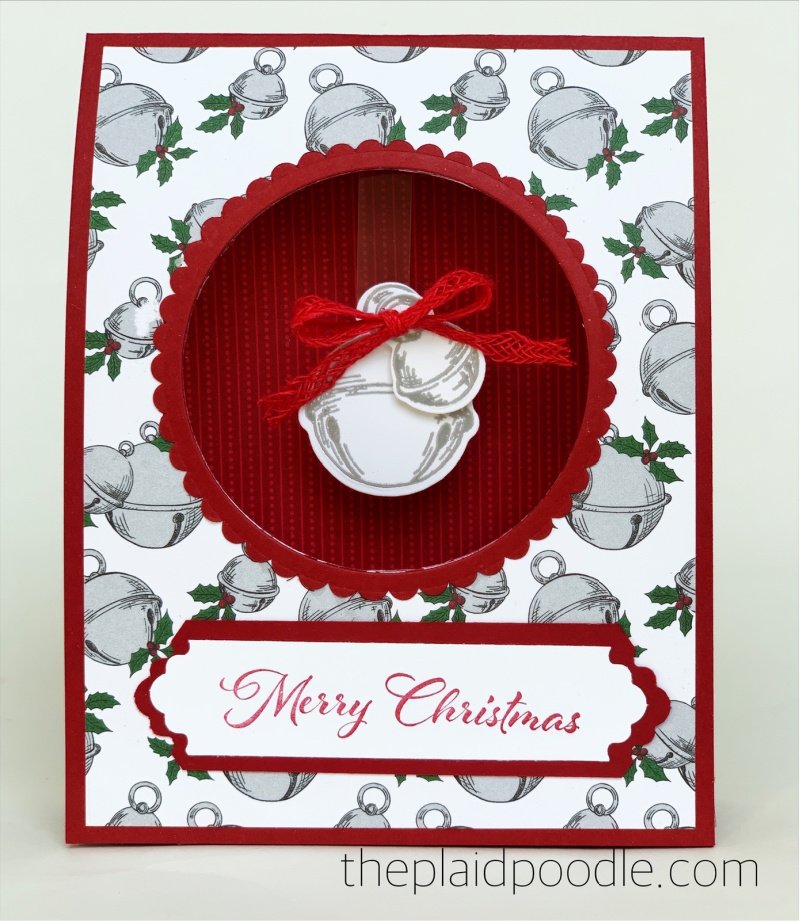
Today’s project is an interactive Christmas card. I’m calling it a swinging tent card. Watch this 7 second video to view the fun swinging motion of the card.
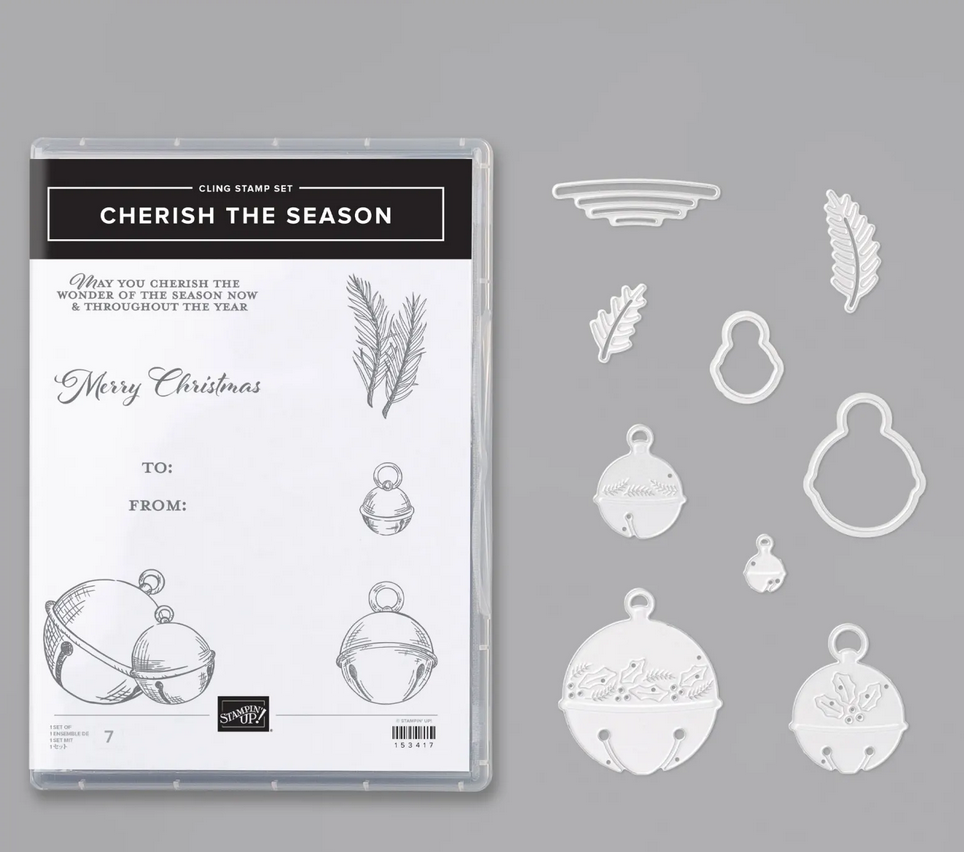
Isn’t that fun?! I recently obtained he Cherish the Season Bundle from Stampin’ Up! and knew the bells would work great for my interactive Christmas card.
This card would be fun to send and awesome to receive. There is a small mechanism made with card stock that enables the swinging motion. Watch the video below for a step-by-step tutorial.
Cutting/Scoring Guide
Card Base = 11″ x 4-1/4″ piece of Cherry Cobbler scored at 5-1/2″
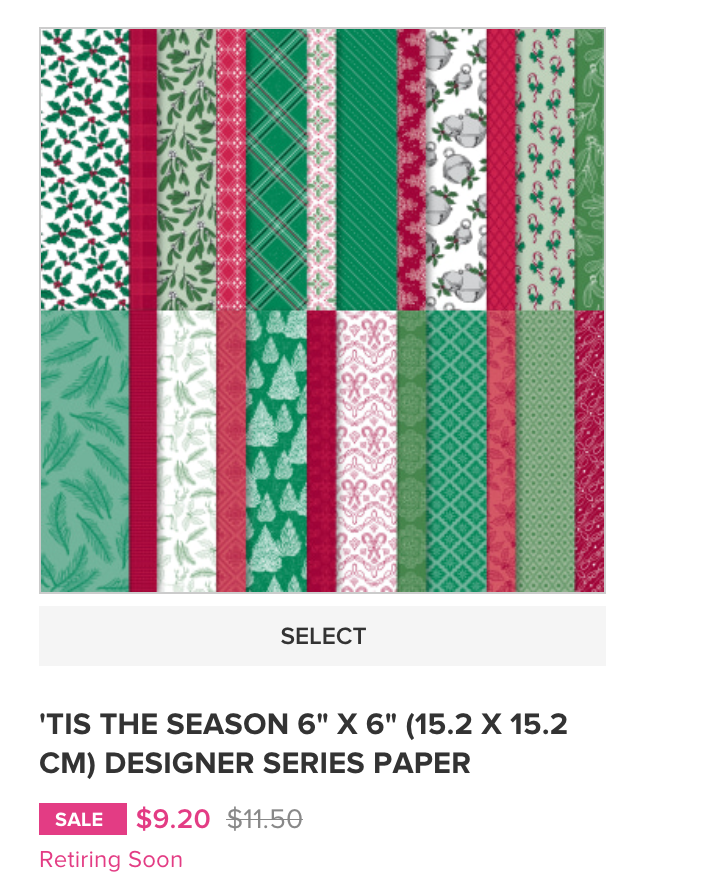
‘Tis the Season Designer Series Paper = two pieces 4″ x 5-1/4″
Swing Mechanism = 1-1/2″ x 1/2″ piece of Cherry Cobbler scored at 1/4″, 3/4″ & 1-1/4″ on the 1-1/2″ side
Tent = 4-1/4″ x 2-1/2″ piece of Cherry Cobber scored at 1/2″, 1-1/4″ & 2″ on the 2-1/2″ side
Window Sheet = 3/8″ x 3″
Sentiment Tag = 1″ x 3-3/4″ piece of Cherry Cobbler and 3/4″ x 3-1/2″ piece of Whisper White
Stamped Images = 3″ x 2″ piece of Whisper White card stock
Scallop Circle = 3-1/2″ x 3-1/2″ piece of Cherry Cobbler
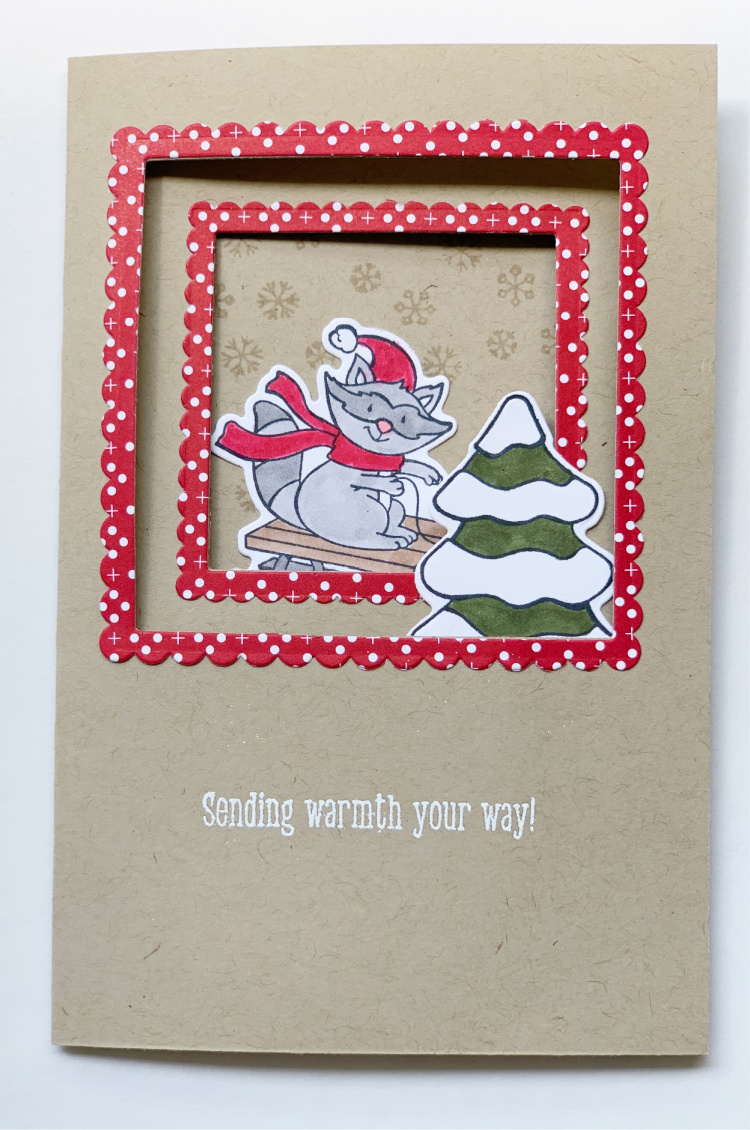
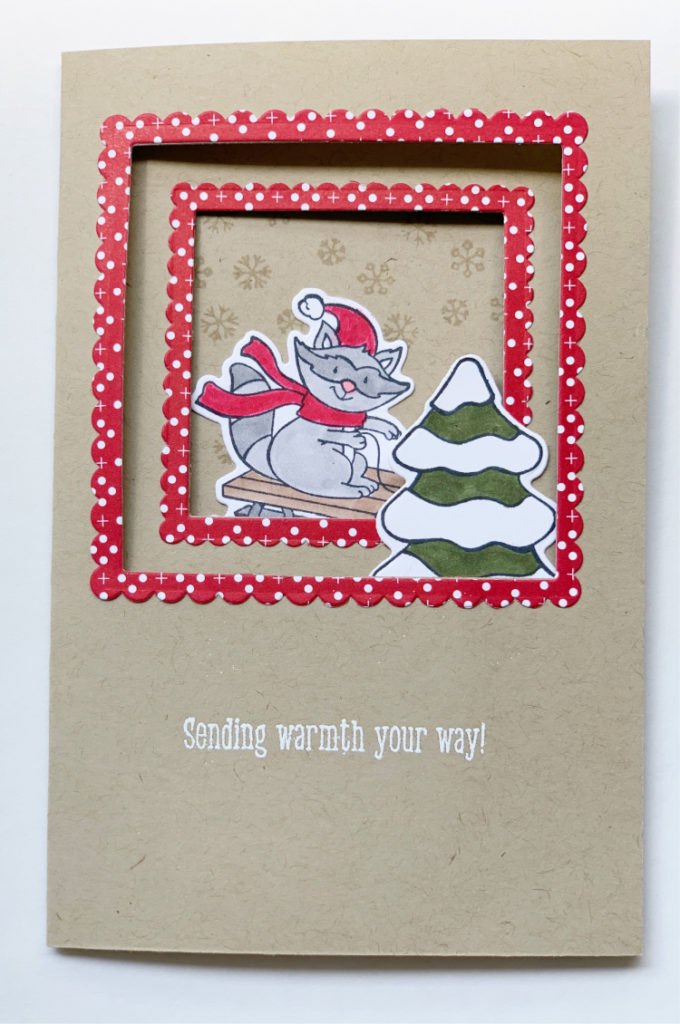
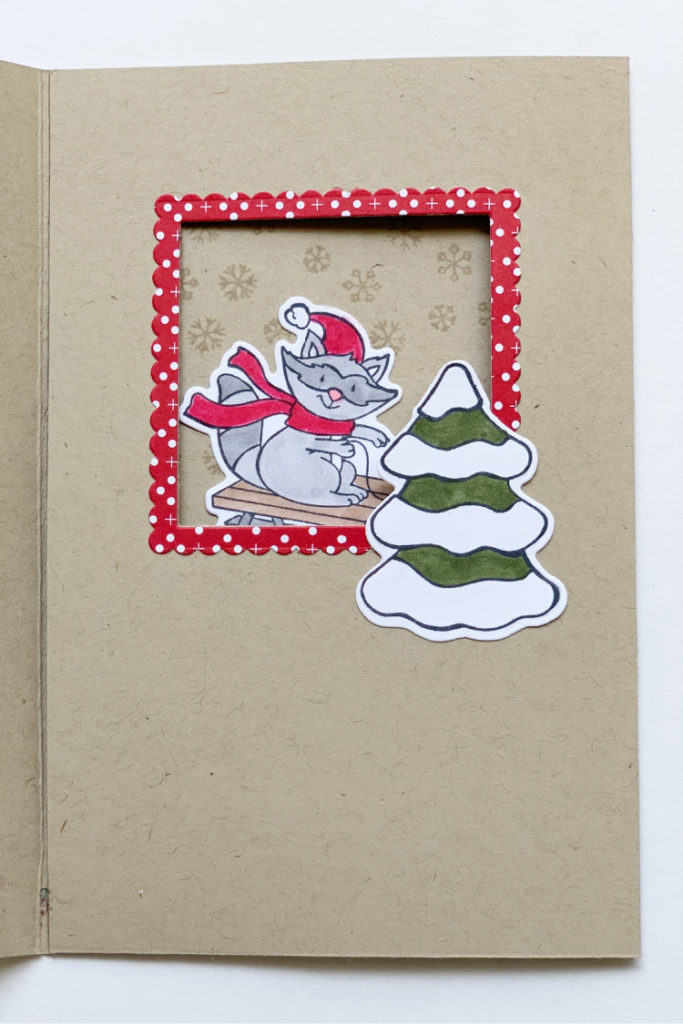
Today’s card was so much fun to make! It’s a tri-fold slimline card with a surprise on each layer. The card front has a large framed window peeking at a charming outdoor scene. The second layer of the card has a sweet little snow-covered tree.
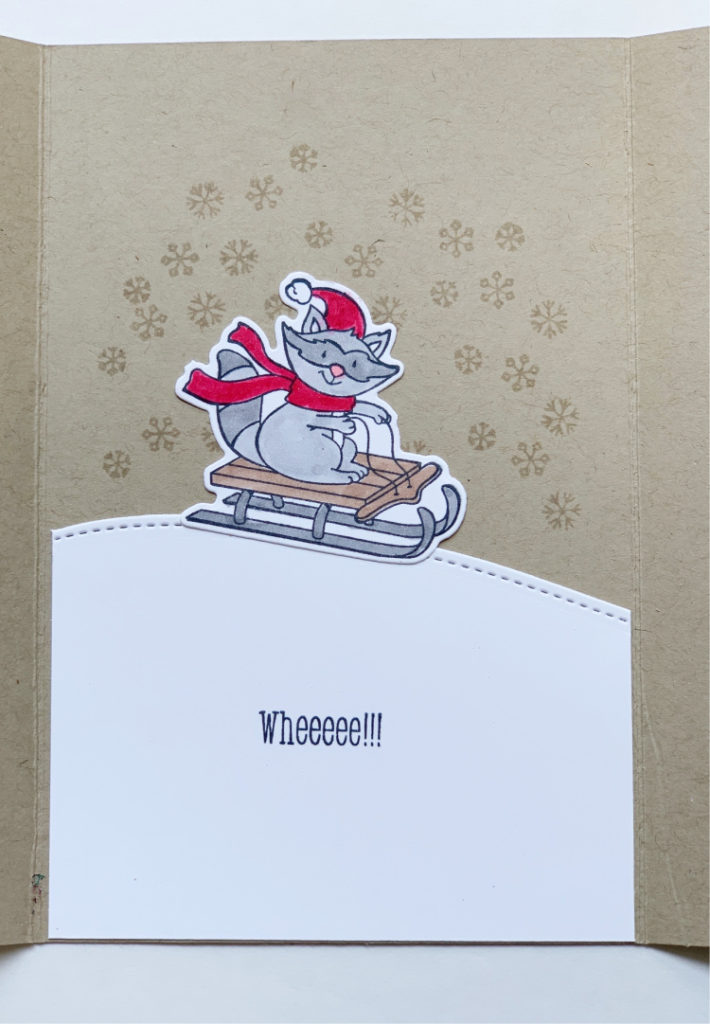
And the final layer, the inside of the card, shows the rascally raccoon getting ready to take his sled down the snowy slope!
Project Recipe
Card Base = 10-7/8″ x 5-1/2″ piece of Crumb Cake card stock scored at 3-5/8″ and 7-1/4″ on the 10-7/8″ side.
Heartwarming Hugs Designer Series Paper = 6-1/4″ x 3-1/2″ (window frames)
Whisper White = 3-1/2″ x 2-1/2″ (snow bank) and 4″ x 2-3/4″ (stamped images)
The tri-fold slimline card is designed to fit into a regular A2 card-sized envelope. Watch the video replay of today’s Make-it-Monday Facebook Live to learn how to make your own tri-fold slimline card.


 Specialty Designer Series Paper")


")
")
")
 Designer Series Paper")


")


")

")


 Braided Linen Trim")
 Circle Punch")


")
 Designer Series Paper")


")

")


")


 Sheer Ribbon")


")


 Double-Stitched Satin Ribbon")
")


")

 Designer Series Paper")


 Circle Punch")


")


