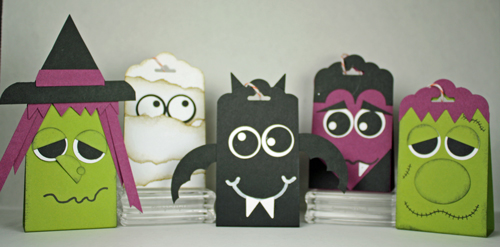
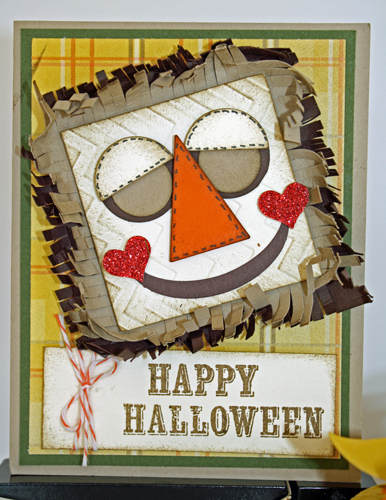
Holidays

Cheer All Year – Really!

image

The card I’m sharing with you today was created by the Stampin’ Up! Creative Design Team.  It uses the Cheer All Year stamp set from the Stampin’ Up! Holiday Catalog and gives your projects some seasonal flair. At first look this is a holiday stamp set but as this card shows, you don’t have to put it away at the end of the year.  Just a simple “Hello” sentiment makes this a fun feathery card you can share all year long!  My favorite thing . . . the gold embossed feather tip!


image

Cheer All Year Stamp Set


Card Supplies:

Cheer All Year Stamp Set; Watermelon Wonder, Whisper White, and White Vellum Cardstock; Fancy Foil Designer Vellum; Basic Black Archival Stampin’ Pad; Watermelon Wonder Classic Stampin’ Pads; VersaMark Pad; Gold Stampin’ Emboss Powder; Gold Metallic Thread; Vintage Faceted Designer Buttons; Stampin’ Dimensionals; Banner Triple Punch; Big Shot; Lots of Labels Framelits Dies

Order Now Button_2-001


Twelve Weeks of Christmas Week 10

Cash-Envelope

The Plaid Poodles, Maggie and Sox, had a visit to the groomer yesterday.  Our dog groomer, Tammy, is wonderful to take whatever mess the dogs show up in and transform them into pretty little poodle like fancy!  And they smell terrific – for dogs!   I would post a photo if they would sit or stand still long enough to do so.

Because this was the Christmas visit I wanted to gift Tammy for her great service all year long.  I decided to create a gussied up envelope to tuck her tip in.  It turned out really cute and is perfect to tuck cash or gift cards into.  The envelope was so quick and easy to make that I created several for other hard-to-buy-for family (can someone say teenage nieces and nephews?).  Here’s the video tutorial with all the details:

Twelve Weeks of Christmas Week 9

Twelve-Days-of-Christmas-WK

Christmas is just twelve days away – gulp!  I am not ready.  I like to say, “Christmas comes ready or not”!  Sure we all want a perfect “Norman Rockwell” holiday but who defines what that is?  Define your own “perfect”.  Don’t kill yourself creating what you imagine a perfect Christmas to be.  Choose what’s important to you and go with that.  Let’s not stress over all the trappings of Christmas and remember the real reason we celebrate. Time is slipping by and Christmases spent together will become fewer and fewer so make the most of it.  Enjoy your family, dysfunction and all!  We won’t remember gifts given or received but we will remember with fondness the sweet times spent enjoying time with our loved ones.  Love each other and laugh together.

Talking about perfection . . . my Twelve Weeks of Christmas have not posted perfectly.  Technical difficulties, scheduling conflicts, blah, blah, blah.  In all honesty, I did not realize the challenge that this was going to become.  Thank you for sticking with me.  It is important to me that I follow through with my commitments and I plan on fulfilling my promise.  It may not have happened as I had planned or you expected but I hope you have enjoyed the series.  Your feedback would be most welcome!  Check back next week as I complete the Twelve Weeks of Christmas with Weeks 10, 11 and 12!

But first, let’s visit Week 9!  I am beginning to gift wrap the Christmas presents purchased thus far.  I created these simple little tags to top each gift.  They coordinate perfectly with the Stampin’ Up! Festive Designer Kraft Paper Rolls that I’m using for  my gift wrapping this year.  I kept it simple using the Tag Topper Scallop Punch.  The sweet little Joy Peace Love sentiment came from the Christmas Tagables photopolymer stamp set.


Product List

Order Now Button_2-001

Twelve Weeks of Christmas Week 8

12-WKS-of-Christmas-WK-8

Tag-a-Bag Gift Bag Gift Card Holder

By now most of us have the Christmas decorations up and have started purchasing presents for our friends and loved ones.  If you are anything like me you will be purchasing your fair share of gift cards.  Why not make the presentation of those gift cards a present in itself!  This gift card fits the bill.  It’s not only adorable but so simple to make using the Stampin’ Up! Polka Dot Tag-a-Bag Gift Bag.  The inspiration for it came from fellow Stampin’ Up! Demonstrator Krista Frattin.  I love the use of dainty accessories like the Tea Lace Paper Doily and Gold Sequin Trim paired with the practical paper bag and newsprint paper.  Very girlie girl and artisan!

The gift card holder is made by simply folding the Tag-a-Bag Gift Bag in half and adhering embellishments.  View my video tutorial for complete instructions:


Product List

Order Now Button_2-001

A Very Special Stampin’ Style Class

Invitations to eat, drink and be merry at the December Stampin’ Style Card Class were sent out and yesterday was the big day!  I wanted to celebrate all the special people who attend my classes all thru the year so we included a soup and salad lunch and turned December’s class into a party!  I tried a new soup recipe and it was a hit.  Several ladies requested the recipe so I thought I would share it here in case you might want to try it.  The recipe makes a larger quantity and is a snap to make.  I made it in the morning and kept it warm in my slow cooker until the party.

Cream of Chicken and Wild Rice Soup

1 pkg. Uncle Ben’s Original Long Grain & Wild Rice
1 pkg. Lipton’s Chicken Noodle Soup
1/4 c chopped onion
1/4 c chopped celery
1 carrot, chopped
3 cans low-sodium (or heart healthy) cream of chicken soup
1 large can chicken (I used rotisserie chicken)

Bring 8 cups of water to boil.  Add rice with seasonings, noodle soup, onion, celery and carrot.  Cook for 10 minutes or until rice is tender.  Stir in cream of chicken soup and chicken  and warm thoroughly.


 Party Favors

You can’t have a party without party favors so I whipped up cute little candy cane holders and placed one on the table at each guest’s place setting.  The inspiration for the candy cane holders came from fellow Stampin’ Up! Demonstrator Sam Donald.   And although I could never repay the blessing that my customers turned friends have become to me, I wanted them to have a small token of my appreciation so I made packages of mini Christmas note cards to take home.

Candy-Cane-Holders Christmas-Note-Cards


Christmas-Note-Cards-2


Photos from A Very Special Card Class

DEC-14-SS-Class Photos-001

Love these awesome women!  So great to take a few hours each month for ourselves and laugh, solve world problems (lol) and of course STAMP!  If you are in the Kansas City area we would invite you to join us.  Check my Stampin’ Up! website under Events for future dates HERE.


Twelve Weeks of Christmas Week 7

Happy-Wonderful-Christmas-C

It’s a Wonderful Life comes to mind when I look at this card.  The gold embossing on the edges imitate gold leaf and the sentiment from the Wondrous Wreath stamp set is out of the ordinary.  A little old fashioned in a good way.  Not to mention the sparkle of cherry cobbler rhinestones!  It’s what I call a “fancy” card.  Formal and dainty with a richness that takes you back to the high quality of times past.  Pure vintage.  You can almost hear an angel earning it’s wings!

Happy-Wonderful-Christmas-2

Here’s the video on how I made this card.


Dimensions:  Basic Black card stock 8-1/2″ x 5-1/2″ scored at 4-1/4″ for card base, Cherry Cobbler card stock 4″ x 5-1/4″, Typeset Designer Series Paper 3-3/4″ x 5″


Product List


Order Now Button_2-001

Twelve Weeks of Christmas Week 6

Back in the day, that time my sister married a Canadian, we celebrated our first Canadian Christmas. Our holiday dinner table was lovely and at each guest’s place setting was an adorable Christmas cracker. Nowadays Christmas crackers are everywhere because . . . you know . . . American consumerism, but back then they weren’t so obvious.  My family had the delight that Christmas of cracking open our very first Christmas crackers! Guess what? I didn’t realize that they actually “crack” when opened – there was smoke involved people! Great hilarity ensued and I believe my brother-in-law wore his crown for the remainder of the meal which may just be another Old English tradition that I am unaware of.

It is a sweet tradition for so many reasons and I always admire those paper party poppers when they catch my eye.  So after hearing somewhere (Pinterest?) that making Christmas crackers with the Stampin’ Up! Envelope Punch Board  is a snap I decided to give it a go.  Here are a few different versions that I whipped together in no time.  Check out my video tutorial and see for yourself just how easy-peasy they are!

Christmas-Crackers


Description:  Designer Series Paper measures 4-1/2″ x 6-1/2″ –  Scored on long edge (landscape) at 1″, 1-1/2″, 2″, 4-1/2″, 5″, 5-1/2″ then scored on short edge (portrait) at 1″, 2″, 3″ and 4″


Twelve Weeks of Christmas Week 5

Twelve Weeks of Christmas Week 5

I know, I know, I know!   I’m very behind in my Twelve Weeks of Christmas series!  I hope you will forgive me.  My goal was to include a video for each post of the series and well, to be honest, video technology is not a big talent of mine.  I am learning however and have decided that perhaps a new video camera would be helpful.  I’m sure it’s the equipment and not me, right?   We’ll see.  In the meantime thank you for your patience and I hope you enjoy the video tutorial for this sweet little card!

12-WKS-of-Christmas-WK-5

Project Details:

Stamps:  Endless Wishes 136829, Bright & Beautiful 135026 (w) 135029 (c)

Ink:  Lost Lagoon 133644, VersaMark 102283

Card Stock:  Smoky Slate 131202 (8-1/2″ x 5-1/2″), Soft Sky 131203 (4″ x 5-1/4″), Whisper White 100730 (4″ x 4″)

Accessories:  All Is Calm Designer Washi Tape 135844, Silver Embossing Powder 109131, Embossing Buddy 103083, Heat Tool 129053, Stars Framelits 133723, Big Shot Die-Cutting Machine 113439, Rhinestone Basic Jewels 119246, 104430 Stampin’ Dimensionals


Order Now Button_2-001

Halloween Treat Creature Feature

TRICK OR TREAT!

Halloween-Treat-Creatures

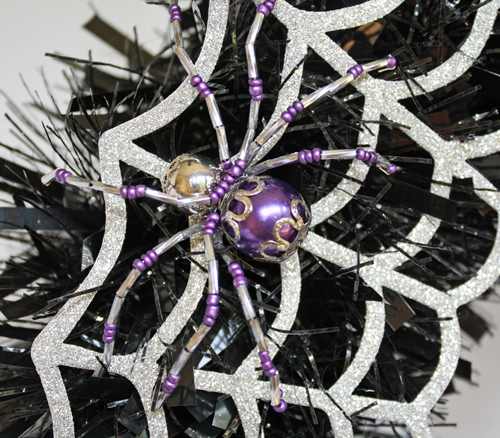
Aren’t these scary creatures just the cutest?  They’re not only adorable but they hold a delicious chocolate treat. Wouldn’t they make the sweetest party favors for the classroom, coworkers, neighbors and friends?! I hung them on this tree I found at Michael’s and placed them on my entry table ready to hand out to those special trick-or-treaters who show up on All Hallows Eve!

Halloween-Treat-Creatures-o

Directions:

Cardstock:  Basic Black, Pumpkin Pie, Whisper White, Old Olive, Elegant Eggplant

Ink:  Momento

Accessories:  Tag Topper Scallop Punch, 3/4″ Circle Punch, 1/2″ Circle Punch, Large Oval Punch, Small Oval Punch, Cupcake Builder Punch, Project Life Journaling Pens, Glue Dots

Treat Holder:  The treat holder is made using a piece of card stock measuring 2″ x 7-3/4″ that is punched on both ends with the Tag Topper Scallop Punch.  Score the strip of card stock at 3-3/8″ from each end, fold at the score lines then adhere the tag together at the top using Glue Dots.  The little slot in the middle of the tag is the perfect size for a chocolate nugget candy which I attached with a Glue Dot.

Faces:  The eyes are made using the 3/4″ Circle Punch for the eyeball and the 1/2″ Circle Punch for the iris.  I used the Cupcake Builder Punch for the small dots in the eyes.  For the witch’s and monster’s eyelids I used the 3/4″ Circle punch cutting the circle in half.  The witch’s nose is a 1/2″ circle cut in half with a small dot made from the Cupcake Builder Punch for her wart.  The monster’s nose is made using the Small Oval Punch.

Monster:  Frankie’s hair was made by punching a scrap of Elegant Eggplant cardstock with the Tag Topper Scallop Punch and fringing the other end with scissors then gluing it on the tag.  His mouth and scars were drawn with a Project Life Journaling Pen.

Witch:  The witch’s hair was made by punching a scrap of Elegant Eggplant cardstock with the Tag Topper Scallop Punch and fringing the other end with scissors then gluing it on the tag.  A few other strips of cardstock were then glued on the edges.  Her hat is a triangle with a rectangular strip of paper with two rounded corners made using the corner rounder punch.  The hat band was a smaller rectangle with rounded corners.  The witch’s mouth is drawn with a Project Life Journaling Pen.

Mummy:  The mummy is “wrapped” by using three 2″ strips of Whisper White cardstock that are torn and sponged on the edges using Momento ink then glued on.

Bat:  The bat’s wings are made using the Large Oval Punch and the 1/2″ Circle Punch.  His teeth and ears are small triangles and I drew his mouth with a chalk pen that I had in my stash.

Vampire:  The Count’s hair line was made by punching a scrap of Basic Black cardstock with the Tag Topper Scallop Punch and the 1/2″ Circle Punch.  His cape, teeth and eyebrows are made by cutting triangles.  The Count’s mouth is drawn with a Project Life Journaling Pen.

12 Weeks of Christmas – Week Three!!!

Gift Box Punch Board

This week’s project was made using the Stampin’ Up! Gift Box Punch Board.  It’s a fun element to add to holiday packaging, creating containers just right for that special gift.  Create boxes up to 4-inch square.  The sizing chart and instructions are even printed on the board making it a sinch to use!  View the video at the end of this post for a live demonstration of this nifty gadget! 

12-WKS-Christmas---WK-3

Aren’t these gift boxes cute?  They are the smallest measuring 1-3/4″ square.   I used a 6 x 6-inch piece of Old Olive Cardstock for the box and a scrap of Red Glimmer Paper and Whisper White Cardstock for the tag.  The Merry Christmas sentiment is from the Petite Pairs Stamp Set and was stamped using Cherry Cobbler Ink.  The box is tied together using 1/8″ Taffeta Ribbon in Old Olive.  I used the 1-1/4″ Scallop Circle Punch and the 1-3/4″ Scallop Circle Punch for the tag and used Stampin’ Dimensionals to assemble the tag and adhere it to the box.  View the video below for a full tutorial on how I assembled the boxes using the Gift Box Punch Board.


Order Now Button_2-001

Twelve Days of Christmas – Week Two!

Lovely As a Tree Card


Lovely-as-a-Tree-Card

This card is made with a classic Stampin’ Up! stamp set, Lovely As a Tree.  Using the “stamp off” technique there appears to be a forest of trees.  The simple technique adds a lot of depth to the card giving it a rich look.  Extra drama was added with a sprinkling of Dazzling Diamonds on the tree branches giving the effect that they are frost covered.  The video below includes all the dimensions and techniques used in the making of this card.  

Products:

Stamps:  Lovely As a Tree 128655 (w) 127793 (c), Bright & Beautiful 135056 (w) 135029 (c)

Cardstock:  Whisper White 100730, Always Artichoke 105119

Ink:  Always Artichoke 126972

Accessories:  Dazzling Diamonds 133751


Order Now Button_2-001

Sweet Scarecrow Card & Memory Keeping Pages

Scary-Scarecrow

My thanks to fellow Stampin’ Up! Demonstrator Diana Ball for her original design that I CASED for this cute scarecrow!  I ended up making two of the darling faces and used one for a card and one for a scrapbook page layout:

Scary-Scarecrow-CardSweet Scarecrow Card


Scary-Scarecrow-Page-LayoutSweet Scarecrow Double Page Scrapbook Layout

Directions:

The scarecrow’s face is a 2-1/2″ x 2-1/2″ square of Very Vanilla Cardstock that I embossed with the Chevron Embossing Folder then sponged the edges with Early Espresso Ink.  The 1″ Circle Punch and the 3/4″ Circle Punch were used for her eyes and eyelids and the heart punch from the Itty Bitty Accents Punch Pack for her rosy cheeks.  I cut a triangle for her nose and used the Extra Large Oval Punch for her mouth.  Her eyelids, nose and cheeks are adhered using Stampin’ Dimensionals.    The “straw” surrounding her face was made with a 3-1/2″ x 3-1/2″ square of Crumb Cake and Early Espresso Cardstock that were fringed on the edges with Fringe Scissors.  I glued the two pieces of “straw” squares together with Snail Adhesive then attached the face to the “straw” with Stampin’ Dimensionals.

Introducing Twelve Weeks of Christmas!!!

Twelve Weeks of Christmas!!!

Today starts the beginning of twelve weeks of Christmas projects.  If you’ve looked at your calendars you will see that I’m already a week behind!  No worries, twelve total projects will be posted so stay tuned and look for a bonus post before jolly, old St. Nick arrives! Join my email list now to make sure you don’t miss a single one!

My first project in this series is this delightful little gift bag.  I think it’s the perfect size for a small cellophane bag of bath salts, tea light or votive candles, a gift card and candies or, of course, cash! 

12-Wks-of-Christmas-2014---

Directions (view the video below for a complete tutorial):

The bag is made with All Is Calm Designer Series Paper. I used a 12″ x 6″ piece of the DSP and scored it in landscape mode at 1-3/4″, 5-1/2″, 7-1/4″ and 11″.  Then, in portrait mode, I scored at 1-3/4″ and 5-1/2″.  For the tag I used the Endless Wishes Stamp Set, stamping the snowflakes with Soft Sky Ink and the sentiment with Black StazOn Ink onto a 2″ circle punched from Whisper White Card Stock. Using Stampin’ Dimensionals I attached the stamped circle to a 2-3/8″ scallop circle punched from Dazzling Diamonds Glimmer Paper.  The circles were attached with Dimensionals to a 2″ x 4″ piece of Pear Pizzazz Card Stock that I flagged at one end.  The tag is attached to the bag using Snail Adhesive.    Finally, the bag is tied up cute with Pear Pizzazz Cotton Ribbon and sprinkled with Rhinestone Basic Jewels.   


Frightful Wreath and DYI Wreath Stand

Frightful-Wreath-on-Stand


Fright-Wreath-Spider

Frightful Wreath Simply Created Kit

We’re entering that Bootiful time of the year when I like to pull out my Halloween decorations.  This wreath was assembled in about 30 minutes using Stampin’ Up!’s Frightful Wreath Simply Created Kit and the coordinating stamp set Frightful Wreath.  I love the bling of the beaded spider – so cute!  The 17″ wreath is perfect for hanging on a door, window or a mirror but I wanted to place it on my entry table and after seeing this pin on Pinterest I decided to get my power tool self on and assemble my own wreath stand.

The materials for the wreath stand are simple and inexpensive.  I found everything I needed at Hobby Lobby or in our garage and probably invested less than $5 .  Here are the materials needed:

Wreath-Stand-Materials


5/8″ Dowel Rod

5″ x 5″ Wooden Base

1″ Wooden Doohickey for the top of the stand

Extra-Strength Adhesive

Small Flat Head Screw (not shown)

Small Cup Hook (not shown)

Flat Black Spray Paint (not shown)


First I cut the dowel rod 20-inches long using a small saw.  Then I drilled a hole in the base to place the dowel rod. ( I would recommend a drill bit the same size as your dowel but since we didn’t have a 5/8″ bit mine was slightly larger than the rod.)   Next I  placed the adhesive into the drilled hole and set the dowel into it.  The topper doohickey was glued on at this time as well.  After letting the adhesive dry overnight, to give the stand a little more stability, I decided to drill a flat head screw through the bottom of the base.  If your drill bit is the same diameter as your dowel this step is probably not necessary.  After spray painting the stand flat black and letting it dry completely  I added a small cup hook to hang the wreath on.

Wreath-Stand-BaseWreath-Stand-Cup-Hook

Without counting drying time it probably took me about an hour to assemble the wreath stand.  I’m really happy with the results and it was so easy to make I’m thinking maybe a gold one for Christmas decorating is in order!

Order Now Button_2-001