Uncategorized

Make an Easter Bunny Treat Holder with Paper!

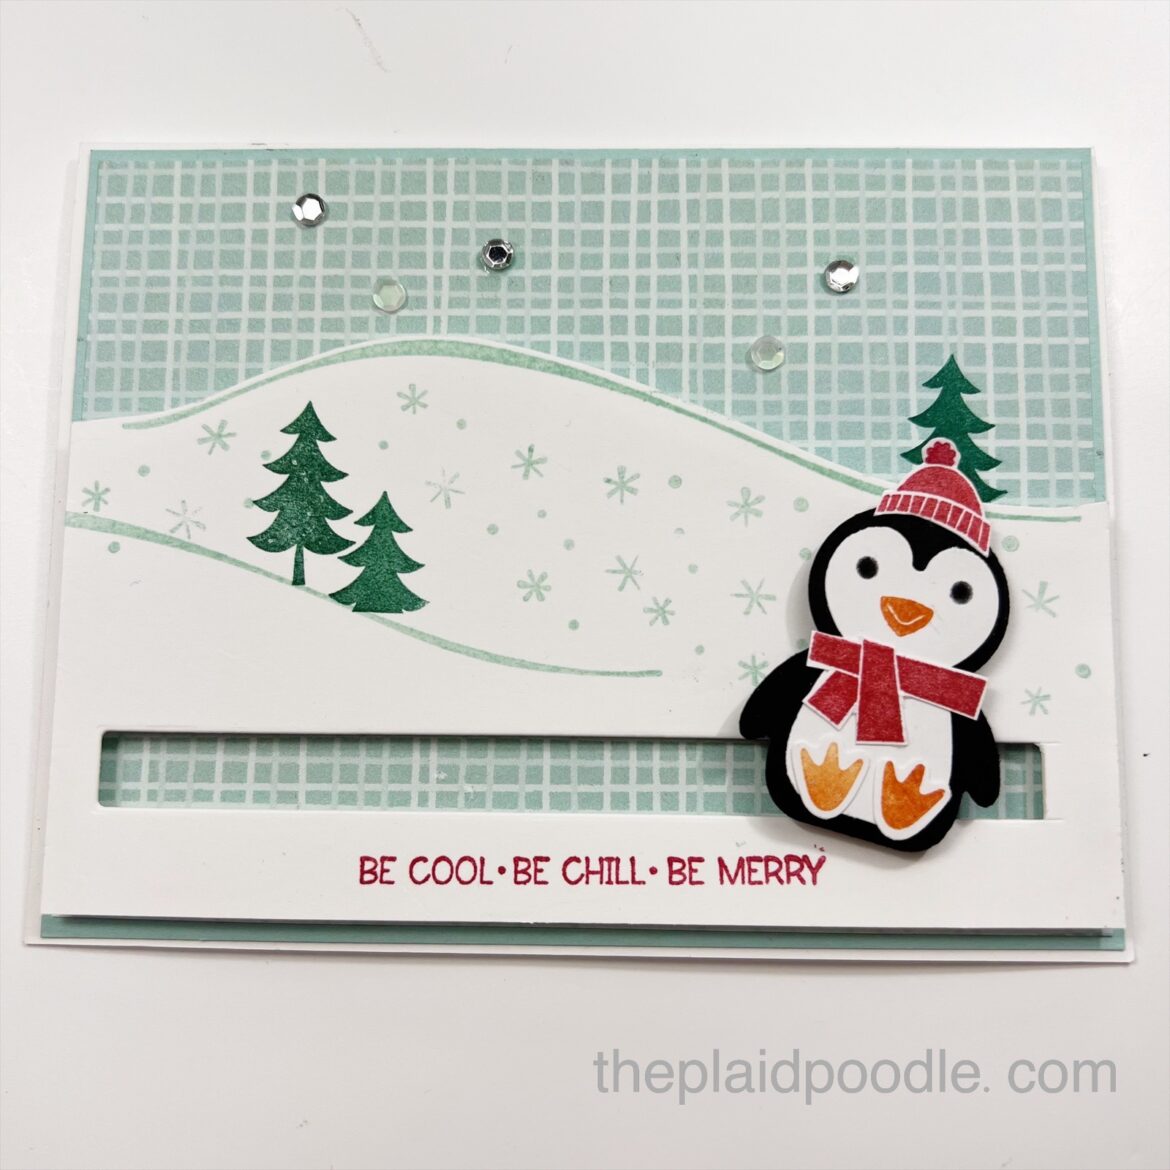
I’m back from a glorious birthday vacation at the beach and am now laser-focused on Easter! I’ve already purchased pretty paper tableware (because that’s how we roll), filled Easter baskets for the littles, and have planned the menu. I always like to have a sweet takeaway for my adult guests and today’s project will fit the bill.

I found the cutest Easter Bunny Treat Holder online and knew I had to give it a go. My design is patterned after the project by Birgit Seidler, a Stampin’ Up! Demonstrator from Germany. Birgit was gracious enough to include the Imperial measurements making it easy for me to copy. You can check out Birgit Seidler’s original design here: https://bit.ly/3rorBP9

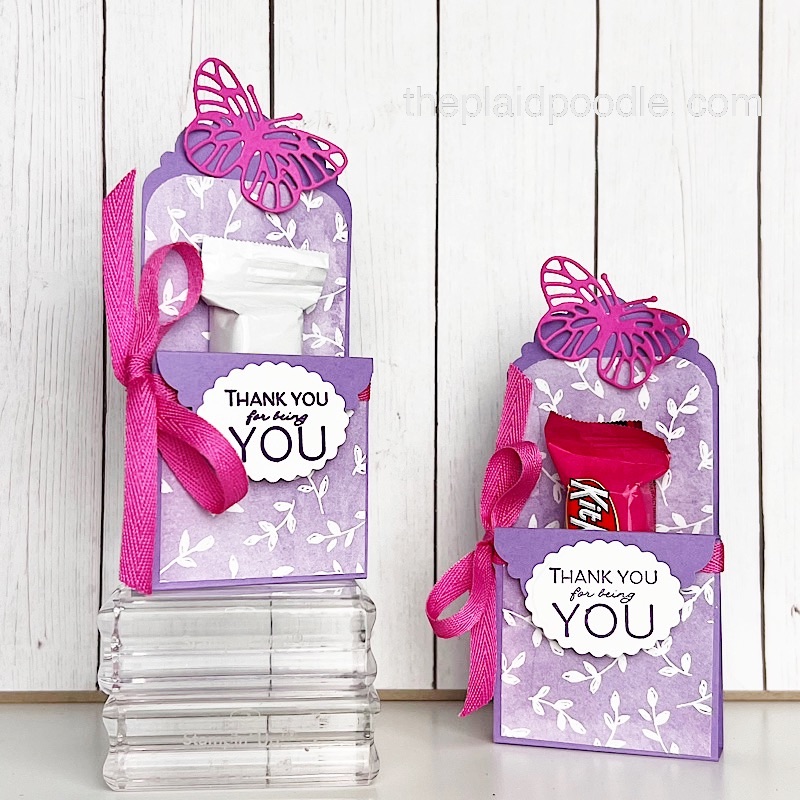
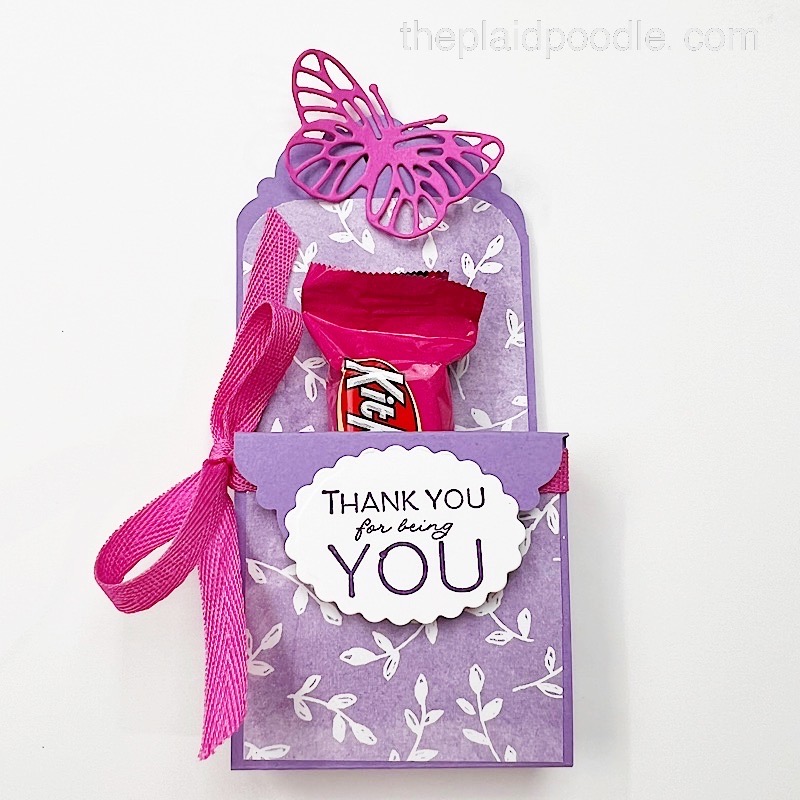
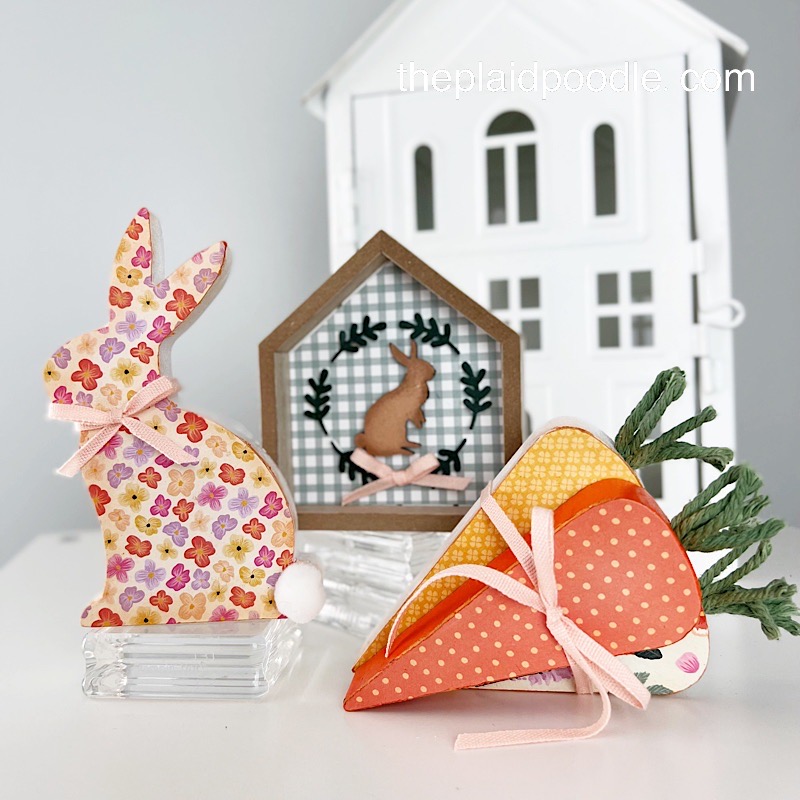
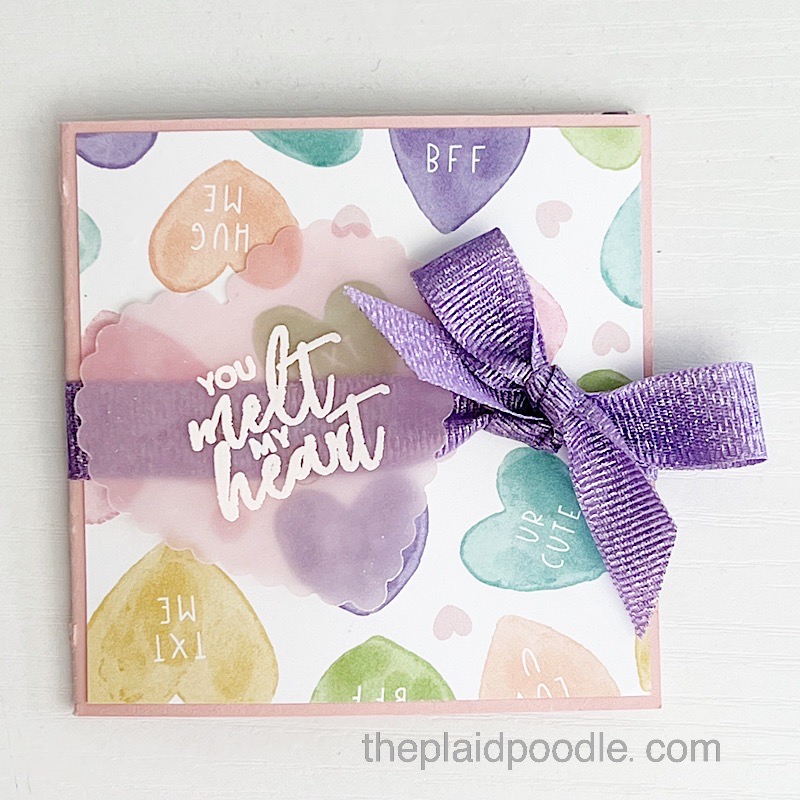
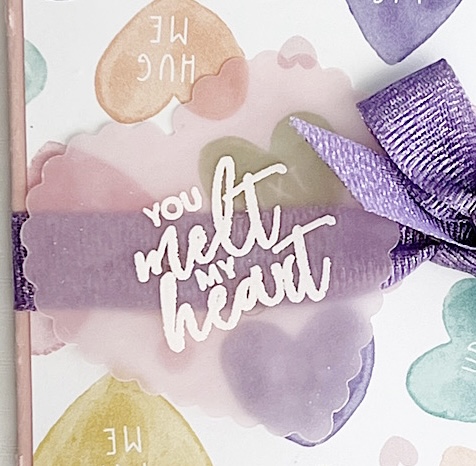
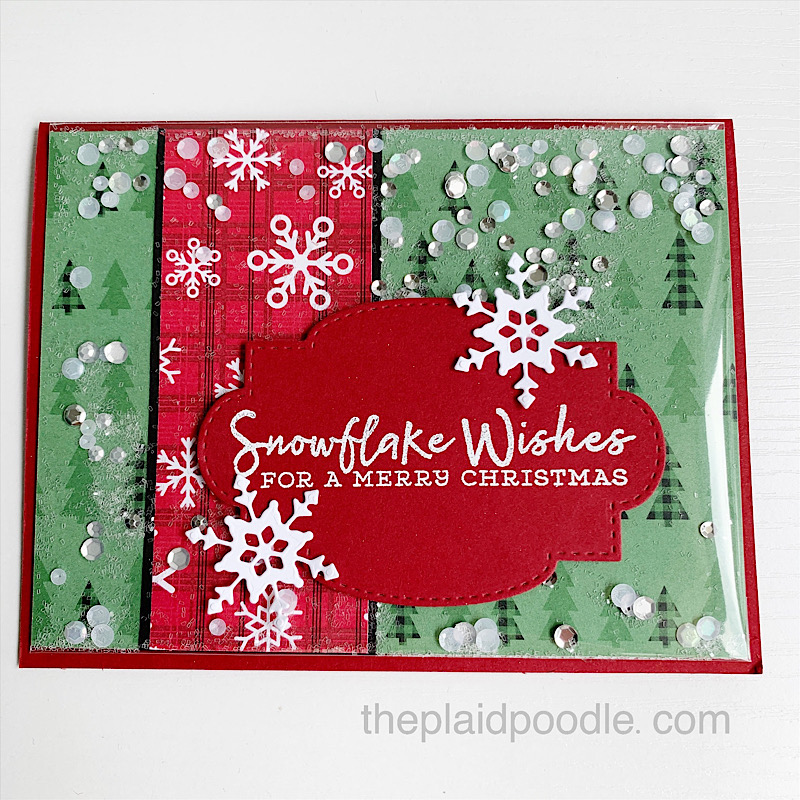
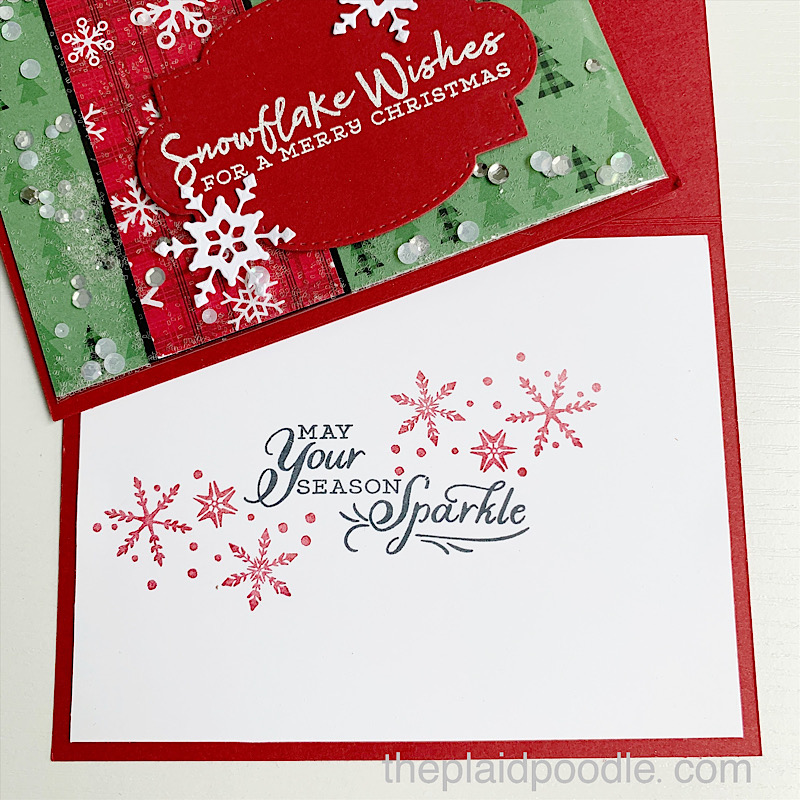
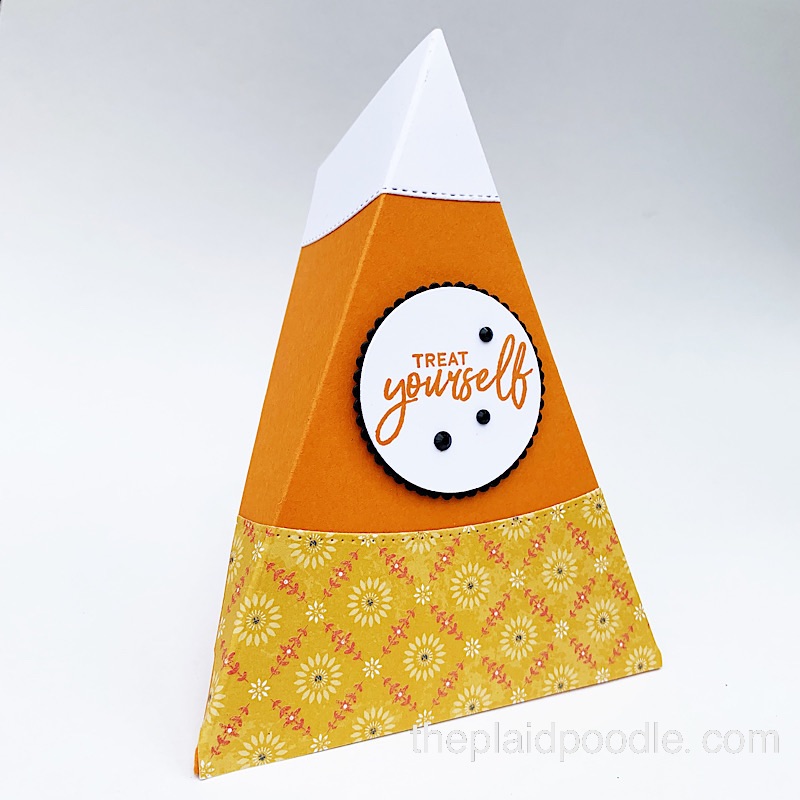
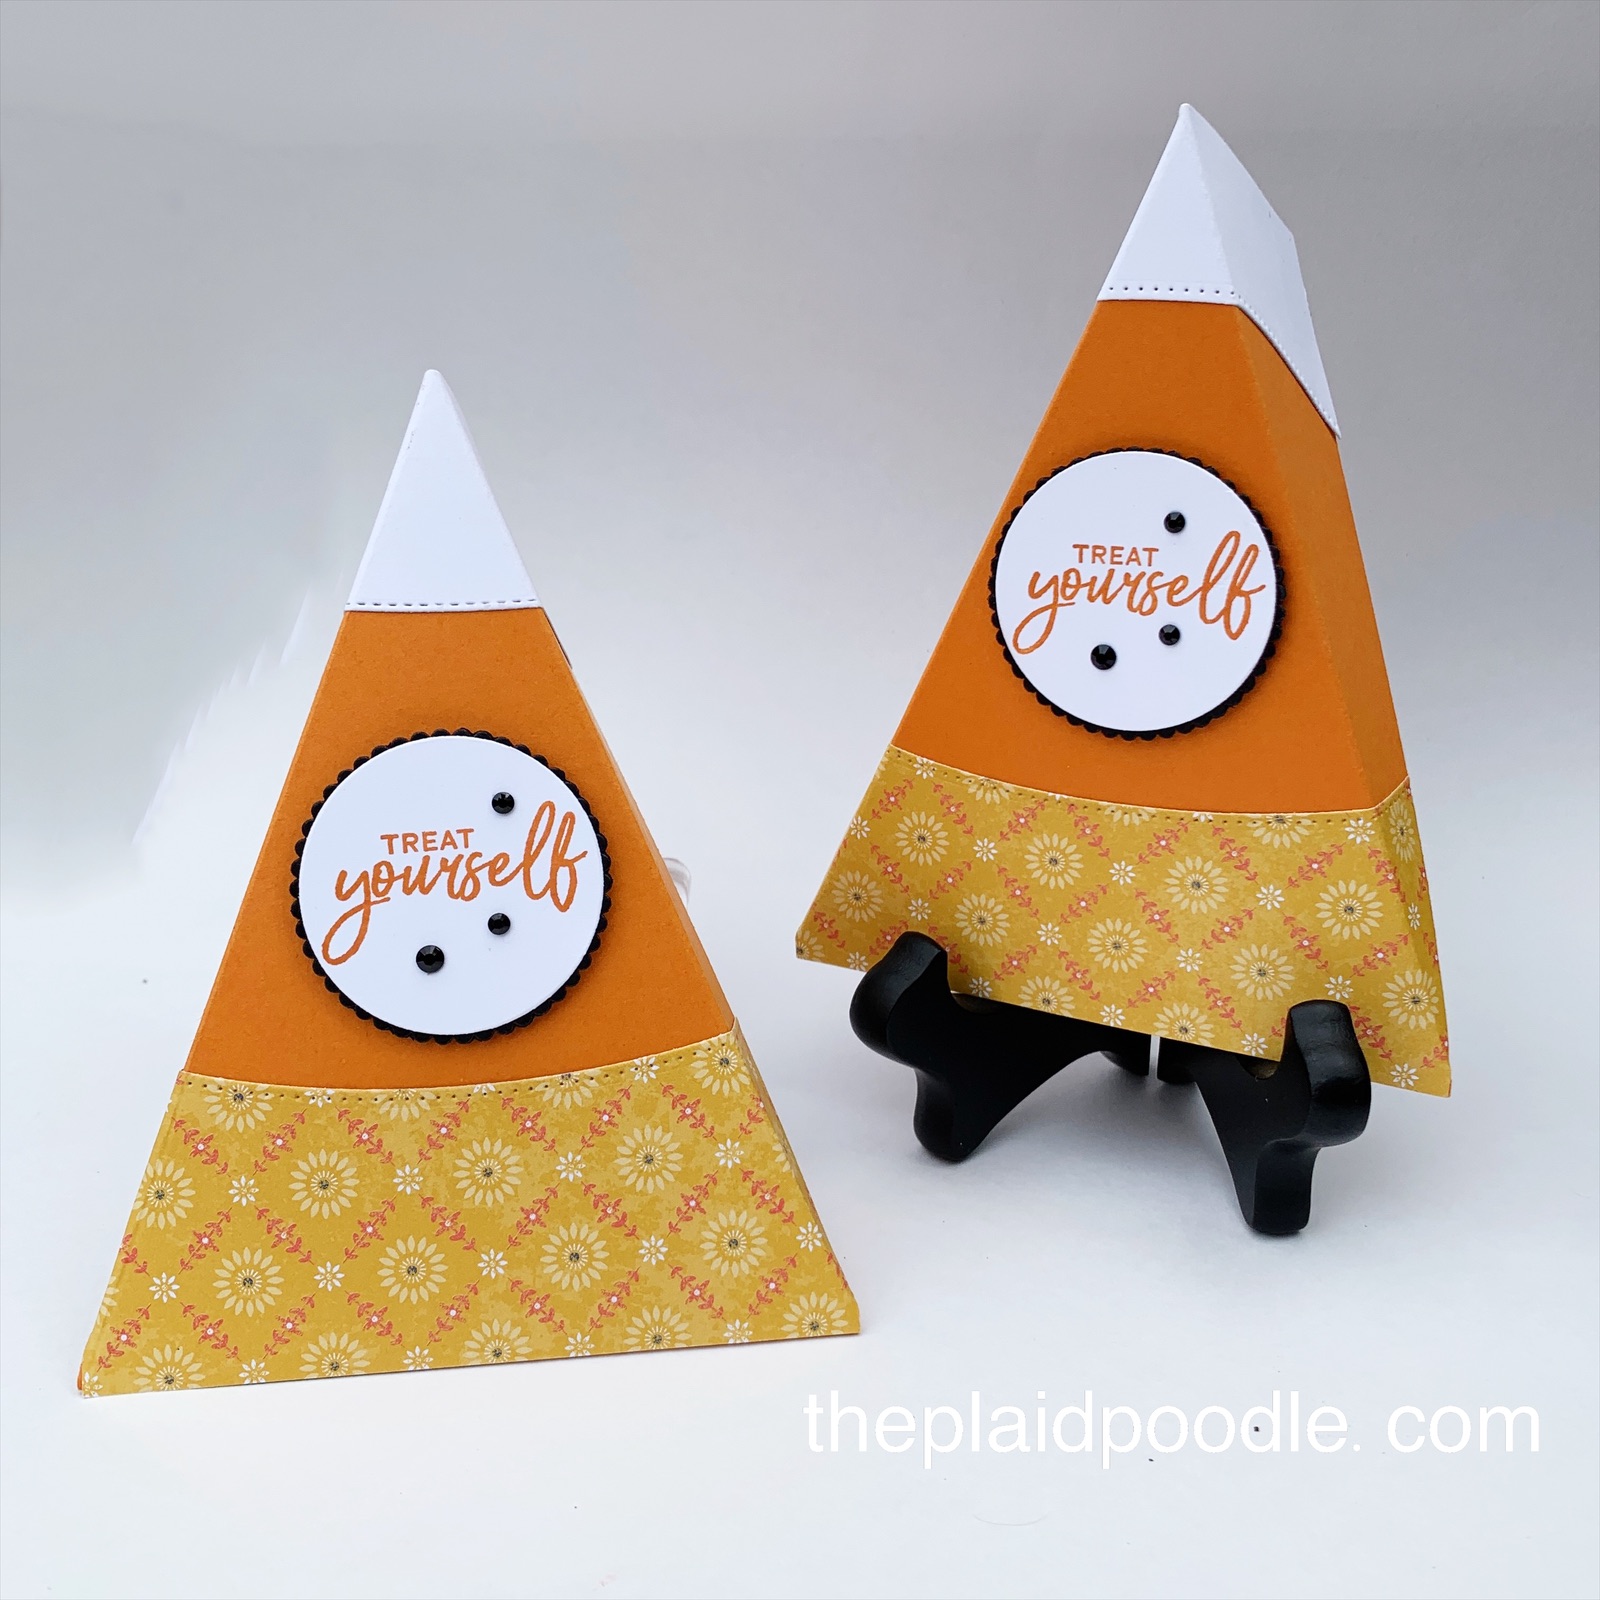
Here is my interpretation of the Easter Bunny Treat Holder. I used one of my favorite retiring Designer Series Papers; the Hand Penned paper from Stampin’ Up! The “Easter Blessings” sentiment on the tag is from a now-retired stamp set called Itty Bitty Greetings.

The paper folding and trimming required to get those fun bunny ears is not difficult. It would however be hard to explain here so I suggest you watch the video below for the instructions.

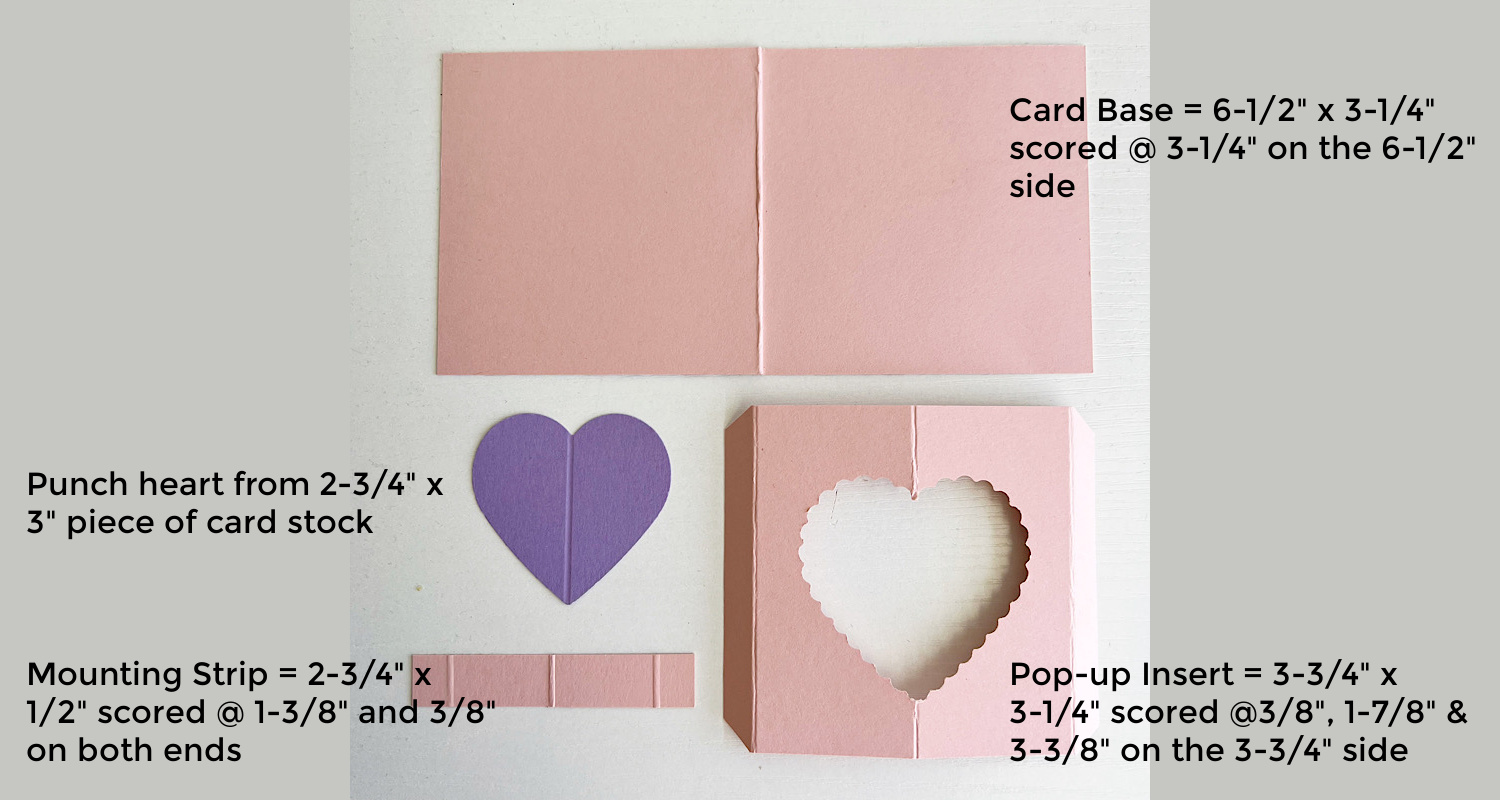
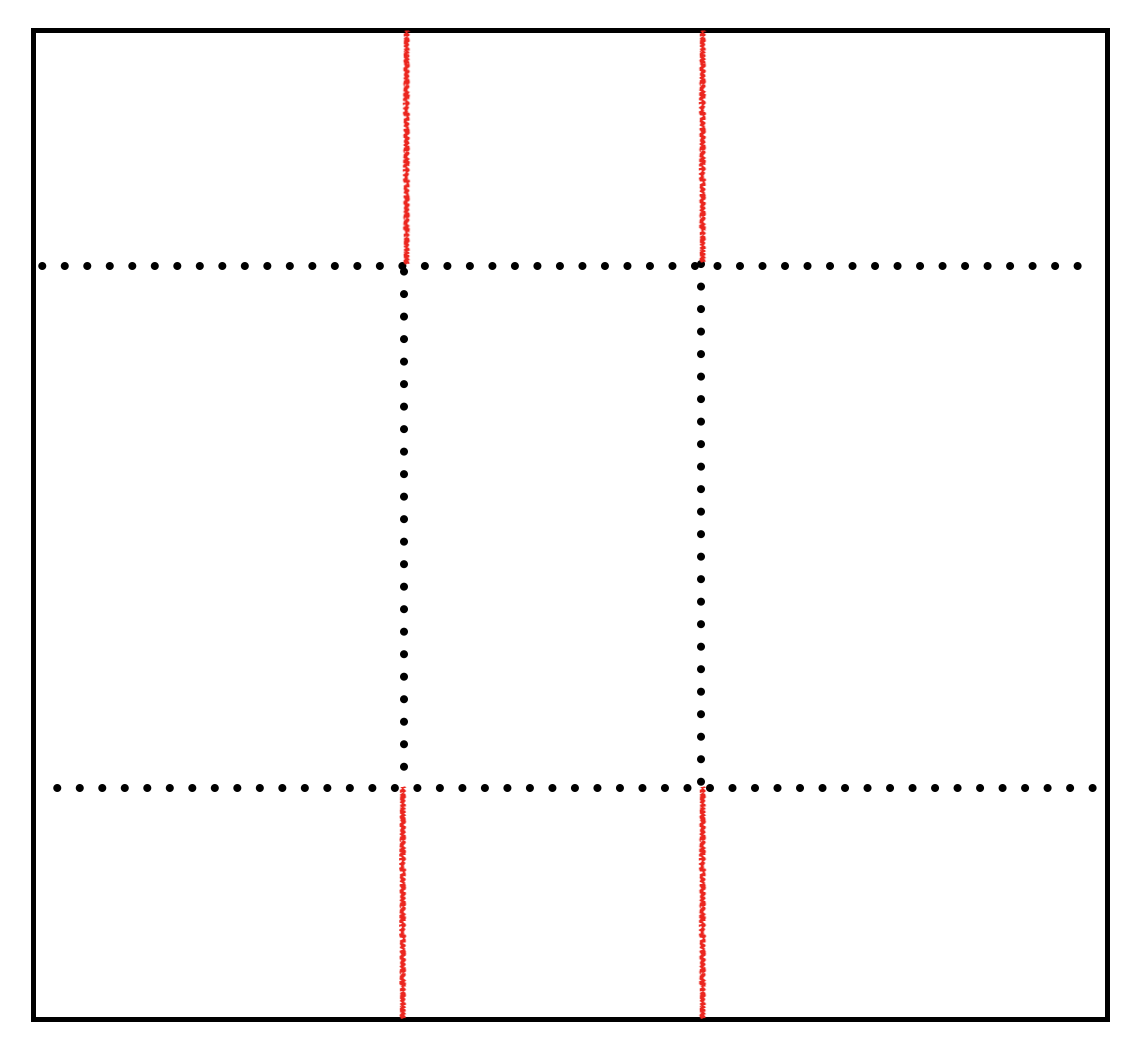
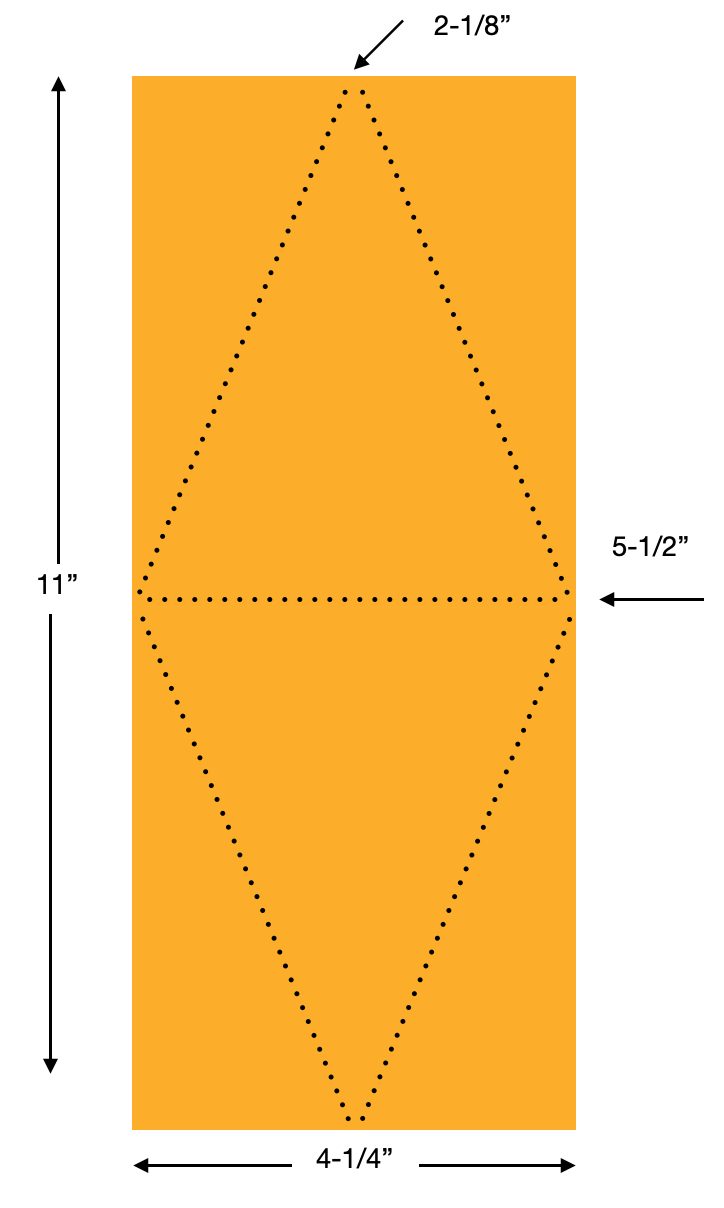
Cutting & Scoring Guide

Score a 12″ x 9-1/2″ piece of Designer Series Paper at 2-1/2″, 3-1/2″, 4-1/2″, 7″, 8″ and 9″ on the 9-1/2″ each side. Score at 1-3/4″ and 6″ on the 12″ side.

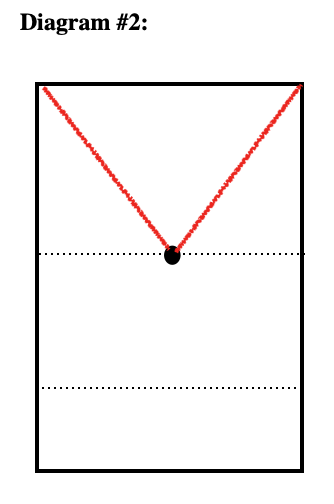
If it helps, here are two diagrams showing the scoring and cutting lines for this project. Diagram #1 is the entire 9″ x 12″ piece of Designer Series Paper. Diagram #2 shows where to cut the ear toppers. The black dotted lines are score lines. The red lines are cutting lines. Once you watch the video these diagrams will make fore sense.

Product List

Make a Springtime Party Favor

Here is a sweet little treat holder that I made up to share with my card class attendees this week. The party favor is so fun and easy to make and will work for any occasion or season depending on your choice of paper and embellishments.

The Hand Penned Designer Series Paper inspired my color choices for the party favor.. To make the base I used a 2″ x 7-3/4″ piece of Highland Heather card stock that I scored at 1″, 3″ and 3-1/2″. I then punched both ends of the card stock using the Delightful Tag Topper Punch.

The designer series paper on the front panel of the party favor measures 1-7/8″ x 1-7/8″. The designer series paper for the inside panel of the party favor measures 1-7/8″ x 3″. To give it a more finished look, I rounded the corners on one end of this strip using the Detailed Trio Punch.

I secured the candy inside the treat holder using Stampin’ Seal then wrapped a length of Magenta Madness 1/4″ Ribbon around the outside of the party favor and tied it in a bow. Finally, I embellished the party favor with a butterfly die-cut and a sentiment tag. Watch the video replay below to see just how easy this Springtime Party Favor is to make!

Product List

St. Patrick’s Day Leprechaun Hat Treat Holder

Happy St. Patrick’s Day! I wanted to share this darling Leprechaun Hat Treat Holder with you today. I embellished the hat with the sweet clover made by adhering three heart die-cuts together. For these I used the medium and small heart dies from the Give it a Whirl Dies.

The Soft Succulent gingham print from the Pansy Petals Designer Series Paper pack was a sure bet for the hat. I shared how to assemble this cute hat Monday during my Make-it-Monday Facebook Live. You can watch the replay here:

Click on the button for the hat template mentioned in the video. Remember to print the .pdf at full size on your printer.

Product List
Sweet As A Peach Photopolymer Stamp Set
Pansy Petals 12" X 12" (30.5 X 30.5 Cm) Designer Series Paper
Layering Circles Dies
Give It A Whirl Dies
Evening Evergreen Classic Stampin' Pad
Soft Succulent 8 1/2" X 11" Cardstock
Mini Stampin' Cut & Emboss Machine
Baker's Twine Essentials Pack
Multipurpose Liquid Glue
Mini Stampin' Dimensionals

Easter Decorations with Target Dollar Spot Supplies

Are you a Target Dollar Spot fan? It’s my first stop upon entering the front doors of the store! I spied a $3 package of wooden Easter decorations this week and had to have them. Once they sat around in my kitchen for a few days I knew I could give these cuties a glow up! I failed to get a “before” photo but if you watch the video tutorial below you will see what I had to start with.

Here’s the after photo:

I’m so happy with the finished project and can’t wait to find a special place in my home to display them. The colors in the Pansy Petals Designer Series Paper from Stampin’ Up! were the right choice. I love how the prints all coordinate and the Petal Pink Cotton Ribbon unified the bunny, the little house, and the carrots in the event I display them all together.

Product List

Make an Amazing Silhouettes Pocket Card

Remember the Always in My Heart pocket card I made here? It was so much fun to make that I decided to explore other types of pocket cards I could create. The card I’m sharing today has a side pocket. My favorite part of this card is the sweet heart-shaped pull tab.

The stamped images on this monochromatic card are from the Amazing Silhouettes stamp set from Stampin’ Up! I stamped the butterfly image onto the card insert but left off any sentiment. This card is can be used for many occasions so I will add the sentiment when the need arises. I love that kind of versatility!

Make sure to watch my video tutorial below to see my tip for how I changed the color of the baker’s twine on the card from white to Fresh Fresia.

Cutting Guide

  • Card Base = 8-1/2″ x 5-1/2″ scored at 4-1/4″ on the 8-1/2″ side
  • Designer Series Paper = 4″ x 5-1/4″ and a scrap for heart die-cut
  • Fresh Fresia Cardstock = 5″ x 3-1/2″, 5-1/4″ x 2-5/8″, and a scrap for heart die-cut
  • Basic White Cardstock = 5″ x 2-3/8″, 3-1/4″ x 4-3/4″
Product List

Make a Friends of the Forest Shaker Card

Today’s project is a 4″ x 4″ shaker card. I used images from the Friends of the Forest stamp set and colored them in with Stampin’ Blend Markers. Just like the card I shared on Monday, I decided to heat emboss the “Glad You’re My Friend” sentiment using White Stampin’ Emboss Powder.

Product List

Make an Always in My Heart Valentine Card

I can’t believe we’re already halfway through January, 2022! Time just needs to stand still for a minute. Am I right? With Valentine’s Day coming at us quickly I needed to focus on the cards I want to send this year. I have the Always in My Heart stamp set and coordinating Floral Heart Dies from Stampin’ Up! sitting on the shelf in my craft room and they were calling out to me, “use us, use us”, so that is what I did.

The heartfelt sentiments in the stamp set make them perfect for Valentine’s Day, wedding, and anniversary projects. This is a Two-Step Stampin’ set; it allows you to layer two or more images to create one final image with extra texture and dimension in the colors you want.

Here is another card that I made using the piece left after die-cutting the heart from the Flowering Fields Designer Series Paper.

Product List

New Spring Mini Catalog & Sale-a-Bration!

The Stampin’ Up! Spring Mini Catalog is live! The January–June 2022 Mini Catalog is your passport to stunning seasonal projects! It contains all the products you’ll need to craft, create, and celebrate during Valentine’s, Easter, and more.

View and download the virtual version of the catalog here.

Sale-a-Bration

During Sale-a-Bration, you may earn a free gorgeous product with every $50 purchase from the Sale-a-Bration brochure! To see the exclusive products you can earn this Sale-A-Bration season, browse our digital brochure here. Remember to take a look at the coordinating products from the January–June 2022 Mini Catalog you can pair with your fabulous Sale-A-Bration finds! 

Besides free products with eligible purchase, there are other perks available only during Sale-a-Bration.

Hosting During Sale-a-Bration

Hosting is even more rewarding during Sale-A-Bration season. When you place any party or personal order of $300 or more, you can receive the Calming Camellia Cling Stamp Set (item 158117) for free!

Joining During Sale-a-Bration

When you become an Independent Stampin’ Up! Demonstrator you join a supportive community of others who share your passion for creativity! Join now and select $125 or products for only $99. During Sale-a-Bration you’ll also get your choice of any two stamp sets for FREE!

Any time is a great time to shop but shopping during Sale-a-Bration and earning FREE products is the best time!

DIY Heart Pop-Up Cool Treats Valentine Card

Happy New Year! I hope your holiday season was all that you were hoping for. I took two weeks off during Christmas and New Year’s and didn’t step into my craft room once. I couldn’t wait to get back to stamping this week!

The next holiday coming up is Valentine’s Day and that had me thinking of hearts and colorful, happy paper. The Sweet Talk Designer Series Paper from Stampin’ Up! was perfect for the project I had in mind. It’s a mini heart pop-up card.

This cute little card starts with a square base that measures 3-1/4″ x 3-1/4″ and includes a ribbon to keep it closed up tight. It’s the ideal size for the kiddos to tuck into all those sweet classroom Valentine boxes. When you untie the ribbon and open the card a delightful purple heart pops up.

I chose the Sweet Ice Cream stamp set from Stampin’ Up for the card sentiments. Doesn’t the font remind you of conversation hearts candy? The punches from the Hearts Punch Pack were just the right size for this mini card. Although the Simple Scored Board from Stampin’ Up! helped a lot with the card, the only thing required to create your own pop-up card is a paper trimmer, bone folder and a strong adhesive.

You will also need a 6-1/2″ x 3-1/4″ piece of Designer Series Paper for the inside lining of the card and a 3-1/8″ x 3-1/8″ piece for the front of the card. I colored a 2-3/4″ x 3″ piece of vellum using the Light Flirty Flamingo Stampin’ Blend Marker. Once the alcohol ink from the marker dried, I punched a scallop heart from the vellum then heat embossed the sentiment onto it using white Stampin’ Emboss Powder.

Product List

Make a Penguin Place Penny Slider Card

The project I’m sharing with you today is a penny slider card.

I used Thick Basic White card stock for the card base. It measures 8-1/2″ x 11″ and is scored at 4-1/4″ on the 11″ side. The first layer of Pool Party card stock measures 4-1/8″ x 5-3/8″. The Sweet Stockings Designer Series Paper layer measures 5-1/4″ x 4″. The final layer on the card with the slider mechanism measures 5-1/4″ x 3-1/4″ before the snow bank is cut from it.

Product List

Book Binding Fun-Fold Christmas Card

I’ve been seeing book binding fun-fold cards all over social media lately and wanted to give it a try. Stampin’ Up! is offering 20% off dies from their annual catalog starting tomorrow so I decided to showcase a couple of them in today’s project. I chose two great stand alone die sets; the Basic Borders Die Set and the Stitched So Sweetly Die Set.

I love all the stitched layers on this book binding fun-fold card. To embellish the card I used the 3/8″ Chevron Weave Ribbon on the book binding and the Holiday Rhinestone Basic Jewels on the holly leaves die-cuts.

Cutting/Scoring Guide

  • Card Base = 4-1/4″ x 11″ piece of Evening Everygreen Cardstock scored at 5-1/2″ and 6-3/4″ on the 11″ side
  • Cherry Cobbler Cardstock = 4-1/8″ x 4-1/8″ piece and 4″ x 2-1/2″ piece
  • Tidings of Christmas Designer Series Paper = 4-1/8″ x 1-1/8″ piece and 3-3/4″ x 4-1/2″ piece
  • Basic White Cardstock = 3″ x 2-1/4″
  • Evening Evergreen Cardstock = scrap for holly leaves

Video Tutorial


Product List

Make an Easy Snowflake Wishes Shaker Card

Shaker cards are crowd pleasers but they can be tricky to put together. The project I’m sharing with you today is an easy alternative to traditional shaker cards.

The hack for this shaker card is the Clear Medium Envelopes from Stampin’ Up! The envelope holds all the shaker medium so that not one grain of glitter is lost! I used the Subtle Shimmer Sequins for my card. The four classic colors and two sizes of the sequins inspired me to use the Snowflake Wishes Stamp Set and the coordinating So Many Snowflakes Dies for the card.

The inside sentiment from the stamp set is on target for my shaker card filled with sparkle and shine. Here’s how I finished the inside of the card:

Video Tutorial


Cutting/Scoring Guide

  • Card Base: 8-1/2″ x 5-1/2″ piece of cardstock scored at 4-1/4″ on the 8-1/2″ side.
  • First Layer: 4″ x 5-1/4″ piece of Designer Series Paper.
  • Basic Black: 1-3/4″ x 4″
  • Designer Series Paper: 1-5/8″ x 4″
  • Sentiment Tag: 2-3/4″ x 4″
  • Basic White: 3″ x 1-1/2″ (snowflake die-cuts), 4″ x 5-1/4″ card insert

Supplies List


Make a Gorgeous Leaves Crate Treat Holder

Nothing says Autumn like a crate full of mums, apples or pumpkins. How about a crate full of snack mix? The project I’m sharing with you today is a paper crate embellished with fall leaves and filled with snack mix.

Boxes are one of the easiest 3-D paper project to make. The design for this crate starts with a 6″ x 5-1/2″ piece of embossed Early Espresso cardstock from Stampin’ Up!

Scoring & Cutting Guide

Score 6″ x 5-1/2″ piece of cardstock at 1-1/2″ and 4-1/2″ on 6″ side. Score at 2″ and 3-1/2″ on the 5-1/2″ side. Trim on red lines per diagram.

Video Tutorial

Product List

Make a Candy Corn Shaped Treat Box for Halloween!

If you need a sweet treat holder for Halloween I’ve got you covered with today’s project! These triangular shaped boxes are fun to make and depending how you want to embellish them, they don’t require any special tools.

I used a die from the Basic Borders Dies from Stampin’ Up! to achieve those cute stitched edges but you don’t need them to create a candy corn shaped treat box. I explain how to get the look without using dies in this video tutorial:

You will need to make several score lines on an 4-1/4″ x 11″ piece of cardstock to create the box. In addition to the tips I shared on the video, here is a diagram that you may find helpful.

You will find that the triangular shaped box works for most occasions. Here are a few alternatives that I created for Halloween and Christmas:

I hope my Candy Corn Shaped Treat Holder has inspired you to create one of your own. I’m including a supplies list and a cutting guide below to get you started!


Cutting Guide

  • 4-1/4” x 11” piece of Pumpkin Pie cardstock
  • 2” x 4-1/4” piece of Harvest Meadow Designer Series Paper
  • 1-1/2” x 4-1/4” piece of Basic White cardstock
  • 2” x 2” piece of Basic Black cardstock
  • 2” x 2” piece of Basic White cardstock
Product List

Blend & Splatter for a Gorgeous Leaves Birthday Card

If you like playing with lots of techniques when making a card, this one is for you! This autumn themed card uses non-traditional colors, has dry embossing, ink blending, die-cutting, distressing and splatters!

I’m late sending a birthday card to a special someone and the inside sentiment I chose for today’s card is coming to my rescue! The sentiment comes from the In Your Words stamp set from Stampin’ Up!

Product List