Uncategorized

Make a Counting Sheep Window Birthday Card

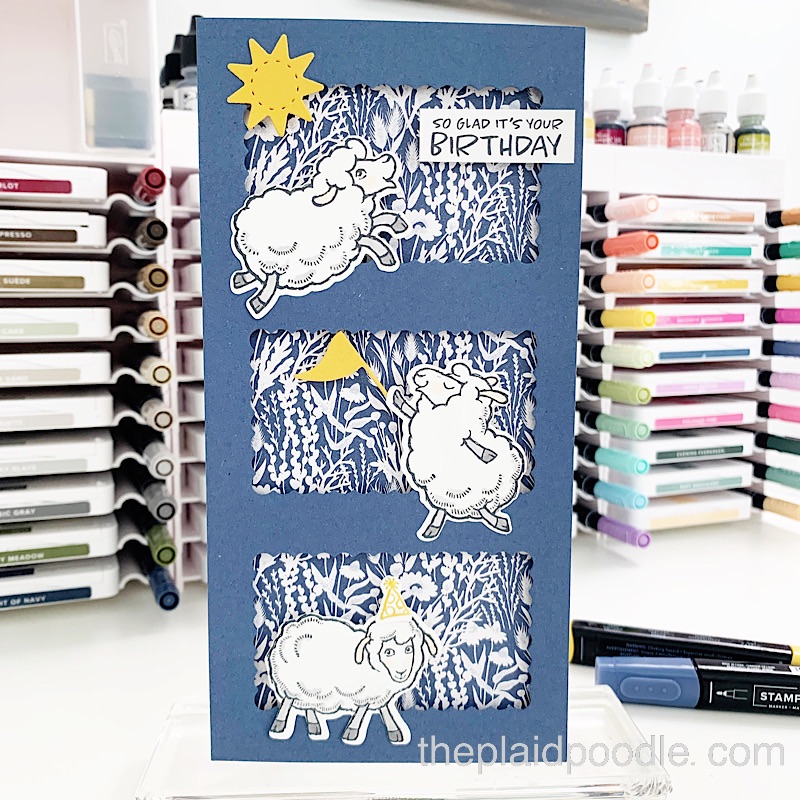
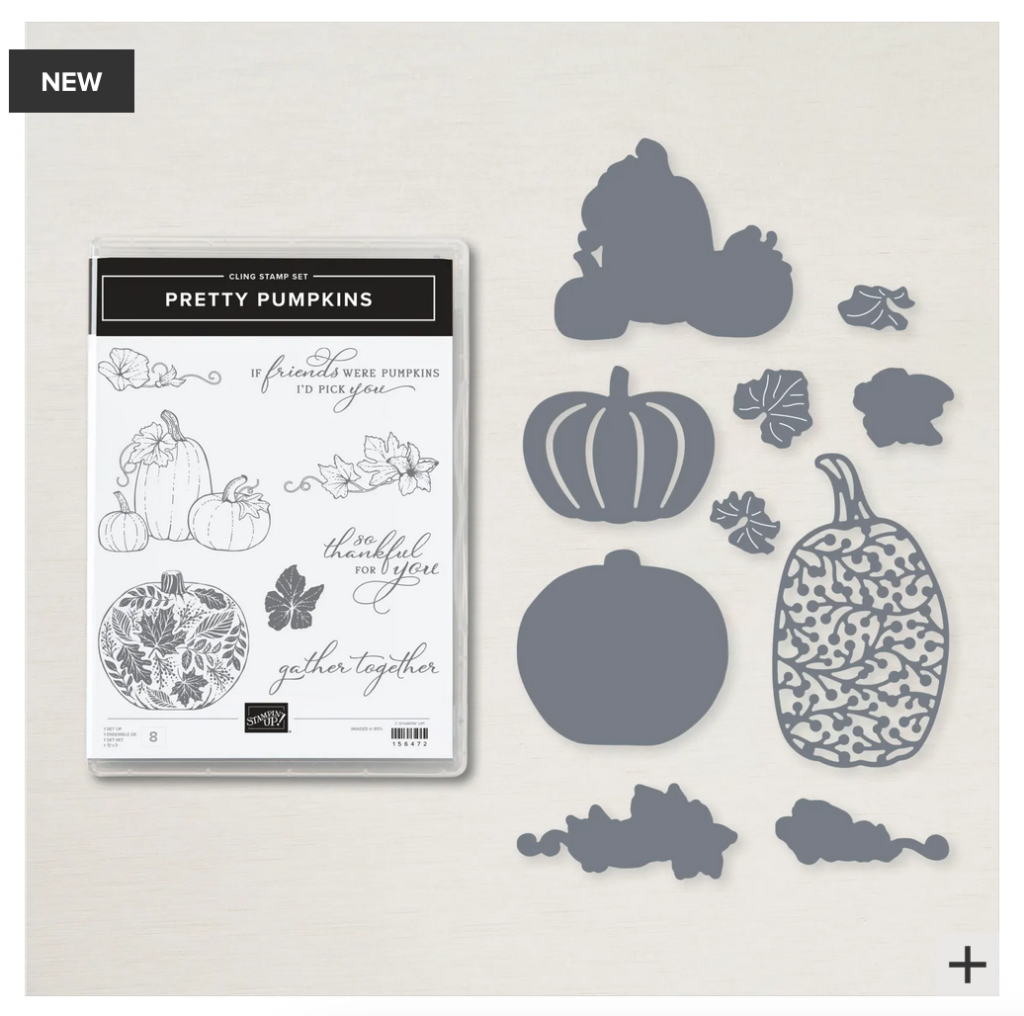
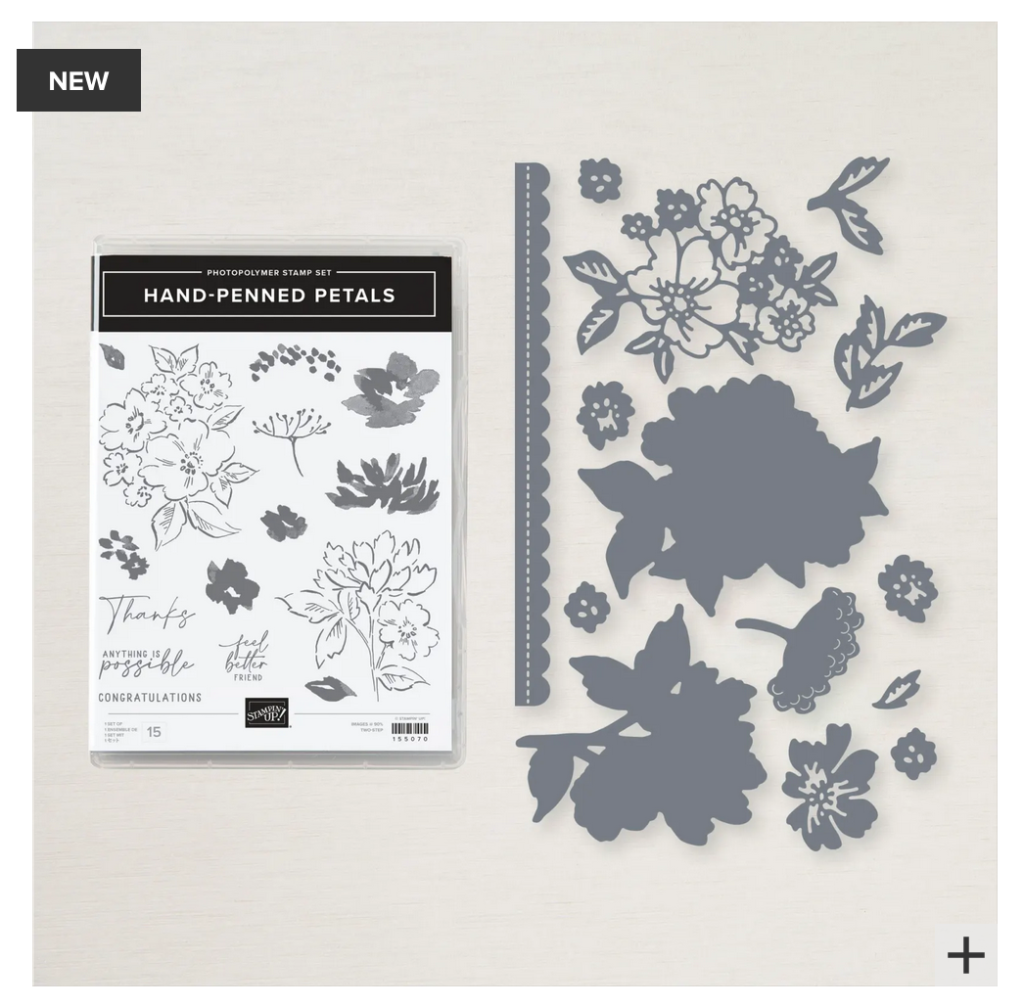
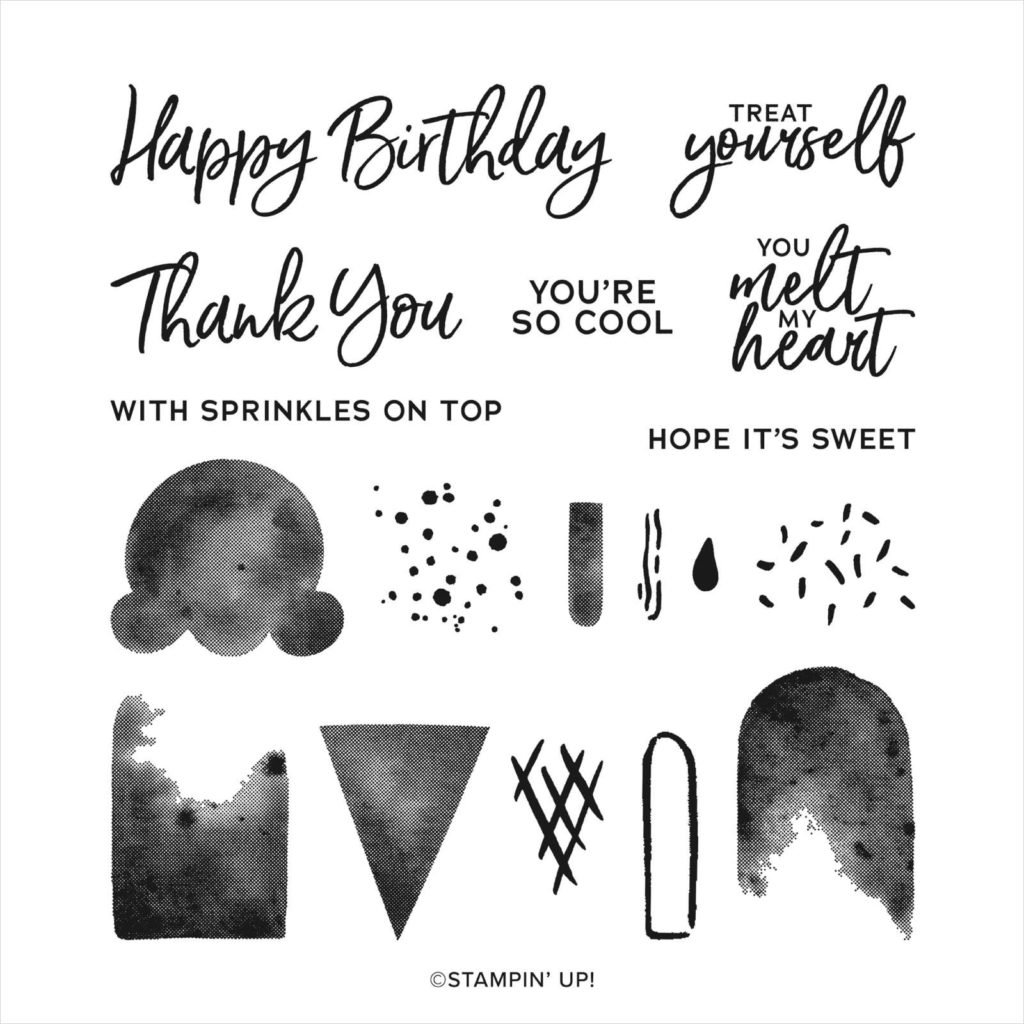
Sure, you can count sheep when trying to sleep, but the lambs in the Counting Sheep Stamp Set want to party! These fun, frolicking farm animals are ready for birthday parties and other festive occasions. Of course, you can also pair these darling sheep with greetings of your choice to use them for any occasion. They are ready to jump right onto your projects!

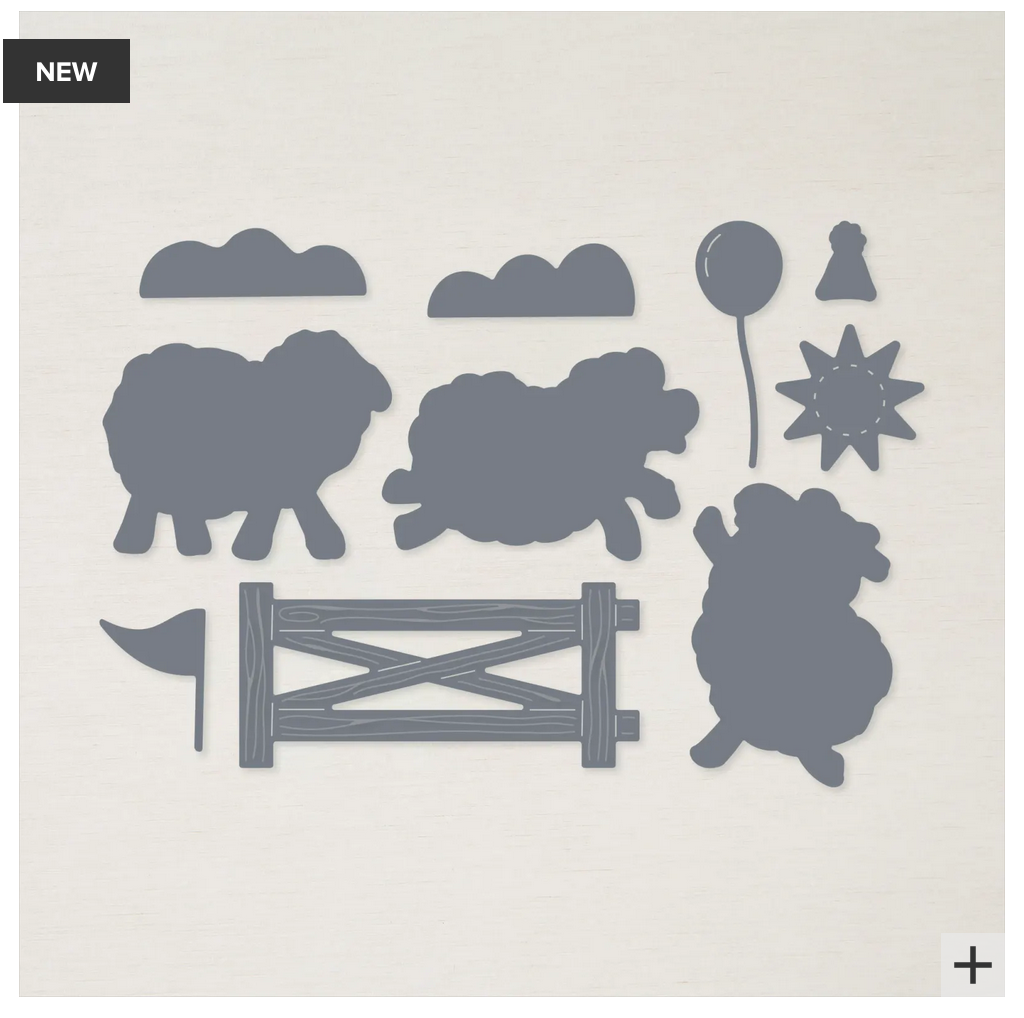
Create a fabulous farm life scene with the images in the Sheep Dies. Choose from a selection of sheep, then add a fence (even though there’s no way to contain this much fun). Complete the scene with party supplies so you’re ready to celebrate! Use these dies on any project you want to turn into a party.
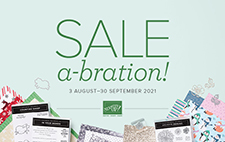
Sale-A-Bration

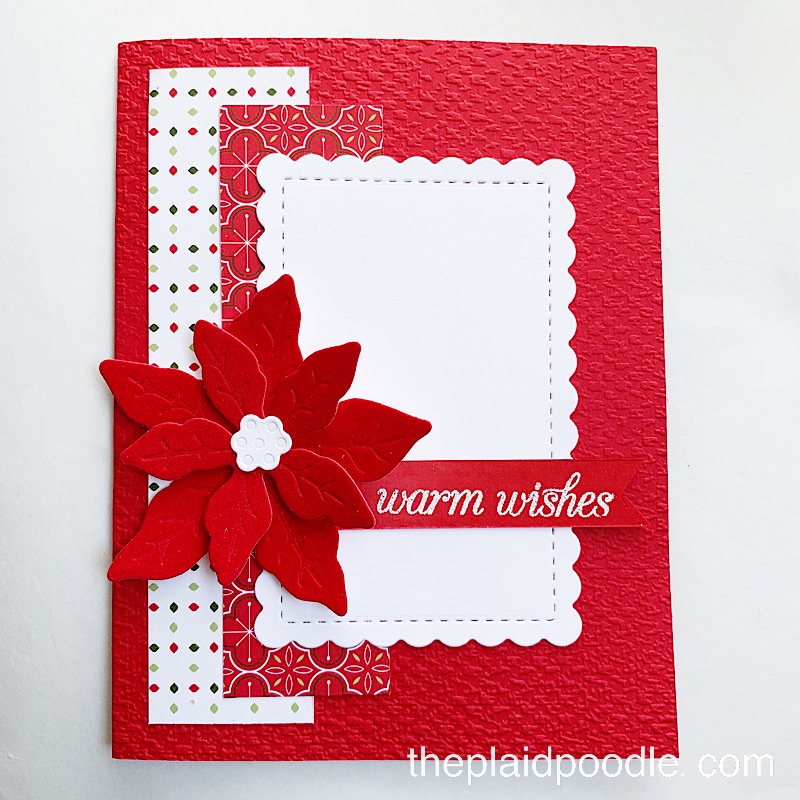
The Counting Sheep Cling Stamp Set and coordinating Sheep Dies are part of the Sale-A-Bration promotion. For every $50 and $100 you spend, you’ll earn an exclusive Sale-A-Bration item for free! Depending on the amount you spend, you’ll be able to mix ‘n’ match the Sale-A-Bration items you earn. The Counting Sheep Cling Stamp Set is FREE with a $50 purchase and the coordinating Sheep Dies are also FREE during Sale-a-Bration with a $50 purchase. Here is my first creation using these fun new products.

Video Tutorial

Product List

Make a Sweet Little Stockings Christmas Card

The card I’m sharing with you today features products from the Sweet Stockings Suite Collection from Stampin’ Up!

Although I’m a dog lover and the critters highlighted in this product suite are the cutest, that is not why I purchased this suite. It was the sweet stocking images that attracted me.

Here is the card I demonstrated during today’s Coffee & a Card Facebook Live using the products in the Sweet Stockings Suite.


Video Tutorial

Product List

Make a Handmade Card with Pretty Pumpkins

Today was the first day of school for my four grandchildren. Two were excited for the new year and two were a bit sad that summer had come to an end. I’m one of those people that looks forward to and enjoys back-to-school season. When the back-to-school bell rings it’s time to start creating pretty Autumn cards.

Nothing says Autumn like pumpkins so I chose the Pretty Pumpkins Bundle from Stampin’ Up! for today’s card. The new Harvest Meadow Designer Series Paper paired perfectly with the bundle. All the pretty pumpkin images to stamp and coordinating dies in this bundle are perfect for all my fall paper crafting projects.

I started today’s card design by using the same map as the recent Plaid Poodle Sketch I shared on this post. To add texture and interest to the card I used the new Timber 3-D Embossing Folder and Diamond Weave Ribbon. I also thought use a few Brushed Metallic Dots to add a little shine to the card front.

It was a refreshing change to use the deeper, regal colors Autumn reminds of of. For today’s project I used Cajun Craze and Bumblebee cardstocks and inks. And, because I did not stamp a sentiment onto the card front, I decided to make the card insert a little fancy by using a Scalloped Contours die-cut.

Video Tutorial


Product List

Learn How to Make Card Designs using Sketches

My mom has had some health problems and I’ve been acting as her care giver for the last few weeks. It’s a new dynamic for me and I’m having to rearrange my routines and schedule to meet her needs. Because my focus has been on her I’ve been having trouble finding my crafting mojo lately.

Whenever I’m at a stall creativity-wise I sometimes find it helpful to use sketches to get back on track. Sketches are like blueprints for card making. You can grab a pad and pencil to make your own sketch or find lots of them by googling “card making sketches”.

A sketch gives you a plan and once you have a plan you can start building your card. Here’s a sketch I came up with this morning to use during my Make-it-Monday Facebook Live.

As you can see, the sketch has all the card basics planned out for me. By looking at the sketch I already know I want to find some coordinating card stock and Designer Series Paper. I also know I’m going to add a die-cut and a sentiment tag to the card front. From here I can choose the different elements.

How Sketches Work in Real Life

Here’s a card I created using the above sketch. I always like to add a little texture to a project so I embossed the card front with the Tasteful Textile 3D Embossing Folder. I then adhered two corodinating strips of Heartwarming Hugs Designer Series Paper onto the card front. Next, I decided to use a die-cut for the 2.25″ x 3″ layer on the sketch and chose a die from the Scalloped Contours Dies to cut a stitched, scalloped rectangle. See how I improvised there?

A card sketch can be copied exactly or you may want to alter it. You will notice I took creative liberty and replaced the circle element from the sketch with a die-cut poinsettia I cut from Red Velvet Paper using dies from the Poinsettia Dies. Finally I heat embossed “warm wishes” onto the sentiment tag using a stamp from the Poinsettia Petals stamp set .

Video Tutorial

Sometimes looking at a pile of paper crafting products can stymie our creative efforts. I hope you can see how helpful a sketch can be as a jumping off point. Sketch out your plan first then elect the elements and finally, execute the plan!

Product List

Holiday Mini Catalog and Sale-a-Bration

The Stampin’ Up! Holiday Mini Catalog is live! To help us celebrate all the awesome new products Stampin’ Up! is giving us a month of Sale-a-Bration!

During Sale-a-Bration, you may earn a free gorgeous product with every $50 purchase from the Sale-a-Bration brochure! Click on the catalog images below and link to the online catalogs.

Make a 4th of July Flag Treat Box

America is having a HUGE birthday party this weekend and I decided to create some themed party favors for it! These little treat boxes are so fun and easy to make. I’m filling mine with little poppers, champagne streamers and sparklers for the little one’s we’ll have here for the celebration! I’m also excited to have several of these to set around my buffet as holiday decor!

One thing I learned while making this project is that each part of the US Flag has a name. The blue square with white stars in the upper left-hand corner of the flag is called the canton or the union. Although not intentional, all the dies I used for the box had stitching on them. A happy accident that I love!

I grabbed a red and white paper straw that was stashed away and adhered a layered, stamped and embellished tag to it. There’s a secret tip I shared on the video tutorial that shows how I kept the sentiment banner upright in the box.

Video Tutorial

Paper Cutting/Scoring Guide

  • Box = 5-1/2″ x 5-3/4″ piece of Basic White cardstock
  • Flag Panels = two 4-3/4″ x 3-3/4″ pieces of Basic White cardstock
  • Flag Stripes = three 3/4″ x 4-3/4″ pieces of Real Red cardstock
  • Flag Canton = 1-3/4″ x 1-3/4″ piece of Night of Navy cardstock
  • Stars = 2″ x 4″ piece of Basic White cardstock and 2″ x 2-1/2″ piece of Real Red cardstock
  • Sentiment Banner = 4″ x 2″ piece of Night of Navy cardstock, 3-1/2″ x 1-3/4″ piece of Basic White cardstock and 3-1/2″ x 1-3/4″ piece of Real Red Cardstock
Product List
Night Of Navy Classic Stampin' Pad
Night Of Navy Classic Stampin’ Pad

Make a Sailing Home Pop-Up Diorama Card

I shared this Sailing Home Pop-Up Diorama card during this week’s Coffee & a Card Facebook Live and really stumbled through it. My listeners were so kind to stay with me until the end and I hope they were happy with the results.

Paper Cutting/Scoring Guide

  • Card Front = 8″ x 5-1/2″ piece of Bermuda Bay card stock scored at 4-1/4″ on the 8″ side. Fold on score line.
  • Card Insert = 8-1/2″ x 5-1/2″ piece of Bermuda Bay card stock scored at 1/2″, 4-1/4″, & 4-3/4″.
  • Middle Layer = 4-3/16″ x 5-7/16″ piece of Pool Party card stock scored at 1/4″ on both ends of 4-3/16″ sides.
  • Stamped Layer = 2-1/4″ x 5-1/2″ piece of Pool Party, 2″ x 5-1/4″ piece of Basic White card stock.
  • Sentiment Tag = 3-1/4″ x 2-1/4″ piece of Pool Party card stock, 3-1/4″ x 2-1/4″ piece of Basic White card stock.
  • Additional Card stock for Die-cuts = scraps of Whisper White, Sahara Sand and Soft Suede card stock.

It’s important to have the card stock measurements and score lines accurate to create this 3-D pop-up card but look at the result!

Did you notice the wavy water in the background? Watch my video tutorial to see how I was able to create the look of waves with just a scrap of card stock, ink and a blending brush. I mentioned that I had a little trouble assembling this card but edited all the goof-ups out of the video. The replay is a little choppy but it will explain correctly how to make this card.

Product List

Now that I’ve worked out all the kinks and know what I’m doing, I can’t wait to make more of these types of cards. I hope this encourages you to create your own diorama pop-up cards!

Make a You’re a Peach Slimline Window Card

Peaches are starting to show up in the grocery stores here. I love a sweet, juicy peach but finding a good one is a bit tricky. Even though I haven’t braved purchasing any peaches to eat I have made the cutest slimline window card using the You’re a Peach Bundle from Stampin’ Up!

This card base is so fun to make and would make a great shaker card. I used rectangular dies from the Stitched So Sweetly Dies to create the card windows but circles or hearts would be fun too!

Cutting/Scoring Guide:

  • Card Base = 8″ x 8″ piece of Thick Basic White cardstock scored at 4″
  • You’re a Peach Designer Series Paper = 3-7/8″ x 7-7/8″
  • Die-cut Layer = 4″ x 8″
Product List

Make a Bowl of Cherries Measure of Love Greeting Card

It’s been a week this week and it’s only Wednesday. I’ve been tired and just haven’t felt myself. The weather has been pretty dreary and my allergies have been a bummer. The worst of it is that my creative mojo has taken the week off. How do you get your mojo back? I just start making things and they are usually CASED from other creators.

CASEing is to copy and share everything. Today I copied a card featured in the new Stampin’ Up! Annual Catalog. I did not have the Designer Series Paper the Stampin’ Up! concept artist used in the catalog sample so I substituted the Pansy Petals Designer Series Paper when making my card.

Paper Cutting/Scoring Guide

  • Card Base = 8-1/2″ x 5-1/2″ piece of Soft Sea Foam card stock scored at 4-1/4″ on the 8-1/2″ side.
  • Pansy Petals DSP = 4″ x 5-1/4″
  • Embossed Layer = 2-3/4″ x 4-3/4″
  • Shelf Die-Cut = scrap of Crumb Cake card stock
  • Stamped Images = 5-1/2″ x 3″ piece of Basic White card stock
  • Sentiment Tag = 1/2″ x 3″ piece of Soft Succulent card stock
Product List

Make a Fun-Fold Votive Candle Greeting Card

Fun-fold cards are as enjoyable to make as they are to receive. During today’s Make-it-Monday Facebook Live I made a fun-fold votive candle greeting card using the Hand Penned Petals Bundle from Stampin’ Up!

The actual mechanics of this fun-fold card are simple and don’t require any special tools. You will want an open die or punch to use on the center panels. This will allow the flicker from the battery operated tea-light candle to show thru. I used the lovely outline die from the Penned Flower Dies worked well for my card.

I decided to leave the inside of the card free of sentiments so as not to distract from the candle flickering behind the vellum.

Sometimes I can’t help myself and for the front of the card I got a little fancy. There are lots of layers, a sentiment tag, scalloped edge and a stamped die-cut. The colors used for this card were pulled from the Hand Penned Designer Series Paper. Color coordination is the main reason I love and use Stampin’ Up! products exclusively.

Paper Cutting & Scoring Guide

  • Card Base = 4-1/4″ x 11″ piece of Misty Moonlight cardstock scored at 5-1/2″
  • Fun-Fold Card Insert = 4-1/4″ x 11″ piece of Misty Moonlight cardstock scroed at 2-3/4″, 5-1/2″, and 8-1/4″ on the 11″ side
  • Hand Penned DSP for Insert = two pieces 2-1/2″ x 4″ each
  • Vellum = two pieces 2-1/2″ x 4″
  • Flower Outline Die -cut = two pieces 2-1/2″ x 3-1/4″
  • Hand Penned DSP for card front = one pattern 1-3/8″ x 5-1/2″, one pattern 4-3/4″ x 3″
  • Scalloped Edge Layer = 5″ x 3-1/2″
  • Sentiment Tag = 4″ x 2-3/4″
  • Stamped Die-Cut = 3″ x 3″

Measure of Love Friendship Card with Twisted Ribbon Border

I recently ran across a new paper crafting technique shown by fellow Stampin’ Up! Demonstrator Cary Buckham. The technique, called twisted ribbon, is actually a quilting technique. I love how the technique does appear to be a zig-zag of folded ribbon.

To make the panel for my card, I used a pencil to mark every half-inch on a 5″ x 2″ piece of Pale Papaya card stock.

Next, I lined up 1″ x 3″ strips of Pansy Petals Designer Series Paper at a diagonal onto the Pale Papaya panel using the pencil marks as guides and adhered them to the card stock.

Then I adhered the next layer of 1″ x 3″ strips of Designer Series Paper to the panel lining them up at a diagonal in the opposite direction.

Watch the replay of this week’s Coffee & a Card to watch exactly how to achieve the twisted ribbon technique.

Paper Cutting Guide

  • Card Base = 5-1/2″ x 6-3/4″ piece of Calypso Coral cardstock scored at 2-1/2″ on the 6-3/4″ side
  • Card Insert = 5-1/4″ x 4″ piece of Basic White cardstock
  • Embossed Panel = 2-1/4″ x 5-1/4″ piece of Pale Papaya cardstock
  • Sentiment Tag = 4″ x 3″ piece of Basic White cardstock
  • “Ribbon Panel” = 5″ x 2″ piece of Pale Papaya cardstock
  • Pansy Petals Designer Series Paper = twelve 1/2″ x 3″ strips
  • Stamped Image = 2-1/2″ x 2-1/2″
Product List
Measure Of Love Photopolymer Stamp Set (English)
Tuxedo Black Memento Ink Pad
Real Red Classic Stampin' Pad
Pansy Petals 12" X 12" (30.5 X 30.5 Cm) Designer Series Paper
Calypso Coral 8-1/2" X 11" Cardstock
Pale Papaya 8 1/2" X 11" Cardstock
Basic White 8 1/2" X 11" Cardstock
Pool Party Stampin' Blends Combo Pack
Checks & Dots Embossing Folders
Stitched So Sweetly Dies
Silicone Craft Sheet
Paper Trimmer
Stampin' Seal
Multipurpose Liquid Glue

Sweet Ice Cream Baby Wipe Technique Thank-You Card

I have some requests to demonstrate the Baby Wipe Technique on a card and today is the day. The baby wipe technique is easy enough for anyone to do but it will require a few extra supplies. One obvious supply needed is baby wipes and fragrance free wipes work best.

Step #1

Choose your stamp set. Images with solid backgrounds are going to show-off the baby wipe technique the best but are not necessary. I chose the Sweet Ice Cream stamp set by Stampin’ Up! for today’s project.

The popsicle images worked beautifully with the baby wipe technique. I stamped the two-step popsicles onto a piece of Basic White cardstock to create a background for my card.

Step #2

Look at those variations of pink colors on the stamped images! I’m thinking I need a fruit bar right about now. To achieve this look, I folded a baby wipe in half and then in half again. I set it on an acrylic block then added several drops of Melon Mambo, Flirty Flamingo, and Petal Pink Stampin’ Ink Refils onto the folded baby wipe.

Looks like quite a mess doesn’t it? The inked baby wipe is a stamp pad for my project. You can watch the video replay of my Make-it-Monday Facebook Live to see how this technique works.

Product List
Sweet Ice Cream Bundle
Basic White 8 1/2" X 11" Thick Cardstock
Flirty Flamingo 8-1/2" X 11" Cardstock
Basic White 8 1/2" X 11" Cardstock
Melon Mambo Classic Stampin' Ink Refill
Petal Pink Classic Stampin' Ink Refill
Flirty Flamingo Classic Stampin' Ink Refill
Crumb Cake Classic Stampin’ Ink Refill
Tuxedo Black Memento Ink Pad
Blackberry Bliss Striped Ribbon
Layering Circles Dies
Crumb Cake Classic Stampin’ Ink Refill
Stampin' Seal
Stampin' Dimensionals
Mini Glue Dots
Multipurpose Liquid Glue

Hand-Penned Petals Watercolor Cards

Watercolor is one of my favorite mediums. It’s soft and fluid with no sharp edges – kinda like coloring outside the lines. I am no watercolor artist by any means but used the technique to create two cards during today’s Coffee & a Card Facebook Live.

The colors I chose are soft and coordinate beautifully with the Hand-Penned Designer Series Paper from Stampin’ Up!

To achieve the watercolor effect on this first card I used a stamp from the Hand-Penned Petals stamp set along with Stampin’ Write Markers and a Stampin’ Spritzer. Once the ink dried on the watercolor paper I used VersaMark ink to re-stamp the image onto the watercolor wash then heat embossed with White Stampin Emboss Powder.

On this second card I used ink and a Water Painter. Once dry, the florals were die-cut out using the Penned Flowers Dies then adhered them to the card front.

Watch the video replay to see how easy these two watercolor techniques are.

Product List
Hand Penned Petals Bundle (English)
Hand Penned Petals Photopolymer Stamp Set
Penned Flowers Dies
Polished Pink Classic Stampin' Pad
Soft Succulent Classic Stampin' Pad
Pale Papaya Classic Stampin' Pad
Versamark Pad
2021–2023 In Color Stampin' Write Markers
Fluid 100 Watercolor Paper
Blushing Bride 8-1/2" X 11" Cardstock
Basic White 8 1/2" X 11" Thick Cardstock
Hand Penned 12" X 12" (30.5 X 30.5 Cm) Designer Series Paper
Basic White 8 1/2" X 11" Cardstock
White Stampin' Emboss Powder
Genial Gems
Water Painters
Stampin' Spritzer
Stitched Rectangle Dies
Stitched So Sweetly Dies
Stamparatus
Heat Tool (Us And Canada)
Stampin' Seal
Multipurpose Liquid Glue
Stampin' Dimensionals

DIY Hand Penned Petals Mother’s Day Table Favors

Do you have plans for Mother’s Day? We’re having the kids and their families over for brunch this year. These people are my favorite people and I look forward to spending the day with them.

Because I’m not cooking on Mother’s Day we will cater in but I plan on setting a fancier than normal table for the occasion. Don’t get me wrong, we’ll use paper plates but they will be those fancy ones – lol! I’m going to use these sweet table favors for each of the ladies to take home with them.

I showed how I made these bouquets on this week’s Make-it-Monday Facebook Live.

Product List

The Moment We’ve All Been Waiting For!

 It’s the moment we’ve all been waiting for—the 2021-2022 Annual Catalog is finally here! I hope you’re as excited as we are about Stampin’ Up!’s biggest publication of the year. With the turn of every page, you’ll find stunning product suites, inspiring project ideas, and the kind of coordination you can’t find anywhere else.

If you have ordered from me within the last year you should have already received your free copy of the catalog. Don’t have a Stampin’ Up! Demonstrator? Contact me and I will get a copy to you. In the meantime, click on the catalog image below to view the catalog online.

Use the May Host Code when shopping with me to receive a free gift. If your order is $150 or more do not use the Host Code. You will earn your own Stampin’ Rewards and receive my gift automatically. 

May Host Code = GMHR6ZFV