
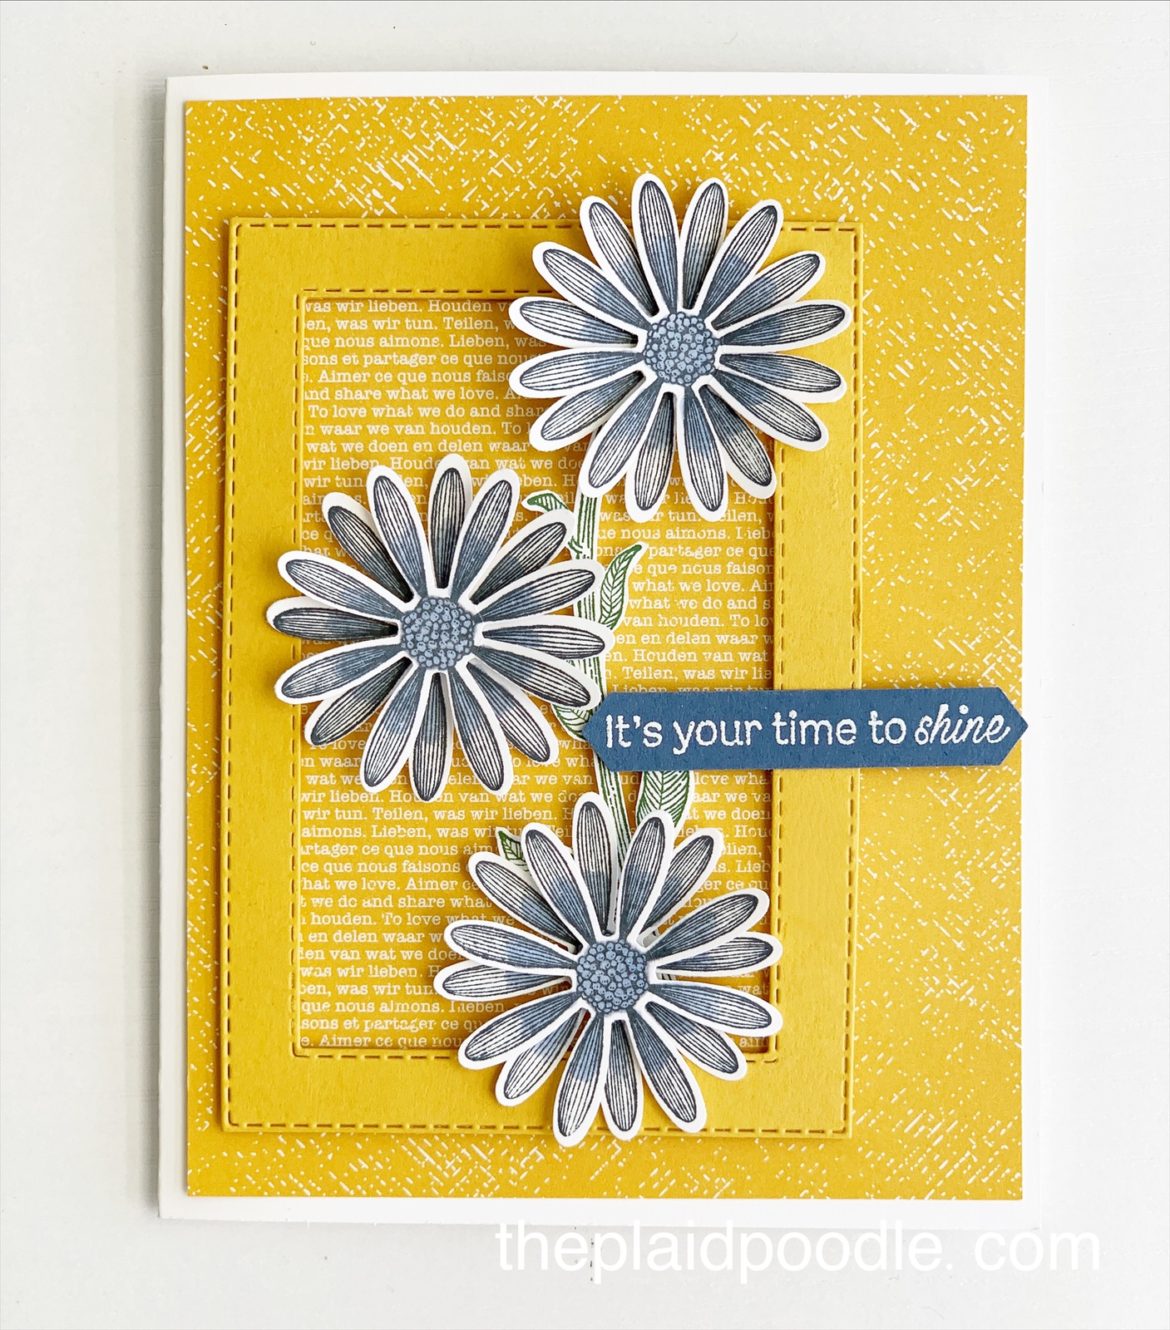
Learn to Make a Daisy Lane Window Card
The spring weather here in Kansas City has me wanting to plant some flowers in the worst way! Our weather is very sneaky as it has been known to snow in April so I’m holding off. Our rule-of-thumb is to wait until Mother’s Day to plant and it cannot get here soon enough!
Just because we’re prevented from exercising our green thumbs doesn’t mean we can’t make something to scratch that itch though. Today, during my regular Wednesday Coffee & a Card Facebook Live we made this fun window card.
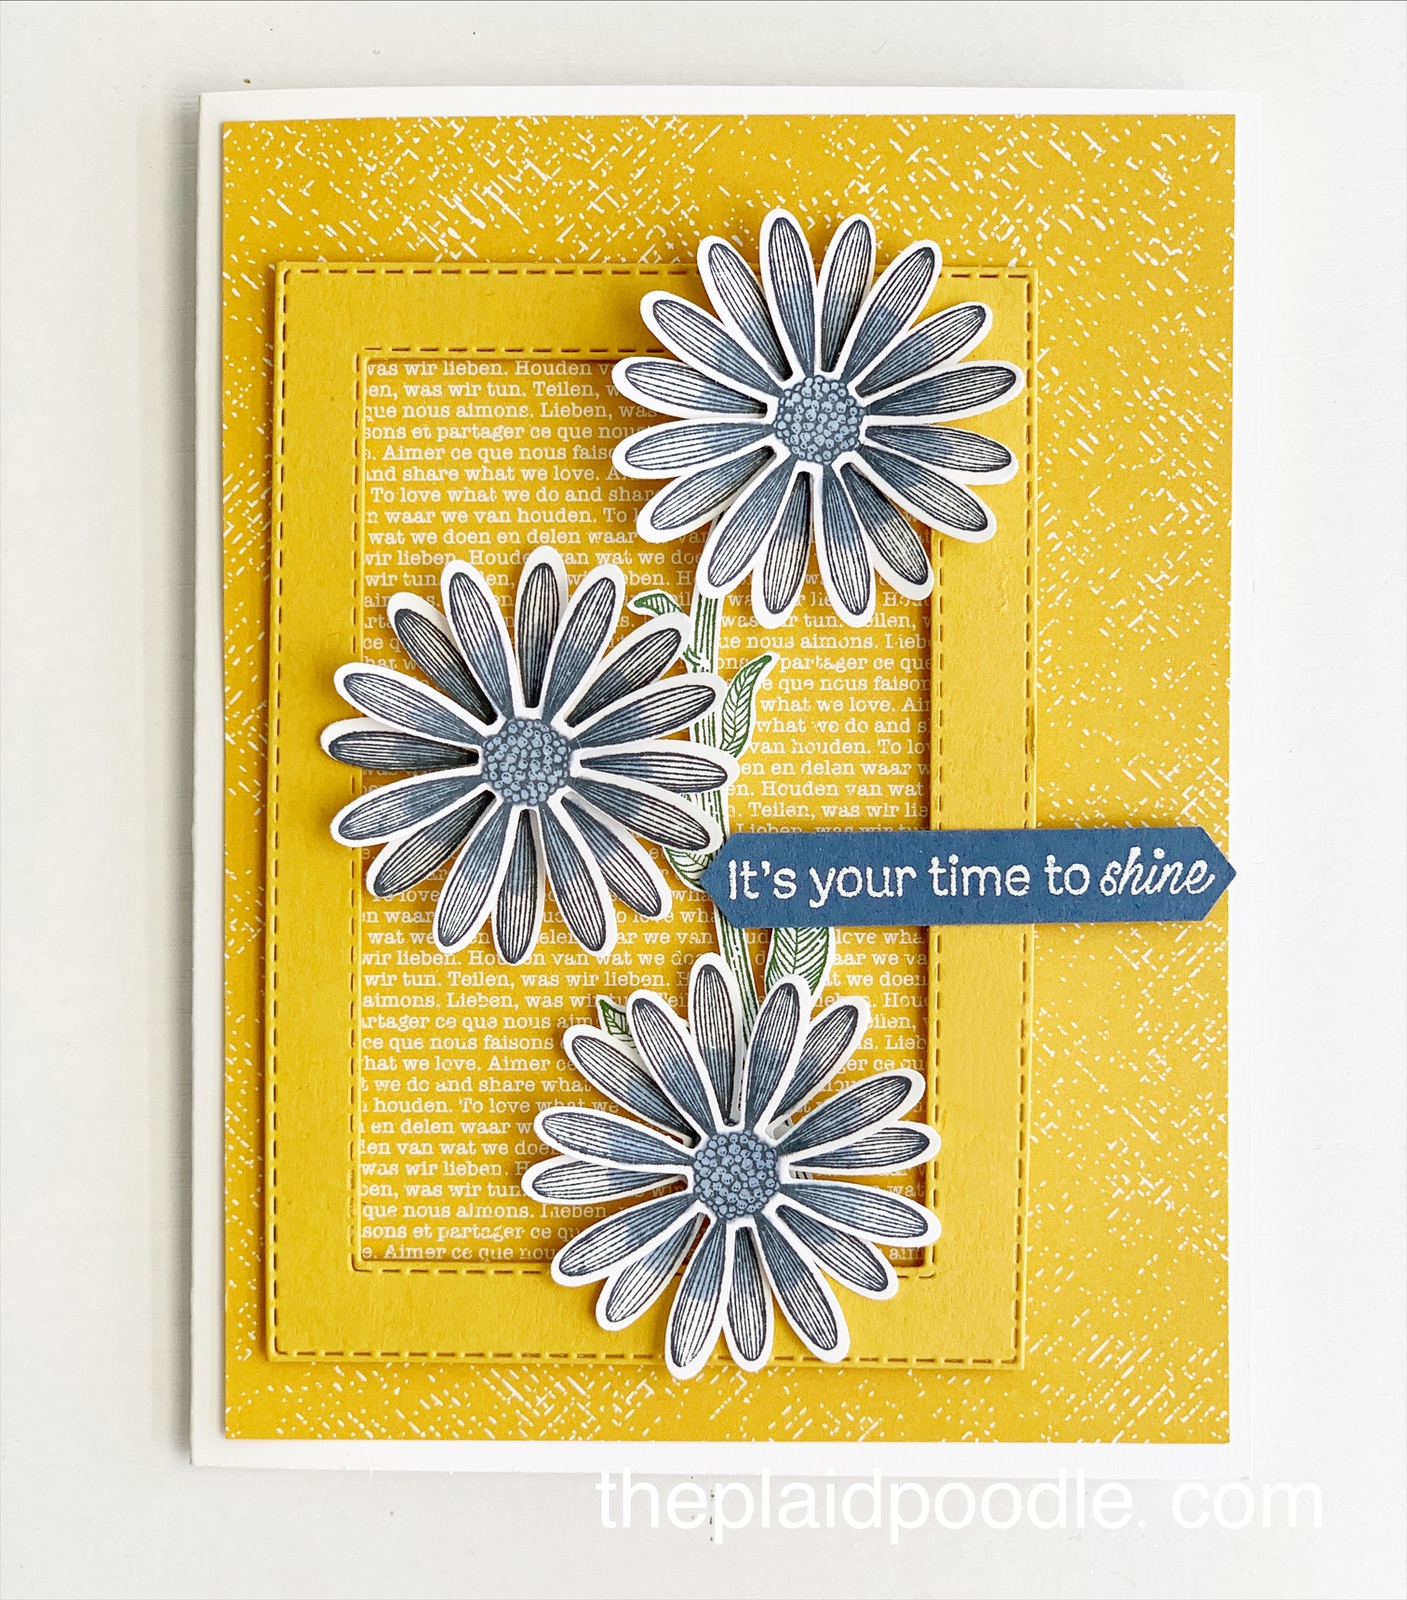
To make the card I die-cut a frame using the Stitched Rectangle Dies from Stampin’ Up! then popped it up on the card front to create the “window”. Next, I used the Daisy Lane stamp set and coordinating Medium Daisy Punch to make the stem of daisies growing from the window.

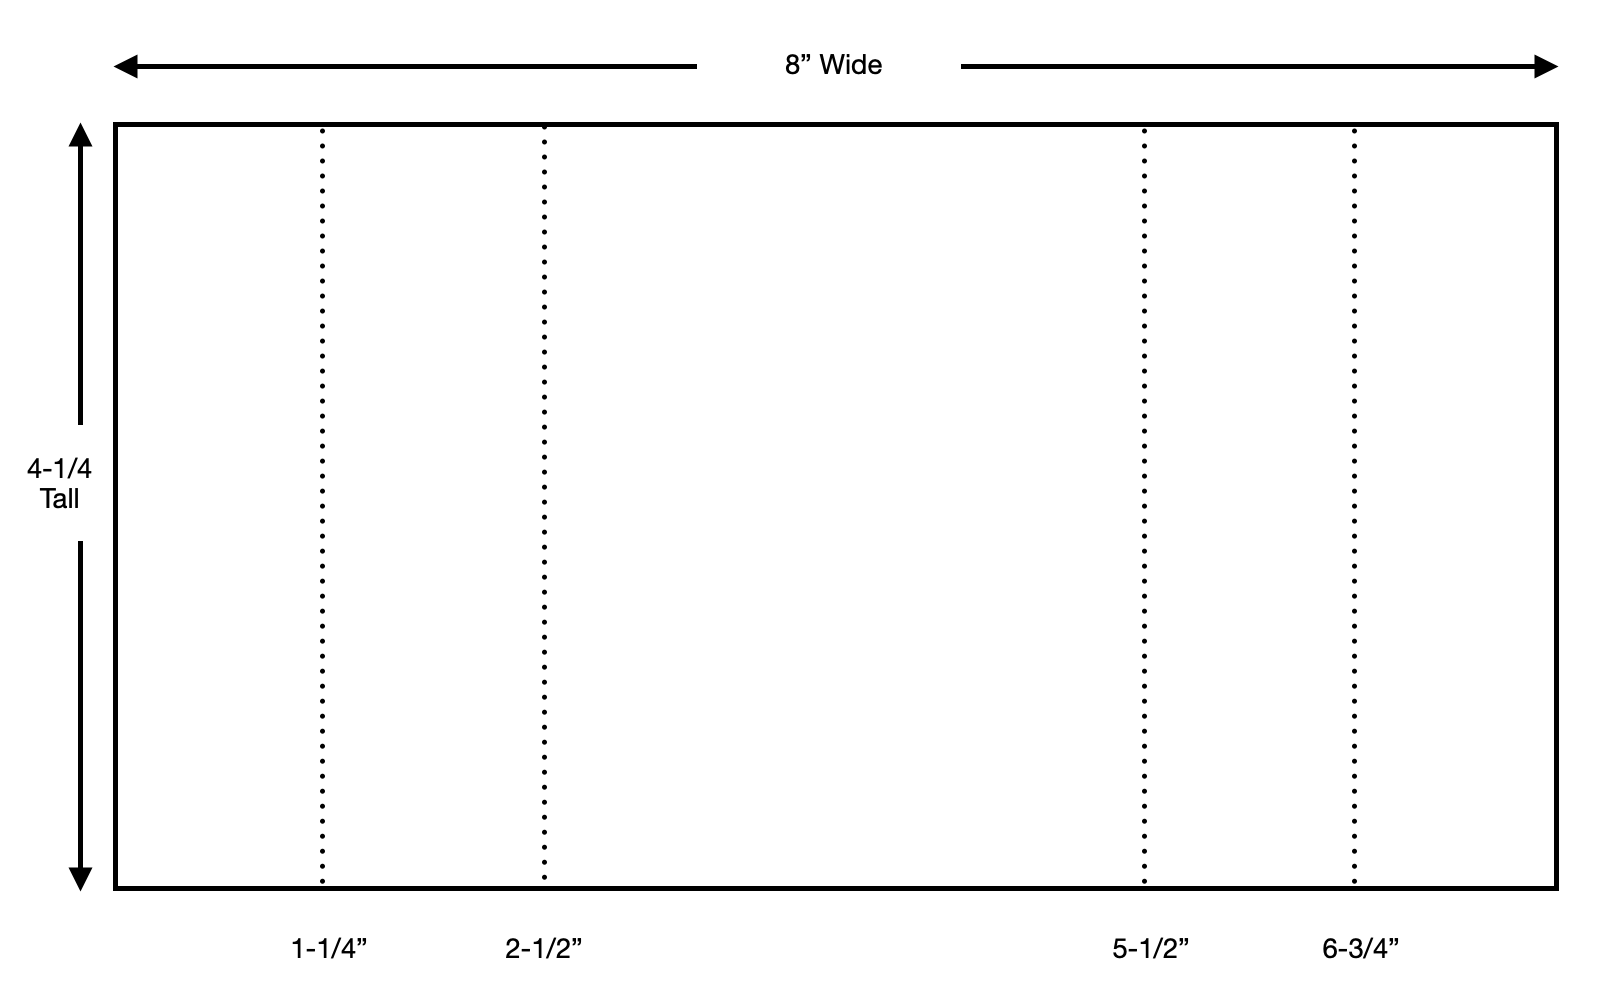
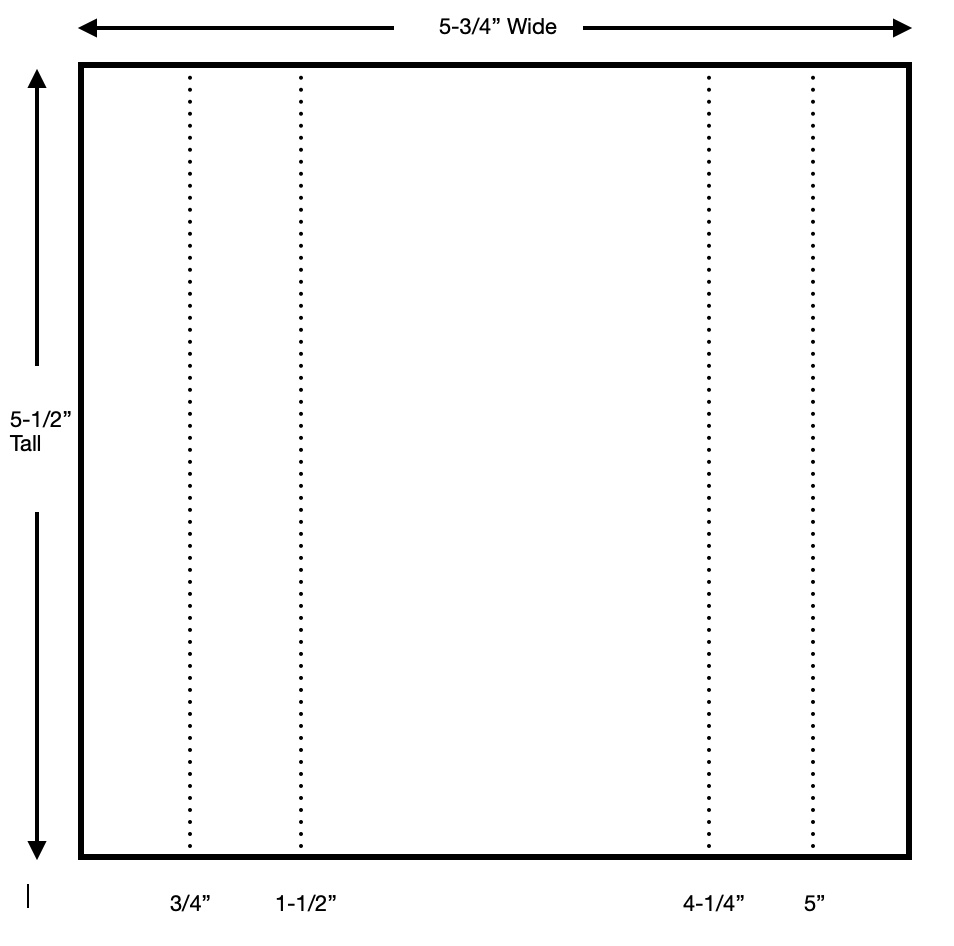
Cutting/Scoring Guide
- Card Base = 8-1/2″ x 5-1/2″ piece of Basic White Thick cardstock scored at 4-1/4″ on the 8-1/2″ side
- First Layer = 5-1/4″ x 4″ piece of 2020-2022 In-Color 6″ x 6″ Designer Series Paper
- Second Layer = 4″ x 2-1/2″ piece of 2020-2022 In-Color 6″ x 6″ Designer Series Paper
- Stitched Die-Cut Frame = 5″ x 3-3/4″ piece of Bumblebee cardstock
- Stamped Images = 6-3/4″ x 3-3/4″ piece of Basic White cardstock
- Sentiment Tag = scrap
Video Tutorial
Supply List


 Designer Series Paper")


I hope you enjoyed today’s card. I know I shouldn’t plant flowers in March but that doesn’t mean I can’t gather some fun, spring-like supplies and “plant” as much as I want with stamps paper and ink!

")


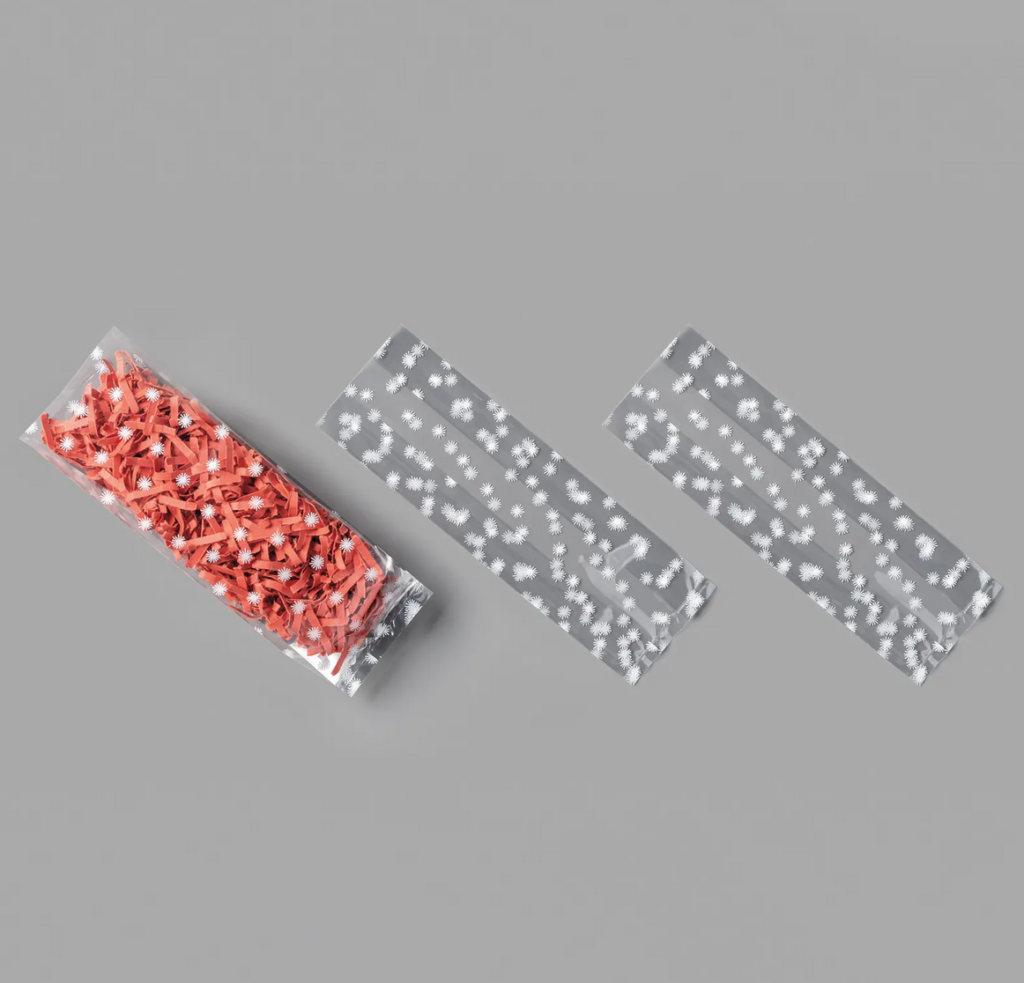


 Printed Gusseted Cellophane Bags")

 2020–2022 In Color Ribbon")


 Designer Series Paper")


")


 Designer Series Paper")


 Braided Linen Trim")


")

")


")


 Sheer Ribbon")


")


